Optimizing Sonication Conditions for Histone ChIP-seq: A Complete Guide for Robust Epigenetic Profiling
This article provides a comprehensive guide for researchers and drug development professionals on optimizing sonication for histone-specific Chromatin Immunoprecipitation followed by sequencing (ChIP-seq).
Optimizing Sonication Conditions for Histone ChIP-seq: A Complete Guide for Robust Epigenetic Profiling
Abstract
This article provides a comprehensive guide for researchers and drug development professionals on optimizing sonication for histone-specific Chromatin Immunoprecipitation followed by sequencing (ChIP-seq). Sonication is a critical step that directly impacts data quality, resolution, and experimental reproducibility. We cover foundational principles of chromatin fragmentation, detailed methodological protocols for various sample types, advanced troubleshooting for common pitfalls, and rigorous validation techniques. By integrating current best practices and quantitative controls, this guide empowers scientists to achieve high-quality, publication-ready histone mark data, essential for advancing studies in gene regulation, disease mechanisms, and therapeutic development.
Understanding Sonication Fundamentals for Histone Chromatin Architecture
The Critical Role of Sonication in Histone ChIP-seq
Chromatin immunoprecipitation followed by sequencing (ChIP-seq) has revolutionized our ability to map protein-DNA interactions and histone modifications across the genome, providing critical insights into epigenetic regulation of gene expression in both health and disease [1] [2]. For histone ChIP-seq, the process begins with chromatin fragmentation, a critical step that directly influences antibody accessibility, resolution of binding sites, and overall data quality. Unlike transcription factor ChIP-seq that targets specific DNA sequences, histone modifications occur over broader genomic regions, requiring optimized shearing conditions to balance fragment size with epitope preservation [3].
Sonication has emerged as the predominant method for chromatin fragmentation in modern ChIP-seq protocols, utilizing high-frequency sound waves to physically shear cross-linked chromatin into manageable fragments. This process is particularly challenging when working with solid tissues, where dense cellular matrices and tissue heterogeneity can compromise shearing efficiency and reproducibility [1]. The refined protocols developed for tissues such as colorectal cancer samples emphasize that proper tissue handling and processing is critical to preserve chromatin integrity and minimize degradation, with sonication parameters requiring careful optimization for each tissue type and experimental condition [1].
The importance of sonication extends beyond simple fragmentation—it represents a critical determinant in the success of subsequent steps including immunoprecipitation, library preparation, and ultimately, the biological interpretation of results. Inadequate shearing can lead to high background noise, reduced resolution, and false positives in peak calling, while excessive sonication may damage histone epitopes and compromise antibody binding [1]. As ChIP-seq applications expand into more complex tissue environments and clinical samples, understanding and optimizing sonication conditions becomes increasingly essential for generating high-quality, reproducible epigenetic data.
Key Principles of Sonication Optimization
Fundamental Parameters Influencing Shearing Efficiency
Optimizing sonication for histone ChIP-seq requires careful consideration of multiple interdependent parameters that collectively determine shearing efficiency and chromatin quality. The cross-linking conditions represent the starting point for this optimization, with formaldehyde concentration and incubation time directly impacting chromatin accessibility and fragmentation behavior. Under-fixed chromatin may shear too easily but provide poor protein-DNA cross-linking, while over-fixed chromatin becomes resistant to sonication and can yield uneven fragment sizes [1]. The buffer composition during sonication plays an equally crucial role, with ionic strength, pH, and detergent concentration all influencing chromatin stability and shearing efficiency. Optimized buffers must maintain chromatin integrity while allowing efficient energy transfer during the sonication process [1].
The physical characteristics of the sample significantly affect sonication outcomes. Tissue density and cellular heterogeneity create challenges not encountered in cell culture models, often requiring customized shearing approaches. The refined ChIP-seq protocol for solid tissues addresses this variability through standardized steps suitable for all tissue sizes, leading to consistent and reproducible output values [1]. Similarly, chromatin concentration must be carefully controlled, as overly dilute samples may require excessive sonication that damages histone epitopes, while concentrated chromatin can lead to incomplete and uneven fragmentation.
The sonication equipment itself introduces another layer of variables, with bath versus probe-based systems offering different trade-offs between sample throughput and shearing consistency. Probe sonicators typically provide more efficient energy transfer but require careful optimization to prevent sample overheating and cross-contamination. Modern systems often incorporate temperature control features to maintain samples at 4°C throughout the process, preserving epitope integrity while preventing chromatin degradation [1]. The duration and intensity of sonication pulses must be empirically determined for each biological system, with the optimal balance between fragment size distribution and histone epitope preservation being critical for successful histone ChIP-seq.
Quantitative Optimization Metrics and Quality Assessment
Systematic optimization of sonication conditions requires rigorous quantification using multiple complementary metrics that collectively assess shearing efficiency and chromatin quality. The fragment size distribution represents the most direct measure of sonication success, typically assessed using capillary electrophoresis or microfluidic platforms. For histone ChIP-seq, ideal fragment sizes generally range from 200-500 base pairs, balancing resolution requirements with the broader distribution patterns characteristic of histone modifications [1] [3].
The efficiency of immunoprecipitation provides a critical functional readout of sonication quality, with the Fraction of Reads in Peaks (FRiP) score serving as a key quality metric. The ENCODE consortium emphasizes that FRiP scores correlate strongly with overall experiment success, with higher values indicating better signal-to-noise ratios [3]. The library complexity metrics, including Non-Redundant Fraction (NRF) and PCR Bottlenecking Coefficients (PBC1 and PBC2), offer additional insights into sonication quality, with preferred values of NRF > 0.9, PBC1 > 0.9, and PBC2 > 10 indicating sufficient library complexity for robust analysis [3].
Table 1: Key Quality Control Metrics for Optimized Sonication in Histone ChIP-seq
| Metric Category | Specific Parameter | Target Value | Significance in Sonication Assessment |
|---|---|---|---|
| Fragment Size | Primary Distribution | 200-500 bp | Ideal range for histone modifications |
| Fragment Size | Size Homogeneity | CV < 25% | Indicates consistent shearing efficiency |
| Library Complexity | Non-Redundant Fraction (NRF) | > 0.9 | Reflects minimal PCR duplication artifacts |
| Library Complexity | PBC1 | > 0.9 | Measures library complexity at low sequencing depth |
| Library Complexity | PBC2 | > 10 | Assesses library complexity at higher sequencing depth |
| Immunoprecipitation Efficiency | FRiP Score | > 1% | Indicates successful target enrichment relative to background |
| Sequencing Metrics | Usable Fragments | > 20 million | ENCODE standard for sufficient sequencing depth |
Advanced quality assessment extends to downstream analytical metrics including strand cross-correlation, which measures the clustering of sequence tags at locations enriched for histone modifications. The cross-correlation analysis produces key metrics such as the Normalized Strand Cross-correlation Coefficient (NSC) and Relative Strand Cross-correlation (RSC), with higher values indicating better signal-to-noise ratios in the data [4] [2]. For histone modifications that typically display broader enrichment patterns, these metrics may have different optimal ranges compared to transcription factor ChIP-seq, necessitating target-specific quality thresholds [3].
Experimental Protocols for Sonication Optimization
Tissue Preparation and Chromatin Extraction
Proper tissue preparation establishes the foundation for successful chromatin shearing, particularly when working with challenging solid tissue samples. The refined ChIP-seq protocol for tissues emphasizes that all steps must be performed under cold conditions to preserve chromatin integrity and prevent degradation [1]. The process begins with retrieving frozen tissue samples directly from -80°C storage and immediately transferring them to ice. Tissue preparation should be conducted in a biosafety cabinet to maintain sterility and prevent contamination during subsequent processing steps.
The tissue mincing procedure requires careful execution using two sterile scalpel blades on a Petri dish placed firmly on ice until the tissue is finely diced. This mechanical disruption increases surface area for improved cross-linking penetration and subsequent shearing efficiency. The minced tissue is then transferred to an appropriate homogenization system, with the protocol offering two validated options: a semi-automated method using a gentleMACS Dissociator or a manual approach using a Dounce tissue grinder [1]. For Dounce homogenization, the minced tissue is transferred to a 7ml grinder on ice, suspended in 1ml of cold 1× PBS supplemented with protease inhibitors, and sheared with 8-10 even strokes of the A pestle. The homogenate is then diluted with additional cold PBS and transferred to a 50ml conical tube, with repeated rinses to ensure complete cell recovery.
Alternative homogenization using gentleMACS follows a standardized program, with the minced tissue transferred to a C-tube containing 1ml cold PBS with protease inhibitors. The C-tubes are tapped upside-down on the lab bench to ensure material contact with the blade, then processed using the predefined "htumor03.01" program optimized for tissue homogenization. The protocol notes that tissue density and thickness may require testing multiple programs to achieve optimal homogenization for specific sample types [1]. Following either homogenization method, the resulting cell suspension undergoes cross-linking with formaldehyde, typically using 1% formaldehyde for 10 minutes at room temperature, followed by quenching with glycine. The cross-linked cells are then pelleted by centrifugation and washed with cold PBS before proceeding to chromatin shearing.
Sonication Apparatus and Parameter Optimization
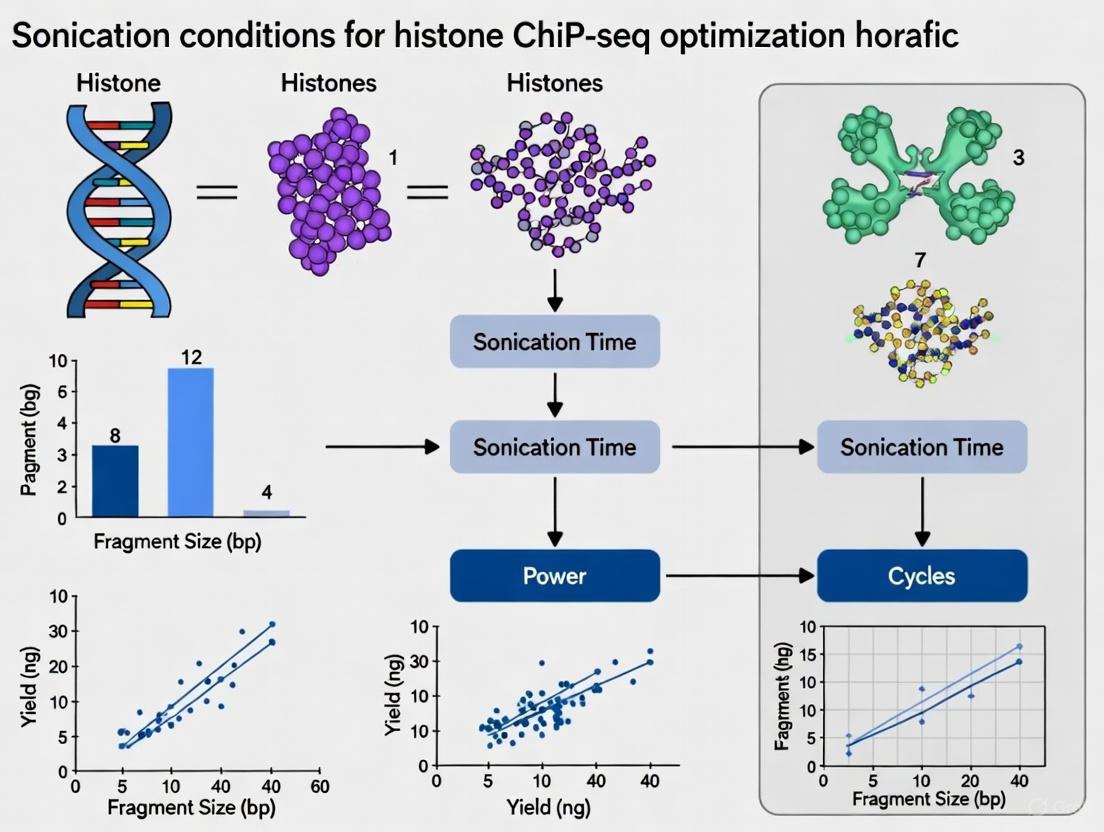
The sonication process itself requires meticulous optimization of both equipment parameters and sample handling conditions. While specific sonication settings vary by instrument model and sample type, the fundamental principles remain consistent across platforms. The following workflow diagram illustrates the critical decision points and optimization pathways for establishing robust sonication conditions:
The optimization process begins with sample preparation, where chromatin concentration should be adjusted to approximately 1-5 million cells per 100-200µl shearing volume to ensure consistent energy transfer during sonication. Samples must be kept cold throughout processing, with many protocols recommending sonication in an ice-water bath or using instruments with integrated cooling systems. The inclusion of protease inhibitors in all buffers is essential to prevent protein degradation during the shearing process [1].
For parameter selection, initial conditions should be determined based on instrument manufacturer recommendations and previous experience with similar sample types. A typical optimization series might test 3-5 different sonication durations (e.g., 5, 10, 15, 20 minutes total sonication time) using fixed power settings and cycle parameters. Most protocols utilize pulsed sonication (e.g., 30 seconds on, 30-60 seconds off) to minimize heat generation and allow for sample mixing between pulses. Following each test condition, a small aliquot (2-5µl) should be removed for fragment size analysis using capillary electrophoresis. This iterative process continues until the majority of fragments fall within the 200-500 base pair range ideal for histone ChIP-seq.
The validated conditions should then be applied to biological replicates to assess reproducibility, with careful documentation of all parameters including instrument model, probe type, power output, pulse settings, sample volume, and tube type. Even after establishing optimal conditions, regular verification of fragment size distribution is recommended, as subtle changes in sample composition or equipment performance can significantly impact shearing efficiency over time.
Research Reagent Solutions for Sonication
Table 2: Essential Research Reagents and Equipment for Chromatin Sonication
| Category | Specific Item | Function and Application | Optimization Notes |
|---|---|---|---|
| Homogenization Systems | gentleMACS Dissociator | Semi-automated tissue disruption using predefined programs | Use "htumor03.01" program or optimize for specific tissue type [1] |
| Homogenization Systems | Dounce Tissue Grinder (7ml) | Manual tissue homogenization using mechanical shear force | 8-10 strokes with Pestle A; effective for small tissue samples [1] |
| Sonication Equipment | Probe Sonicator | Direct energy transfer for efficient chromatin fragmentation | Risk of cross-contamination; requires thorough cleaning between samples |
| Sonication Equipment | Bath Sonicator | Indirect energy transfer through water bath | Minimizes cross-contamination; may require longer processing times |
| Critical Buffers | PBS with Protease Inhibitors | Tissue preservation and homogenization medium | Essential for preventing protein degradation during processing [1] |
| Critical Buffers | Lysis Buffer | Chromatin extraction and preparation for shearing | Composition affects shearing efficiency and epitope preservation |
| Quality Assessment Tools | Capillary Electrophoresis System | Fragment size distribution analysis | Enables precise quantification of shearing efficiency |
| Quality Assessment Tools | Microcentrifuge | Sample processing and post-sonication cleanup | Refrigerated models preferred for maintaining low temperatures |
| Consumables | C-Tubes (gentleMACS) | Specialized tubes for automated homogenization | Optimized for use with gentleMACS Dissociator system [1] |
| Consumables | AFA-Tubes (Covaris) | Specific tubes for focused ultrasonication | Designed for optimal energy transfer in dedicated systems |
The selection of appropriate reagent solutions significantly impacts sonication efficiency and subsequent ChIP-seq outcomes. Beyond the equipment listed in Table 2, several specialized reagents play crucial roles in successful chromatin shearing. Protease inhibitor cocktails must be fresh and properly formulated to prevent histone degradation during the extended processing times required for tissue samples. The composition of lysis and shearing buffers requires careful optimization, with particular attention to detergent concentration, ionic strength, and pH, all of which influence chromatin accessibility and shearing behavior [1].
For researchers working with particularly challenging tissues such as colorectal cancer samples, the refined ChIP-seq protocol emphasizes that buffer composition and homogenization method must be tailored to the specific tissue characteristics. Dense, fibrous tissues may benefit from more aggressive mechanical disruption followed by gentler sonication, while more delicate tissues might require the opposite approach [1]. The inclusion of specific enzyme inhibitors targeting endogenous nucleases and proteases present in certain tissue types can significantly improve chromatin integrity and shearing reproducibility.
Recent advancements in sonication technology have introduced specialized systems designed specifically for chromatin shearing applications. These instruments often feature advanced temperature control, automated energy calibration, and standardized protocols that improve reproducibility across experiments and between laboratories. Regardless of the specific equipment selected, consistent use of high-quality reagents and meticulous documentation of all processing parameters remains essential for generating robust, reproducible histone ChIP-seq data.
Impact of Sonication on Data Quality and Biological Interpretation
Direct Effects on Sequencing Metrics and Peak Calling
Sonication quality exerts profound effects on downstream data quality, influencing multiple critical metrics that determine the biological validity of ChIP-seq results. The fragment size distribution directly impacts peak calling accuracy, with improperly sized fragments leading to either excessively broad peaks (undershearing) or insufficient signal for confident peak detection (overshearing). For histone modifications that typically display broader enrichment patterns compared to transcription factors, optimal fragment sizes must balance resolution requirements with the inherent biological characteristics of the epigenetic mark being studied [3].
The library complexity metrics, including Non-Redundant Fraction (NRF) and PCR Bottlenecking Coefficients (PBC1 and PBC2), show strong dependence on sonication quality. Well-sheared chromatin with appropriate fragment sizes typically yields higher complexity libraries, reflected in preferred values of NRF > 0.9, PBC1 > 0.9, and PBC2 > 10 [3]. Conversely, poor shearing often manifests as reduced library complexity, increasing the required sequencing depth to achieve sufficient genome coverage and potentially introducing amplification biases that compromise data interpretation.
The Fraction of Reads in Peaks (FRiP) score, a key quality metric emphasized by the ENCODE consortium, demonstrates particular sensitivity to sonication conditions. Optimal shearing maximizes specific signal while minimizing background, resulting in higher FRiP scores that correlate strongly with overall experiment success [3]. For histone modifications, the target-specific standards recommend sufficient sequencing depth (typically >20 million usable fragments per replicate) to ensure robust peak detection, with sonication quality directly influencing the proportion of these fragments that ultimately contribute to genuine signal rather than background noise [3].
Influence on Biological Interpretation and Comparative Analyses
Beyond technical metrics, sonication quality fundamentally shapes biological interpretation by affecting the resolution and accuracy of histone modification mapping. Insufficient shearing can obscure biologically relevant patterns by merging distinct modification sites into artificially broad peaks, potentially leading to misinterpretation of coordinated regulatory events. Conversely, excessive shearing may fragment genuine modification domains beyond recognition, resulting in false negative calls and incomplete epigenetic profiles.
The reproducibility between replicates, as measured by metrics such as the Irreproducible Discovery Rate (IDR), shows strong dependence on consistent sonication across samples [3]. The ENCODE standards for transcription factor ChIP-seq specify that experiments pass quality thresholds when both rescue and self-consistency ratios are less than 2, with similar principles applying to histone modifications despite their different peak characteristics [3]. Variations in sonication efficiency between replicates can introduce technical artifacts that confound biological interpretation and reduce statistical power in differential analysis.
For comparative studies examining histone modification changes across conditions, treatments, or disease states, consistent sonication becomes particularly critical. Technical variations in shearing efficiency can create systematic biases that mimic or obscure genuine biological differences, potentially leading to erroneous conclusions about epigenetic regulation. The implementation of standardized sonication protocols, rigorous quality control checkpoints, and careful documentation of all processing parameters provides the foundation for robust cross-study comparisons and meta-analyses, ultimately enhancing the reliability and reproducibility of epigenetic findings in the research literature.
Sonication represents far more than a simple mechanical step in the histone ChIP-seq workflow—it serves as a critical determinant of data quality, reproducibility, and biological validity. The optimization of sonication conditions requires careful consideration of multiple interdependent parameters, from initial tissue processing and cross-linking to precise control of shearing energy and duration. The development of standardized protocols specifically addressing the challenges of complex solid tissues represents a significant advancement, enabling more reliable epigenetic profiling in physiologically relevant contexts [1].
The future of chromatin shearing for histone ChIP-seq will likely see increased automation and standardization through platforms such as H3NGST, which provides fully automated, web-based ChIP-seq analysis [5]. As these tools evolve to incorporate quality metrics specifically relevant to sonication efficiency, they may offer valuable feedback for iterative optimization of wet-lab protocols. Similarly, the establishment of comprehensive quality standards by consortia such as ENCODE provides essential benchmarks for assessing shearing quality and overall experiment success [3].
Emerging technologies including microfluidic shearing devices and enzymatic fragmentation approaches offer potential alternatives to traditional sonication, each with distinct advantages and limitations. Regardless of the specific method employed, the fundamental principles of optimized chromatin fragmentation—balancing epitope preservation with appropriate fragment sizes, maintaining consistency across replicates, and implementing rigorous quality control—will remain essential for generating biologically meaningful histone ChIP-seq data. As epigenetic research continues to illuminate the complex regulatory networks underlying development, disease, and therapeutic response, refined sonication protocols will play an increasingly vital role in ensuring that these insights rest upon a foundation of technically robust, reproducible data.
Defining Ideal Chromatin Fragment Sizes for Histone Marks (150-900 bp)
In chromatin immunoprecipitation followed by sequencing (ChIP-seq) for histone modifications, chromatin fragment size represents a fundamental parameter that directly influences data quality, resolution, and biological interpretation. Optimal fragmentation balances competing requirements: sufficient DNA yield for library preparation while maintaining adequate resolution to map histone modification patterns accurately across the genome. For histone marks, the ideal fragment size range of 150 to 900 base pairs encompasses mono-nucleosomes through penta-nucleosomes, providing the necessary context for understanding epigenetic landscapes [6].
The fragmentation method significantly impacts experimental outcomes. Sonication, the more traditional approach, uses acoustic energy to shear cross-linked chromatin and works exceptionally well for assessing histones and histone modifications, which are abundant and stable components of chromatin [6]. Understanding and controlling fragmentation size is particularly crucial within optimization research for sonication conditions, as it affects everything from antibody efficiency to sequencing library complexity and eventual data interpretation.
Quantitative Specifications for Chromatin Fragmentation
The ideal chromatin fragment size varies depending on the specific experimental goals and the genomic context of the histone mark being studied. The table below summarizes the key size specifications for histone ChIP-seq experiments.
Table 1: Ideal Chromatin Fragment Size Specifications for Histone Mark ChIP-seq
| Parameter | Sonication-Based Fragmentation | Enzymatic (MNase) Fragmentation |
|---|---|---|
| Ideal Size Range | 100–1000 bp (appears as a smear on agarose gel) [6] | 150–1000 bp (discrete bands: mono-, di-, tri-, tetra-, penta-nucleosomes) [6] |
| Optimal Target Range | 200–1000 bp [6] | 150–300 bp (provides nucleosome-level resolution) [7] |
| Acceptable Distribution | 60–90% of fragments < 1 kb (30–60% with longer crosslinking) [8] | Predominantly mono- and di-nucleosomes [6] |
| Visualization on 1% Agarose Gel | Smear between 100 and 1000 bp [6] | Discrete bands corresponding to nucleosome multiples [6] |
Sonication-Based Fragmentation Protocol for Histone Marks
This optimized protocol is designed for preparing chromatin from mammalian cells or tissues specifically for histone modification studies, targeting the ideal fragment size range of 150-900 bp.
Cell Culture Cross-Linking and Sample Preparation
- Cell Harvesting: For optimal ChIP results, use approximately 4 × 10⁶ cells for each immunoprecipitation reaction. For adherent cells (e.g., HCT 116 at 90% confluency), gently rinse cells twice with 20 mL ice-cold PBS [8].
- Cross-Linking: Add formaldehyde to the culture medium to a final concentration of 1%. For a 15 cm dish with 20 mL medium, add 540 µL of 37% formaldehyde. Swirl to mix and incubate for 10 minutes at room temperature [8] [9]. Note: For histone modifications, 10 minutes of fixation is sufficient [8].
- Quenching: Add 2 mL of 10X glycine to the dish, swirl to mix, and incubate for 5 minutes at room temperature to quench the cross-linking reaction [8].
- Cell Collection: Remove media and wash cells twice with 20 mL ice-cold PBS. Scrape cells into 2 mL of ice-cold PBS containing Protease Inhibitor Cocktail (PIC) and transfer to a conical tube. Pellet cells at 1,000 × g for 5 minutes at 4°C [8].
- Cell Lysis: Resuspend the cell pellet in 1 mL of 1X ChIP Sonication Cell Lysis Buffer + PIC per chromatin preparation (up to 2 × 10⁷ cells). Incubate on ice for 10 minutes [8].
- Nuclear Pellet: Pellet cells at 5,000 × g for 5 minutes at 4°C. Remove supernatant and resuspend the pellet in a second 1 mL aliquot of ice-cold 1X ChIP Sonication Cell Lysis Buffer + PIC. Incubate on ice for 5 minutes and centrifuge again as before [8].
- Nuclear Lysis: Resuspend the pellet in 1 mL of ice-cold ChIP Sonication Nuclear Lysis Buffer + PIC per chromatin preparation. Incubate on ice for 10 minutes [8].
Chromatin Sonication and Size Optimization
- Sample Setup: Transfer 1 mL of the cell suspension in Nuclear Lysis Buffer to an appropriately sized tube for sonication. Critical: The number of cells and sample volume are crucial for efficient fragmentation. Do not exceed 2 × 10⁷ cells per 1 mL buffer [8].
- Sonication Conditions: Using a probe sonicator (e.g., Branson Digital Sonifier with 1/8-inch Micro Tip), fragment chromatin with the following typical parameters: 50% amplitude, 1-second ON/1-second OFF pulses for 8 minutes total cycle time (4 minutes net sonication time). Keep the sample tube in an ice-water bath throughout sonication to prevent overheating [8].
- Fragment Size Verification: Resolve a small aliquot of purified DNA on a 1% agarose gel. Optimal sonication should produce a smear between 100–1000 bp, with the bulk of fragments falling within the 150–900 bp range [6]. If using a Bioanalyzer or TapeStation, the peak should center around 200–500 bp.
- Clarification: Centrifuge the sonicated lysate at 21,000 × g for 10 minutes at 4°C to pellet debris. Transfer the supernatant (containing fragmented chromatin) to a new tube. This cross-linked chromatin preparation can be used immediately for immunoprecipitation or stored at -80°C [8].
Diagram 1: Sonication workflow for histone ChIP-seq. The critical optimization feedback loop for fragment size verification is highlighted.
The Scientist's Toolkit: Essential Reagents for Fragment Size Optimization
Table 2: Key Research Reagent Solutions for Chromatin Fragmentation
| Reagent / Kit | Function in Fragmentation Protocol | Application Note |
|---|---|---|
| SimpleChIP Plus Sonication Chromatin IP Kit (CST) | Provides optimized sonication cell & nuclear lysis buffers for mild shearing conditions [6]. | Specially formulated buffers prevent degradation and dissociation of chromatin proteins, improving ChIP signal [6]. |
| Formaldehyde (37%) | Cross-linking agent that preserves protein-DNA interactions in their natural chromatin context [8]. | Use fresh formaldehyde (< 3 months old). Final concentration of 1% is standard for histone ChIP [8] [10]. |
| Protease Inhibitor Cocktail (PIC) | Prevents proteolytic degradation of histones and chromatin-associated proteins during processing [8]. | Add to all buffers used after cell harvesting to maintain complex integrity [8]. |
| Glycine (10X Solution) | Quenches formaldehyde cross-linking reaction by reacting with excess formaldehyde [8]. | Critical for stopping cross-linking at the desired timepoint to maintain antigen accessibility [8]. |
| Protein A/G Magnetic Beads | Solid support for antibody-mediated capture of chromatin fragments after sonication [6]. | Magnetic beads are preferred for ChIP-seq as they are not blocked with DNA, preventing contamination in sequencing reads [6]. |
Troubleshooting Fragment Size Abnormalities
Oversonication and Undersonication
- Problem: Fragments too small (<150 bp): This indicates oversonication, which can damage chromatin and displace bound proteins, potentially leading to loss of signal [6].
Solution: Reduce sonication time or amplitude. Use the minimal number of sonication cycles that produce the desired size range. For histone modifications, some oversonication may be tolerated better than for transcription factors, but should still be avoided [6] [7].
Problem: Fragments too large (>1000 bp): Undersonication results in poor resolution and can lead to increased background noise in sequencing.
- Solution: Increase sonication time or amplitude incrementally. Note that longer cross-linking times (e.g., 30 minutes for transcription factors) may naturally increase fragment size, requiring adjustment of sonication parameters [6] [8].
Impact of Cross-linking on Fragment Size
Cross-linking conditions directly affect chromatin fragmentation efficiency. While 10 minutes of fixation is sufficient for histone modifications, researchers exploring simultaneous transcription factor binding should note that longer cross-linking times (10-30 minutes) may be necessary for non-histone proteins but will increase chromatin fragment size after sonication [6] [8]. With longer cross-linking, expect only 30-60% of fragments to be <1 kb compared to 60-90% with standard cross-linking [8]. In these cases, avoid further sonication to prevent dissociation of proteins from DNA.
Achieving ideal chromatin fragment sizes of 150-900 bp is not an isolated technical goal but a fundamental prerequisite for generating high-quality histone ChIP-seq data in sonication optimization research. Properly sized fragments ensure that immunoprecipitated DNA accurately represents the in vivo nucleosomal organization while providing sufficient material for robust library preparation and sequencing. The protocols and specifications outlined here provide a framework for standardizing this critical parameter, enabling more reproducible and biologically meaningful epigenomic studies. As ChIP-seq methodologies evolve toward single-cell applications and more quantitative comparisons, precise control of chromatin fragmentation will remain essential for advancing our understanding of epigenetic mechanisms in development and disease.
How Cross-linking Time Influences Sonication Efficiency and Fragmentation
In histone ChIP-seq workflows, the interplay between cross-linking time and the subsequent sonication efficiency is a critical, yet often underestimated, determinant of experimental success. Cross-linking with formaldehyde stabilizes protein-DNA interactions, but simultaneously alters the physical properties of chromatin, directly impacting the energy required for mechanical shearing [11] [12]. Excessive cross-linking creates an overly robust chromatin network that resists fragmentation, leading to incomplete shearing, reduced resolution, and potential epitope masking [12] [13]. Insufficient cross-linking, conversely, fails to preserve the native interactions and can make chromatin overly sensitive to sonication, risking the disruption of protein-DNA complexes [11]. For researchers focusing on histones and their post-translational modifications, optimizing this balance is not merely a procedural step but a foundational aspect of generating high-quality, reliable genome-wide binding data. This application note, framed within a broader thesis on sonication condition optimization, provides a detailed quantitative and procedural guide to mastering this critical parameter.
The Critical Link: Cross-linking and Sonication
The cross-linking time directly influences the covalent bond density between histones and DNA. Formaldehyde fixation is a time-sensitive reaction that must be quenched precisely to avoid negative downstream effects [9]. As cross-linking progresses, the chromatin complex becomes increasingly resistant to mechanical shearing by sonication. This necessitates a careful equilibrium: sufficient cross-linking to capture genuine biological interactions without creating a structure so resilient that it cannot be efficiently fragmented to the desired size [12] [13].
The implications of improper cross-linking are severe for data quality. Over-crosslinking results in:
- Inefficient Sonication: The need for drastically increased sonication time or power to achieve fragmentation, raising the risk of generating excessive heat and damaging the chromatin [12].
- Low Resolution: Generation of large DNA fragments (>700 bp) that obscure precise mapping of histone modification sites [11].
- Epitope Masking: Antibodies can no longer access their target histone marks, leading to low immunoprecipitation efficiency and high background noise [12].
Conversely, under-crosslinking leads to:
- Fragile Complexes: Sonication may dislodge histones from their associated DNA, resulting in the loss of the very interactions the experiment aims to capture [11].
- Avidity Bias: Larger chromatin fragments immunoprecipitate more efficiently than smaller ones, not due to greater abundance of the target, but due to having more antibody-binding sites, thus skewing enrichment results [11].
Table 1: Consequences of Cross-linking Time on Sonication and Data Quality
| Cross-linking State | Impact on Sonication Efficiency | Impact on Fragment Size | Impact on IP Efficiency |
|---|---|---|---|
| Under-crosslinked | Chromatin is overly sensitive; risk of over-fragmentation and complex disruption. | Fragments are too small (<150 bp); may not represent mononucleosomes. | Low yield due to dissociation of proteins from DNA; high background. |
| Optimally Cross-linked | Efficient shearing with standard sonication cycles to desired size range. | Ideal size of 150-300 bp for histones, representing mononucleosomes [11]. | High specificity and yield; accurate representation of in vivo binding. |
| Over-crosslinked | Chromatin is highly resistant; requires extended sonication, risking sample degradation. | Fragments are too large (>700 bp); low resolution for mapping. | Reduced antibody binding due to masked epitopes; low signal-to-noise. |
Quantitative Data and Optimization Strategies
Optimizing cross-linking is an empirical process, dependent on cell type, tissue, and biological target. The following data, synthesized from established protocols and research, provides a starting framework for this optimization.
Establishing a Baseline: Cross-linking and Quenching
A standard initial protocol for cell cultures involves using a 1% formaldehyde final concentration for a 10-minute incubation at room temperature, followed by quenching with 125 mM glycine for 5 minutes [9]. It is critical to perform all steps involving formaldehyde in a fume hood and dispose of waste according to local regulations [9].
For tissues, the process requires further optimization. Harder tissues or those with high lipid content (e.g., adipose tissue) may require longer fixation times for the formaldehyde to penetrate, but this increases the risk of over-crosslinking [14] [13]. One study on peach bud and fruit tissues found that using formaldehyde 1% (v/v) was efficient for subsequent ChIP steps, with the necessity to balance time for penetration without creating excessive linkages [13].
A Systematic Approach to Optimization
A time-course experiment is the most reliable method for determining the optimal cross-linking time for a new system.
Table 2: Experimental Design for Cross-linking Time Optimization
| Parameter | Recommended Range | Key Considerations |
|---|---|---|
| Formaldehyde Concentration | 1% [9] | Higher concentrations may be used for transcription factors but increase the risk of over-fixing for histones. |
| Cross-linking Time | 5 - 30 minutes [12] [13] | Test a range (e.g., 5, 10, 15, 20 min) for cell lines. Tissues may require longer. |
| Quenching Agent | 125 mM Glycine [9] | Incubate for 5 minutes at room temperature. |
| Sonication Validation | Post-optimization; monitor fragment size. | Use agarose gel electrophoresis or capillary electrophoresis (e.g., Bioanalyzer) to assess size distribution [11]. |
The workflow for this optimization process, from sample preparation to analysis, is outlined in the diagram below.
After cross-linking and chromatin isolation, the samples are subjected to sonication. The goal for histone targets is to achieve a fragment size of 150-300 bp, which corresponds to mononucleosomal DNA [9] [11]. The efficiency of this process is directly visualized by analyzing the sheared DNA. As shown in the diagram below, the optimal cross-linking time yields a tight distribution in the desired 150-300 bp range, whereas under- and over-crosslinked samples produce undesirable fragment profiles.
Detailed Protocol: Cross-linking and Sonication for Histone ChIP-seq
This protocol is optimized for adherent cell lines (e.g., HeLa) using 1 x 10^7 cells per ChIP sample [9] and can be adapted for other cell types or tissues with appropriate optimization.
Materials and Reagents
Table 3: Research Reagent Solutions for Cross-linking and Sonication
| Reagent/Buffer | Key Components | Function in Protocol |
|---|---|---|
| Formaldehyde (1%) [9] | Methanol-free, 37% stock diluted in PBS. | Cross-linking agent: Creates covalent bonds between histones and DNA to freeze interactions. |
| Glycine (125 mM) [9] | Glycine powder dissolved in PBS. | Quenching agent: Stops the cross-linking reaction by reacting with excess formaldehyde. |
| Nuclear Extraction Buffer 1 [9] | 50 mM HEPES-NaOH pH=7.5, 140 mM NaCl, 1 mM EDTA, 10% Glycerol, 0.5% NP-40, 0.25% Triton X-100, 1x protease inhibitors. | Initial lysis: Gently lyses the cell membrane and cytoplasm to isolate nuclei. |
| Nuclear Extraction Buffer 2 [9] | 10 mM Tris-HCl pH=8.0, 200 mM NaCl, 1 mM EDTA, 0.5 mM EGTA, 1x protease inhibitors. | Nuclear wash: Washes and strips nuclei of residual cytoplasmic components. |
| Histone Sonication Buffer [9] | 50 mM Tris-HCl pH=8.0, 10 mM EDTA, 1% SDS, protease inhibitors. | Shearing buffer: Provides optimal ionic and detergent conditions for sonicating cross-linked histone complexes. |
| Magnetic Beads [9] [14] | Protein A and Protein G magnetic beads. | Immunoprecipitation: Bind the antibody-target complex to isolate it from the solution. |
| ChIP-grade Antibody [11] | Antibody validated for ChIP, specific to histone mark (e.g., H3K4me3, H3K27me3). | Target capture: Specifically binds to the histone post-translational modification of interest. |
Step-by-Step Procedure
Stage 1: Harvesting and Cross-linking Cells [9]
- Grow and Harvest: Culture cells to ~90% confluence. For adherent cells, gently rinse twice with ~10-20 mL of ice-cold PBS.
- Cross-link: Add formaldehyde directly to the culture medium to a final concentration of 1%. Swirl gently to mix and incubate for 10 minutes at room temperature.
- Critical: Perform in a fume hood. This is the key step for optimization; a time course (e.g., 5, 10, 15 min) should be performed for new cell types.
- Quench: Add glycine to a final concentration of 125 mM to quench the cross-linking reaction. Incubate for 5 minutes at room temperature with gentle agitation.
- Wash and Scrape: Discard the liquid and wash cells twice with ice-cold PBS. For adherent cells, scrape them into a fresh tube using a cell scraper and PBS. Pellet cells by centrifugation (1,500 x g, 5 mins, 4°C).
Stage 2: Isolating the Nuclear Fraction [9]
- Lyse Cytoplasm: Resuspend the cell pellet in ~2 mL of ice-cold Nuclear Extraction Buffer 1. Incubate for 15 minutes at 4°C with rocking.
- Pellet Nuclei: Centrifuge at 1,500 x g for 5 minutes at 4°C. Discard the supernatant (cytoplasmic fraction).
- Wash Nuclei: Resuspend the pellet in ~2 mL of ice-cold Nuclear Extraction Buffer 2. Incubate for 15 minutes at 4°C with rocking. Pellet nuclei again by centrifugation and discard the supernatant.
Stage 3: Chromatin Sonication [9] [11]
- Resuspend in Sonication Buffer: Pellet the nuclei and carefully discard the supernatant. Resuspend the nuclear pellet in 350 µL of Histone Sonication Buffer.
- Sonicate: Transfer the suspension to a microcentrifuge tube compatible with your sonicator (e.g., Covaris microTUBE or Diagenode Bioruptor tube).
- Using a focused-ultrasonicator (e.g., Bioruptor Plus [14] or Covaris S2), sonicate the sample to shear DNA to an average fragment size of 150–300 bp.
- Example Conditions (requires optimization): Bioruptor Pico setting, 30 seconds ON, 30 seconds OFF, for 8-12 cycles.
- Clear Lysate: Pellet insoluble cell debris by centrifuging at 17,000 x g for 15 minutes at 4°C. Transfer the supernatant (containing sheared chromatin) to a new tube.
- Quality Control: Take a 10-50 µL aliquot of the sheared chromatin. Reverse cross-links (incubate at 65°C for 4-6 hours with NaCl), purify DNA, and analyze fragment size distribution using an Agilent Bioanalyzer High-Sensitivity DNA kit [14]. A successful shearing will show a tight distribution between 150-300 bp.
The precise calibration of cross-linking time is a foundational element in the optimization of sonication efficiency for histone ChIP-seq. As demonstrated, this parameter has a direct and measurable impact on fragmentation quality, data resolution, and ultimately, the biological validity of the experiment. The protocols and data presented here provide a roadmap for researchers to systematically optimize this step within their specific experimental systems, thereby ensuring the generation of robust and high-quality epigenetic data for drug discovery and basic research. Mastery of this interplay is not a mere technicality but a crucial component of a rigorous ChIP-seq workflow.
Comparing Sonication vs. Enzymatic Fragmentation for Histone Studies
Within chromatin immunoprecipitation followed by sequencing (ChIP-seq) for histone studies, chromatin fragmentation is a critical step that directly impacts data quality, resolution, and experimental success. The choice between sonication (physical shearing) and enzymatic digestion (typically with Micrococcal Nuclease, MNase) involves significant trade-offs depending on the specific histone mark being investigated, desired resolution, and sample type. For researchers optimizing sonication conditions for histone ChIP-seq, understanding these nuances is essential for generating reliable, high-quality genome-wide binding data. This application note provides a detailed comparison of these two fragmentation methods, supported by quantitative data and optimized protocols for histone-focused research.
Mechanism and Workflow Comparison
The fundamental difference between sonication and enzymatic fragmentation lies in their mechanism of chromatin disruption. The diagram below illustrates the key procedural differences and outputs of each method.
The workflow diagram above highlights the procedural divergence between the two methods. Sonication utilizes high-frequency sound waves to physically break chromatin into random fragments ranging from 200-1000 base pairs, typically encompassing 2-3 nucleosomes [15]. This approach preserves both nucleosome-bound and nucleosome-free regions, making it suitable for studying histone modifications in the context of surrounding chromatin architecture.
In contrast, enzymatic digestion with MNase specifically cleaves linker DNA between nucleosomes, resulting in predominantly mononucleosomal fragments of approximately 147 base pairs [15]. This method provides superior resolution for mapping precisely where histone modifications occur but may underrepresent nucleosome-depleted regions, such as active promoters and enhancers where transcription factors often bind.
Quantitative Performance Comparison
The choice between fragmentation methods significantly impacts experimental outcomes, particularly for different histone modification types. The following table summarizes key performance metrics based on comparative experimental data.
| Performance Metric | Sonication | Enzymatic Digestion (MNase) | Experimental Context |
|---|---|---|---|
| Fragment Size Range | 200-1000 bp [15] | ~147 bp (mononucleosomes) [15] | Standard protocol comparison [15] |
| Resolution | Lower (2-3 nucleosomes) | Higher (single nucleosome) | Native vs. cross-linked chromatin [15] |
| Signal-to-Noise Ratio | Variable; requires optimization | Generally higher for histone marks [16] | Comparative analysis of histone modifications [16] |
| Enrichment Efficiency | Robust for stable interactions | Superior for less stable interactions [17] | Polycomb group proteins (Ezh2, SUZ12) [17] |
| Chromatin Integrity | May damage epitopes and DNA [17] | Preserves epitopes and DNA integrity [17] | Antibody binding efficiency assessment [17] |
| Protocol Consistency | Variable between instruments [17] | Highly consistent with controlled digestion [17] | Inter-laboratory reproducibility assessment [17] |
Experimental evidence demonstrates that enzymatic digestion provides more robust enrichment of target DNA loci compared to sonication, particularly for challenging histone marks such as those associated with polycomb group proteins (Ezh2 or SUZ12) [17]. This enhanced performance is attributed to the gentler fragmentation process that preserves antibody epitopes and maintains protein-DNA interactions that might be disrupted by sonication's harsh conditions [17].
For histone modifications specifically, enzymatic digestion often yields a higher signal-to-noise ratio because it generates a more defined population of mononucleosomal fragments, reducing background from non-specifically precipitated chromatin [16]. However, sonication may be preferable when studying histone modifications in regions with unstable nucleosomes or when analyzing transcription factor interactions simultaneously with histone marks.
Detailed Experimental Protocols
Sonication-Based Fragmentation Protocol for Histone ChIP-seq
This protocol is optimized for cross-linked chromatin and suitable for studying histone modifications in the context of open chromatin regions and transcription factor binding.
Materials and Reagents
- Lysis Buffer: 50 mM HEPES-KOH (pH 7.5), 140 mM NaCl, 1 mM EDTA, 10% glycerol, 0.5% NP-40, 0.25% Triton X-100, plus protease inhibitors [7]
- Sonication Buffer: 10 mM Tris-HCl (pH 8.0), 1 mM EDTA, 0.1% SDS [7]
- Sonicator: Focused-ultrasonicator (e.g., Covaris) or bath sonicator (e.g., Diagenode Bioruptor)
- Magnetic Beads: Protein A/G magnetic beads for immunoprecipitation
Step-by-Step Procedure
Cell Lysis and Nuclei Preparation
- Resuspend 1-10 million fixed cells in 1 mL of ice-cold Lysis Buffer
- Incubate for 10 minutes at 4°C with gentle mixing
- Centrifuge at 1350× g for 5 minutes at 4°C
- Discard supernatant and resuspend pellet in 1 mL of Sonication Buffer [7]
Chromatin Shearing
- Transfer chromatin to sonication tubes (130 μL per tube for focused ultrasonicator)
- Sonicate using optimized conditions:
- Focused-ultrasonicator: 105 seconds at 7°C, duty factor 20%, peak incident power 175 W, 200 cycles per burst
- Bath sonicator: 15-20 cycles of 30 seconds ON/30 seconds OFF at high power [18]
- Centrifuge at 20,000× g for 10 minutes at 4°C to remove debris
- Transfer supernatant to new tube
Fragment Size Verification
- Reverse cross-linking for 15 μL of sample: incubate with 200 mM NaCl at 65°C for 4 hours
- Purify DNA using PCR purification kit
- Analyze fragment size distribution using Bioanalyzer or TapeStation
- Optimal size range: 200-500 bp with peak at ~300 bp [7]
Critical Optimization Parameters
- Cell Number: 1 million cells sufficient for abundant histone marks (H3K4me3); 10 million recommended for less abundant marks [7]
- Cross-linking: 1% formaldehyde for 10 minutes at room temperature for histones
- SDS Concentration: 0.1-0.5% to improve shearing efficiency while maintaining epitope integrity [7]
Enzymatic Digestion Protocol for High-Resolution Histone Mapping
This protocol utilizes micrococcal nuclease (MNase) for precise nucleosomal fragmentation, providing superior resolution for mapping histone modification positioning.
Materials and Reagents
- MNase Enzyme (e.g., Micrococcal Nuclease, Worthington)
- MNase Digestion Buffer: 10 mM Tris-HCl (pH 7.5), 5 mM CaCl₂, 1 mM DTT, plus protease inhibitors
- MNase Stop Solution: 10 mM EDTA, 1% SDS
- Magnetic Beads: Protein A/G magnetic beads for immunoprecipitation
Step-by-Step Procedure
Nuclei Preparation and Digestion
- Resuspend 1 million fixed cells in 500 μL of MNase Digestion Buffer
- Add MNase enzyme (0.5-2 units per million cells; requires titration)
- Incubate at 37°C for 5-20 minutes with gentle mixing
- Stop reaction by adding 20 μL of MNase Stop Solution and incubating at 65°C for 10 minutes [17]
Chromatin Solubilization and Clarification
- Centrifuge at 20,000× g for 10 minutes at 4°C
- Transfer supernatant containing soluble chromatin to new tube
- Measure DNA concentration by spectrophotometry
Fragment Size Verification
- Analyze 5 μL of chromatin on Bioanalyzer using DNA High Sensitivity chip
- Optimal digestion: >80% fragments between 140-200 bp (mono- and dinucleosomes)
- Under-digestion: Increase enzyme concentration or incubation time
- Over-digestion: Reduce enzyme concentration or incubation time [15]
Critical Optimization Parameters
- Enzyme Titration: Essential for each cell type and fixation condition
- Calcium Concentration: 1-5 mM CaCl₂ required for MNase activity
- Digestion Time: 5-20 minutes at 37°C; shorter times preferred to prevent over-digestion
Research Reagent Solutions
The following table outlines essential reagents and their specific functions for chromatin fragmentation in histone ChIP-seq studies.
| Reagent/Catalog Number | Manufacturer | Function in Protocol | Application Notes |
|---|---|---|---|
| SimpleChIP Plus Enzymatic Chromatin IP Kit #9005 | Cell Signaling Technology | Complete solution for enzymatic fragmentation | Provides optimized MNase and buffers for consistent mononucleosomal digestion [17] |
| iDeal ChIP-seq Kit for Histones C01010051 | Diagenode | Sonication-based ChIP kit | Includes validated antibodies and optimized sonication buffers for histone marks [18] |
| Micrococcal Nuclease (MNase) | Worthington Biochemical | Enzymatic digestion of chromatin | Requires titration for each cell type; sensitive to calcium concentration [15] |
| Protein A/G Magnetic Beads | Multiple suppliers | Immunoprecipitation of chromatin complexes | Reduced background compared to agarose beads; suitable for low-abundance targets |
| Covaris Focused-ultrasonicator | Covaris | Consistent chromatin shearing | Provides reproducible fragment size distribution with minimal tube-to-tube variation [18] |
| Diagenode Bioruptor | Diagenode | Bath sonication system | Processes multiple samples simultaneously; requires optimization of cycle number [18] |
Method Selection Guidelines
The decision between sonication and enzymatic fragmentation should be guided by specific research objectives and the biological questions being addressed. The following diagram illustrates the key decision factors and recommended applications for each method.
Recommended Applications for Enzymatic Digestion
- High-Resolution Mapping: Studies requiring precise nucleosome positioning of histone modifications [15]
- Facultative Heterochromatin: Inactive histone marks (e.g., H3K27me3) that form condensed chromatin structures [18]
- Quantitative Comparisons: Experiments requiring consistent fragmentation between samples [17]
- Epitope Sensitivity: When histone epitopes are sensitive to sonication-induced damage [17]
Recommended Applications for Sonication
- Transcription Factor Co-binding: Studies examining both histone modifications and transcription factor interactions [15]
- Open Chromatin Regions: Analysis of histone modifications in promoter and enhancer regions [7]
- Heterogeneous Samples: Tissues with complex cell matrices that may resist enzymatic digestion [1]
- Established Protocols: When working with limited samples and well-optimized sonication conditions [7]
Advanced Technical Considerations
Iterative Fragmentation for Challenging Histone Marks
For inactive histone marks that form highly condensed heterochromatin (e.g., H3K27me3), iterative sonication can significantly improve detection. This technique involves additional shearing rounds after immunoprecipitation and DNA recovery:
- Perform standard ChIP protocol with initial sonication
- After DNA elution and purification, subject 20 μL of immunoprecipitated DNA to additional sonication rounds
- Use 100 μL capped tubes (not standard 1.5 mL tubes) for efficient energy transfer
- Apply 2-3 rounds of sonication (5 cycles per round: 30 seconds ON/30 seconds OFF) [18]
This approach can yield a 5×-10× increase in DNA yield for challenging heterochromatic marks by reducing fragment length bias and making more material available for sequencing [18].
Tissue-Specific Optimization Strategies
When working with solid tissues (e.g., colorectal cancer samples as referenced in [1]), additional considerations apply:
- Homogenization Efficiency: Use gentleMACS Dissociator or Dounce homogenizer for tissue disruption
- Cross-linking Optimization: Balance between sufficient fixation (preserving interactions) and over-fixation (reducing shearing efficiency)
- MNase Titration: Required for each tissue type due to variations in chromatin accessibility and composition [1]
Quality Control Checkpoints
- Fragment Size Distribution: Verify using Bioanalyzer or TapeStation before immunoprecipitation
- Digestion Efficiency: For enzymatic methods, aim for >80% mononucleosomes
- Antibody Validation: Include positive control regions with known enrichment in QC PCR [7]
- Cross-linking Reversal: Ensure complete reversal before DNA purification to maximize yield
The choice between sonication and enzymatic fragmentation for histone ChIP-seq involves balancing resolution requirements, sample characteristics, and practical experimental constraints. Enzymatic digestion with MNase provides superior resolution for precise nucleosome positioning and is particularly advantageous for studying condensed chromatin regions marked by modifications such as H3K27me3. Sonication remains valuable for experiments examining histone modifications in the context of open chromatin or when simultaneously investigating transcription factor binding. By applying the optimized protocols and selection guidelines presented here, researchers can make informed decisions that enhance the quality and biological relevance of their histone ChIP-seq data.
Step-by-Step Sonication Protocols for Cells and Tissues
Optimized Cell Culture Cross-linking and Lysis Protocol
Chromatin Immunoprecipitation followed by sequencing (ChIP-seq) has revolutionized our understanding of epigenetic regulation and protein-DNA interactions. The critical foundation of any successful ChIP-seq experiment lies in the initial steps of cross-linking and cell lysis, which preserve native protein-DNA interactions while allowing sufficient chromatin accessibility for immunoprecipitation. This protocol provides a meticulously optimized framework for cross-linking and lysis specifically tailored for histone ChIP-seq applications, establishing the essential groundwork for subsequent sonication optimization research. Proper execution of these preliminary steps ensures the preservation of histone-DNA complexes while maintaining chromatin integrity through downstream processing.
Materials and Reagents
Research Reagent Solutions
Table 1: Essential reagents for cross-linking and lysis procedures
| Reagent | Function | Specifications |
|---|---|---|
| Formaldehyde | Cross-links proteins to DNA | 37% concentration, methanol-free [19] [10] |
| Glycine | Quenches formaldehyde | 2.5 M solution in PBS [9] [20] |
| EGS (Ethylene glycol bis(succinimidyl succinate)) | Secondary cross-linker for protein complexes | 300 mM stock in DMSO (for dual-X-ChIP) [21] |
| Protease Inhibitor Cocktail (PIC) | Prevents protein degradation | 200X stock, add fresh to buffers [19] |
| Nuclear Extraction Buffer 1 | Initial cell lysis | 50 mM HEPES-NaOH pH=7.5, 140 mM NaCl, 1 mM EDTA, 10% Glycerol, 0.5% NP-40, 0.25% Triton X-100 [9] |
| Nuclear Extraction Buffer 2 | Nuclear purification | 10 mM Tris-HCl pH=8.0, 200 mM NaCl, 1 mM EDTA, 0.5 mM EGTA [9] |
| SDS-Based Lysis Buffer | Chromatin extraction | 1% SDS, 10 mM EDTA, 50 mM Tris-Cl, pH 8.0 [22] |
| PMSF | Serine protease inhibitor | 100 mM stock in ethanol, add fresh [20] |
| Phosphate Buffered Saline (PBS) | Cell washing | Ice-cold, pH 7.4 [9] [19] |
Methodology
Cross-linking Optimization
Standard Formaldehyde Cross-linking
Cell Preparation: Begin with adherent cells at approximately 90% confluence. For optimal ChIP results, use approximately 4 × 10^6 cells for each immunoprecipitation, with a total chromatin preparation defined as 1 × 10^7 to 2 × 10^7 cells [19].
Formaldehyde Fixation:
Quenching:
Cell Harvesting:
Dual Cross-linking Approach (Optional)
For challenging targets or transcription factors, a dual cross-linking method may be superior:
Primary Cross-linking: Resuspend cells in PBS containing EGS at a final concentration of 1.5 mM. Incubate with gentle swirling at room temperature for 30 minutes [21].
Secondary Formaldehyde Cross-linking: Add formaldehyde to a final concentration of 1% and incubate for an additional 10 minutes at room temperature [21].
Quenching and Washing: Add glycine to 125 mM final concentration, incubate 5 minutes, then proceed with washing as described above [21].
Cell Lysis and Nuclear Preparation
Cell Membrane Lysis:
Nuclear Extraction:
- Resuspend pellet in 1 mL of Nuclear Extraction Buffer 1 (50 mM HEPES-NaOH pH=7.5, 140 mM NaCl, 1 mM EDTA, 10% Glycerol, 0.5% NP-40, 0.25% Triton X-100) [9].
- Incubate for 15 minutes at 4°C with rocking [9].
- Pellet nuclei by centrifugation at 1,500 × g for 5 minutes at 4°C [9].
- Resuspend in Nuclear Extraction Buffer 2 (10 mM Tris-HCl pH=8.0, 200 mM NaCl, 1 mM EDTA, 0.5 mM EGTA) and incubate for 15 minutes at 4°C with rocking [9].
Chromatin Preparation:
- Pellet nuclei as above and resuspend in appropriate sonication buffer [9].
- For histone targets: Use histone sonication buffer (50 mM Tris-HCl pH=8.0, 10 mM EDTA, 1% SDS, protease inhibitors) [9].
- The recommended concentration is 1 × 10^7 cells in 350 μL of sonication buffer for efficient shearing [9].
Results and Data Analysis
Quantitative Comparison of Cross-linking Methods
Table 2: Optimization parameters for cross-linking conditions
| Parameter | Standard FA Cross-linking | Dual Cross-linking | Remarks |
|---|---|---|---|
| Formaldehyde Concentration | 1% [9] [19] | 1% [21] | Higher concentrations may reduce antigen accessibility |
| Cross-linking Duration | 10 min [19] | 10 min FA + 30 min EGS [21] | Excessive cross-linking reduces sonication efficiency |
| Cell Number per IP | 4 × 10^6 [19] | 1 × 10^7 - 5 × 10^7 per dish [21] | Varies by cell type and protein abundance |
| Quenching Reagent | 125 mM glycine [9] | 125 mM glycine [21] | Critical for terminating cross-linking |
| Primary Application | Histone modifications [19] | Transcription factors, protein complexes [21] [23] | Histone ChIP typically requires only FA |
Buffer Composition Comparison
Table 3: Buffer formulations for lysis and nuclear extraction
| Buffer Component | Nuclear Extraction Buffer 1 | Nuclear Extraction Buffer 2 | SDS Lysis Buffer |
|---|---|---|---|
| Buffer Function | Cell membrane lysis | Nuclear purification | Chromatin extraction |
| Detergent | 0.5% NP-40, 0.25% Triton X-100 [9] | None | 1% SDS [22] |
| Salt Concentration | 140 mM NaCl [9] | 200 mM NaCl [9] | None specified |
| pH | HEPES-NaOH pH 7.5 [9] | Tris-HCl pH 8.0 [9] | Tris-Cl pH 8.0 [22] |
| Chelating Agent | 1 mM EDTA [9] | 1 mM EDTA, 0.5 mM EGTA [9] | 10 mM EDTA [22] |
Experimental Workflow and Optimization Relationships
Protocol Workflow Diagram
Optimization Parameter Relationships
Discussion
Critical Optimization Parameters
The cross-linking and lysis steps represent fundamental determinants of success in histone ChIP-seq experiments. Several key parameters require careful optimization:
Cross-linking Duration and Concentration: While 1% formaldehyde for 10 minutes serves as a standard starting point [19], optimal conditions must be determined empirically for each cell type and target. Excessive cross-linking masks epitopes and reduces chromatin shearing efficiency, while insufficient cross-linking fails to preserve transient interactions [21].
Cell Number and Lysis Efficiency: Maintaining appropriate cell numbers throughout the protocol ensures efficient processing. The recommendation of 1 × 10^7 to 2 × 10^7 cells per chromatin preparation accounts for potential low yield with some cell types while ensuring efficient chromatin fragmentation during subsequent sonication [19].
Buffer Composition Specificity: The sequential use of specialized buffers for cell membrane lysis (Nuclear Extraction Buffer 1) and nuclear purification (Nuclear Extraction Buffer 2) reduces cytoplasmic contamination while maintaining nuclear integrity [9]. The transition to SDS-containing sonication buffer then facilitates efficient chromatin extraction while preserving protein-DNA interactions.
Impact on Downstream Sonication
The cross-linking and lysis conditions established in this protocol directly influence sonication efficiency, a critical focus of ongoing optimization research. Properly cross-linked chromatin from 1 × 10^7 cells resuspended in 350 μL sonication buffer shears efficiently to the desired fragment size of 150-300 bp for histone targets [9]. Inadequately cross-linked samples may undergo excessive fragmentation, while over-cross-linked chromatin resists shearing, both compromising downstream immunoprecipitation and sequencing results.
The methodologies presented herein provide a robust foundation for histone ChIP-seq applications, with particular attention to parameters affecting subsequent sonication optimization. Through systematic implementation of these protocols, researchers can establish consistent starting conditions for investigating sonication parameters in histone-DNA interaction studies.
Within the framework of optimizing sonication conditions for histone ChIP-seq, sample preparation remains a foundational step whose success dictates all subsequent analyses. Just as ChIP-seq protocols require meticulous optimization of parameters like formaldehyde concentration and DNA shearing [22], the preparation of tissues with challenging physicochemical properties demands a tailored approach. High-lipid and fibrous tissues present unique obstacles that, if not adequately addressed, can compromise molecular integrity and data quality. This application note details evidence-based, tissue-specific protocols for lipidomic profiling, providing a complementary methodology to support robust epigenetic research. The principles of rigorous protocol optimization demonstrated here are directly applicable to preparing complex tissues for chromatin analysis.
Tissue-Specific Challenges in Lipidomics
Lipidomics reveals that every tissue possesses a distinct lipid fingerprint [24]. This inherent biochemical diversity means a single, universal extraction protocol is ineffective. The table below summarizes the primary challenges associated with the tissues discussed in this note.
Table 1: Key Challenges in Preparing High-Lipid and Fibrous Tissues
| Tissue Type | Primary Challenge | Impact on Analysis |
|---|---|---|
| Adipose Tissue | Extremely high triacylglycerol (TAG) content; prone to lipid delocalization during cryosectioning [25]. | Suppresses ionization of less abundant lipid classes; compromises spatial integrity in imaging. |
| Liver | Complex lipid profile with high phospholipid and sterol lipid content [24]. | Standard methods may not simultaneously extract polar and non-polar lipids efficiently. |
| Heart & Skeletal Muscle | High energetic demand results in a unique lipidome rich in acylcarnitines and ubiquinone [24]; fibrous nature complicates homogenization. | Inefficient homogenization leads to poor lipid recovery and reproducibility. |
Optimized Extraction Protocols for Diverse Tissues
A comprehensive evaluation of six liquid-liquid extraction methods demonstrated that the optimal technique is highly tissue-specific [26]. The following protocols are optimized for maximum lipid coverage, yield, and reproducibility.
Protocol for Adipose Tissue
The BUME (butanol:methanol) protocol is optimal for adipose tissue, achieving the highest lipid coverage and reproducibility [26].
- Homogenization: Homogenize 50 mg of fresh-frozen or lyophilized tissue in 20 volumes of cold homogenization buffer (e.g., 180 mM KCl, 5 mM MOPS, 2 mM EDTA, 1 mM DTPAC, 1 μM BHT, pH 7.4) using an Ultra-Turrax or similar homogenizer at 4°C [24].
- Lipid Extraction: Add a 3:1 (v/v) mixture of butanol and methanol to the homogenate. Vortex vigorously for 1 minute.
- Phase Separation: Add a non-polar solvent (e.g., heptane or ethyl acetate) and water to induce phase separation. Centrifuge to resolve phases.
- Collection: Combine the organic (upper) phases and evaporate to dryness under a stream of nitrogen. Reconstitute the lipid extract in a suitable solvent for LC-MS analysis.
Critical Consideration for Imaging: For MALDI imaging of adipose tissue, cryosectioning must be performed with the chamber temperature maintained below -30°C to prevent lipid delocalization caused by tissue melting. Thaw-mounting onto pre-cooled slides and matrix application via sublimation are recommended [25].
Protocol for Liver Tissue
For liver tissue, the MTBE (methyl tert-butyl ether) method with ammonium acetate is most effective [26].
- Homogenization: Homogenize 50 mg of tissue in 10 volumes of cold phosphate-buffered saline (PBS, pH 7.4) at 4°C [24].
- Extraction: To the homogenate, add a monophasic mixture of methanol, MTBE, and aqueous ammonium acetate solution. Vortex and incubate.
- Biphasic Separation: Add water to induce phase separation, resulting in an upper organic phase (MTBE) containing the lipids and a lower aqueous phase.
- Collection: Collect the upper organic phase. Evaporate to dryness under nitrogen and reconstitute for analysis.
Protocol for Heart Tissue
The BUME protocol at a different ratio is optimal for heart tissue [26].
- Homogenization: Due to the fibrous nature, use a bead-beater or a more powerful homogenizer in a cold, isotonic buffer to ensure complete tissue disruption.
- Lipid Extraction: Use a 1:1 (v/v) mixture of butanol and methanol for extraction, following the same steps as the adipose tissue protocol.
The workflow below visualizes the decision-making process for selecting and applying the appropriate tissue-specific protocol.
Essential Research Reagent Solutions
The table below lists key reagents and their critical functions in the described tissue-specific lipid extraction protocols.
Table 2: Essential Research Reagents for Lipid Extraction Protocols
| Reagent | Function / Rationale |
|---|---|
| Butanol:MeOH (BUME) | A monophasic extraction solvent highly effective for polar and non-polar lipids, especially in adipose and heart tissues [26]. |
| Methyl tert-Butyl Ether (MTBE) | Forms a biphasic system with water/methanol; favored for high yield and minimal emulsion formation, ideal for liver [26]. |
| Ammonium Acetate | Added to the extraction mixture to enhance the recovery of specific lipid classes, such as phospholipids, in the MTBE method [26]. |
| Butylated Hydroxytoluene (BHT) | Antioxidant added to homogenization buffers to prevent oxidative degradation of unsaturated lipids during processing [27] [24]. |
| Protease Inhibitor Cocktail | Added to plasma/serum samples when concurrent analysis of obesity-associated hormones (e.g., leptin) is required [27]. |
| EDTA / DTPAC | Metal ion chelators added to homogenization buffers to inhibit metal-catalyzed oxidative degradation of lipids [24]. |
Successful lipidomic profiling is contingent upon tissue-specific sample preparation. The protocols detailed herein, optimized for adipose, liver, and heart tissues, provide a robust framework for obtaining comprehensive and reproducible lipid data. The rigorous methodology required for this work—meticulous optimization of extraction conditions, careful handling to preserve molecular integrity, and validation in biological models—mirrors the systematic approach needed for challenging techniques like histone ChIP-seq. Integrating these tailored preparation strategies ensures that subsequent analytical results, whether in lipidomics or epigenomics, are a true and accurate reflection of the in vivo biological state.
Sonication Buffer Formulations for Preserving Histone Epitopes
Chromatin immunoprecipitation followed by sequencing (ChIP-seq) has revolutionized our understanding of epigenetic regulation, enabling genome-wide mapping of histone modifications that control gene expression. Within this workflow, sonication represents a pivotal yet challenging step that directly impacts data quality and experimental success. The fundamental challenge lies in achieving effective chromatin fragmentation to appropriate sizes while simultaneously preserving the integrity and immunoreactivity of histone epitopes. This balance is particularly crucial for histone modifications, where over-sonication can degrade protein structures and compromise antibody recognition, while under-sonication results in poor resolution and specificity.
The optimization of sonication buffer formulations emerges as a critical parameter in this process, as buffer composition directly influences both chromatin shearing efficiency and epitope preservation. Properly formulated buffers maintain histone epitopes throughout the rigorous sonication process, ensuring that immunoprecipitation accurately reflects the in vivo distribution of histone marks. This application note details optimized sonication buffer formulations and conditions specifically designed to preserve histone epitopes while achieving optimal chromatin fragmentation for high-quality ChIP-seq results.
Research Reagent Solutions for Histone ChIP-seq
Table 1: Essential reagents for sonication buffer formulation and histone ChIP-seq protocols
| Reagent | Function | Application Notes |
|---|---|---|
| Formaldehyde | Crosslinking agent for stabilizing DNA-protein interactions | Use methanol-free formulations (e.g., Pierce 16% formaldehyde) for consistent results [14] |
| Protease Inhibitor Cocktail (PIC) | Preserves protein integrity during chromatin preparation | Add fresh before use; EDTA-free versions recommended [14] |
| Sodium Dodecyl Sulfate (SDS) | Ionic detergent for cell lysis and chromatin solubilization | Concentration critical (typically 0.1-1%); affects sonication efficiency [28] |
| Sodium Deoxycholate | Ionic detergent for cell lysis | Often combined with Triton X-100 and SDS in RIPA buffers [14] |
| Triton X-100 | Non-ionic detergent for membrane permeabilization | Helps solubilize membranes while maintaining protein function [28] |
| Ethylenediaminetetraacetic Acid (EDTA) | Chelating agent that inhibits metalloproteases | Preserves histone integrity by inhibiting metal-dependent proteases [14] |
| Phenylmethanesulfonyl Fluoride (PMSF) | Serine protease inhibitor | Added fresh from stock solution; unstable in aqueous solutions [14] |
| Sodium Butyrate (NaBu) | Histone deacetylase inhibitor | Prevents loss of acetylated histone marks during processing [14] |
Sonication Buffer Formulations and Optimization Strategies
Optimized Buffer Compositions for Histone Preservation
Table 2: Sonication buffer formulations for histone ChIP-seq applications
| Component | RIPA Zero-SDS Buffer [14] | Extraction & Lysis Buffer (ELB) [28] | Cell Lysis Buffer [14] |
|---|---|---|---|
| Tris-HCl | 10 mM (pH 8.0) | 50 mM (pH 8.0) | - |
| PIPES | - | - | 5 mM |
| NaCl | 140 mM | 50 mM | - |
| KCl | - | - | 85 mM |
| EDTA | 1 mM | 1 mM | - |
| EGTA | 0.5 mM | - | - |
| SDS | 0.1% | 0.5% | - |
| Sodium Deoxycholate | 0.1% | - | - |
| Triton X-100 | 1% | - | - |
| NP-40 | - | - | 1% |
| Protease Inhibitors | 1× PIC, 1 mM PMSF | Included | 1× PIC, 1 mM PMSF |
| Histone Deacetylase Inhibitor | 20 mM NaBu | - | - |
| Primary Application | Frozen tissues, histone modifications [14] | Cultured cells, chromatin shearing optimization [28] | Initial tissue/cell lysis prior to sonication [14] |
Critical Sonication Parameters for Histone Epitope Preservation
The following diagram illustrates the strategic workflow for optimizing sonication conditions to preserve histone epitopes while achieving appropriate chromatin fragmentation.
Effective sonication requires careful optimization of multiple parameters to balance chromatin fragmentation against histone epitope preservation. Key considerations include:
Detergent Concentration Optimization: The SDS concentration in the sonication buffer critically affects both shearing efficiency and epitope preservation. Pchelintsev et al. demonstrated that diluting samples to a final concentration of 0.1% SDS before sonication significantly improves reproducibility while maintaining protein integrity [28]. Higher SDS concentrations (e.g., 0.5% in ELB) may improve initial chromatin extraction but require dilution before sonication to prevent excessive protein denaturation.
Sample Volume and Sonicator Geometry: Consistent sample volume (500μL recommended) and precise positioning within the sonication bath ensure reproducible energy transfer. Studies using the Bioruptor system show that tube position significantly affects sonication efficiency, with positions R1-R4 providing most consistent results [28].
Power Settings and Pulse Regimens: For histone preservation, low power settings with short pulse intervals (5 seconds ON/5 seconds OFF) minimize heat generation and reduce protein degradation while effectively shearing chromatin [28]. Extended sonication times at low power preserve epitopes better than shorter times at high power.
Temperature Control: Maintaining samples at 4°C throughout sonication is crucial for preserving histone epitopes. Using a pre-cooled water bath without floating ice provides stable thermal conditions, as ice creates temperature gradients that reduce sonication consistency [28].
Detailed Experimental Protocols
Chromatin Preparation from Challenging Tissues
For fatty tissues like frozen adipose samples, specialized pretreatment is essential:
- Tissue Homogenization: Begin with 100-200mg of frozen tissue. Homogenize in cold PBS using an Omni Tissue Homogenizer with hard tissue probes [14].
- Cross-linking: Resuspend homogenized tissue in 1% formaldehyde (methanol-free) in PBS. Cross-link for 15 minutes at room temperature with gentle rotation [14].
- Quenching and Washing: Add 2.5M glycine to a final concentration of 0.125M to quench cross-linking. Incubate 5 minutes at room temperature, pellet cells, and wash twice with cold PBS [14].
- Lipid Removal: For fatty tissues, after cross-linking, wash samples with additional cold PBS cycles to reduce lipid content that interferes with sonication [14].
- Chromatin Extraction: Resuspend cell pellets in RIPA Zero-SDS Buffer (Table 2) supplemented with fresh protease inhibitors and 20mM sodium butyrate. Incubate 15 minutes on ice [14].
Sonication Protocol for Histone Epitope Preservation
The following diagram details the optimized sonication procedure for maintaining histone integrity while achieving appropriate chromatin fragmentation.
Execute sonication with the following precise parameters:
Sample Preparation: Resuspend extracted chromatin in optimized buffer and dilute to achieve a final SDS concentration of 0.1%. For ELB-based protocols, dilute 1:4 with water to reduce SDS from 0.5% to 0.1% final concentration [28].
Sonication Parameters:
- Equipment: Bioruptor XL or similar water bath sonicator
- Power setting: Low
- Pulse regimen: 5 seconds ON, 5 seconds OFF
- Total time: 20 minutes (for 100-400bp fragments)
- Temperature: +4°C water bath without floating ice
- Tube position: Positions R1-R4 for consistent results [28]
Quality Control: After sonication, reverse cross-links by incubating with 200mM NaCl overnight at 65°C. Add RNase A (500ng/μL final concentration) and incubate 30 minutes at 37°C, followed by proteinase K treatment (2μg/μL final concentration) for 2 hours at 55°C [14]. Purify DNA using Qiagen PCR clean-up kit and analyze fragment size on 1.1% agarose gel or Agilent Bioanalyzer.
Alternative Fragmentation Approach for Large Proteins
For particularly sensitive histone epitopes or large chromatin-associated proteins, a combined approach may be beneficial:
Brief Sonication Followed by Benzonase Digestion: Sonicate samples for 2 minutes under standard conditions, then bring to room temperature and add 1mM MgCl₂ followed by benzonase digestion (protocol detailed in [28]).
Digestion Conditions: Incubate with benzonase for 30 minutes at room temperature. This combination generates similarly sized chromatin fragments (100-400bp) while better preserving protein integrity [28].
Troubleshooting and Technical Considerations
Addressing Common Sonication Challenges
Incomplete Fragmentation: If chromatin remains largely unsheared after standard sonication, verify SDS concentration (0.1% optimal), check sonicator probe alignment, and ensure samples are properly mixed before and during sonication [28].
Over-sonication and Epitope Damage: If histone integrity is compromised (verified by Western blot), reduce total sonication time incrementally (try 15 minutes instead of 20), ensure proper temperature control at 4°C, and verify that power settings are correctly configured to "Low" on the sonicator [28].
Sample-to-Sample Variability: For consistent results, use identical tube types, maintain consistent sample volumes (500μL recommended), and standardize tube positions within the sonication bath, preferably in positions R1-R4 [28].
High Lipid Content in Fatty Tissues: For challenging tissues like adipose, implement additional washing steps after cross-linking to remove lipids that interfere with sonication efficiency [14].
Buffer-Specific Optimization Strategies
The optimal buffer formulation varies by sample type:
RIPA Zero-SDS Buffer: Particularly effective for frozen tissues and histone modifications, as its combination of ionic and non-ionic detergents effectively extracts chromatin while the inhibitor cocktail preserves histone integrity [14].
ELB Formulation: Ideal for cultured cells where more stringent initial extraction (0.5% SDS) is needed, followed by dilution to 0.1% SDS for sonication [28].
Cell Lysis Buffer: Best suited for initial tissue disruption before chromatin extraction, especially for tough plant tissues or fatty samples [14].
Sonication buffer formulation represents a critical factor in successful histone ChIP-seq experiments, directly impacting both chromatin fragmentation efficiency and histone epitope preservation. The optimized buffers and conditions detailed in this application note provide a foundation for reproducible, high-quality ChIP-seq results across various sample types, from cultured cells to challenging frozen tissues. By carefully controlling detergent concentrations, sonication parameters, and sample preparation methods, researchers can achieve the delicate balance between effective chromatin shearing and maintenance of histone integrity essential for accurate epigenomic profiling.
Empirical Determination of Optimal Sonication Cycles and Power Settings
The optimization of sonication conditions is a critical and challenging step in the chromatin immunoprecipitation followed by sequencing (ChIP-seq) workflow. This process, which shears cross-linked chromatin into small fragments, directly influences data quality and reproducibility, impacting the resolution and accuracy of protein-DNA binding profiles or histone modification maps [1] [14]. While standard protocols exist for cell cultures, achieving optimal chromatin fragmentation in solid tissues remains particularly difficult due to their dense cellular matrices and heterogeneous composition [1] [14]. This application note provides a consolidated guide for the empirical determination of sonication parameters, with a specific focus on histone ChIP-seq applications in complex tissue samples.
Key Principles of Chromatin Sonication
The Role of Sonication in ChIP-seq
Sonication uses high-frequency sound energy to physically disrupt and fragment cross-linked chromatin. The goal is to generate DNA fragments within an ideal size range, typically 200–500 base pairs [14]. This size range provides a compromise between sufficient resolution for mapping binding events and efficient immunoprecipitation. Inadequate sonication results in large fragments and poor resolution, while over-sonication can damage epitopes and reduce yields.
Tissue-Specific Challenges
Solid tissues present unique challenges not encountered with cell cultures. Their high lipid content (e.g., in adipose tissue) and abundant extracellular matrix can impede chromatin extraction and require more aggressive sonication conditions [14]. Furthermore, the cellular heterogeneity of tissues means that a single sonication protocol must effectively process multiple cell types simultaneously, each with slightly different nuclear densities and chromatin organization [1].
Optimized Sonication Protocols for Tissues
The following protocols have been adapted from recent, refined methodologies for handling challenging solid tissues, including colorectal cancer and frozen adipose tissue [1] [14].
Tissue Preparation and Cross-Linking
Initial Tissue Processing
- Begin with 25–150 mg of fresh or frozen tissue [29] [14].
- Using a sterile scalpel on a cold Petri dish placed on ice, mince the tissue into 1–2 mm cubes [1] [29]. Keeping the tissue cold during this step is crucial to prevent protein degradation.
- Transfer the minced tissue to a Dounce homogenizer or a gentleMACS C-tube.
Homogenization
- Dounce Homogenization: Add 1 mL of ice-cold PBS supplemented with protease inhibitors. Shear the tissue with the tight-fitting pestle (Pestle A) using 8–10 even strokes [1]. The presence of some connective tissue debris is expected.
- GentleMACS Dissociator: For a semi-automated approach, use the preconfigured program "htumor03.01" [1]. The optimal program may vary with tissue density and thickness.
Cross-Linking
- Cross-link proteins to DNA using a final concentration of 1% formaldehyde for 10 minutes at room temperature [29]. For transcription factors, fixation may be extended to 30 minutes, but for histone modifications, 10 minutes is typically sufficient [29].
- Stop the reaction by adding glycine to a final concentration of 0.125 M and incubating on ice for 5 minutes [29].
- Pellet the cells and wash twice with ice-cold PBS containing protease inhibitors.
Chromatin Extraction and Shearing
Nuclei Lysis and Chromatin Preparation
- Resuspend the cell pellet in ChIP Sonication Cell Lysis Buffer (or RIPA-zero SDS buffer for adipose tissue) supplemented with protease inhibitors [29] [14].
- Incubate the lysate on ice for 10 minutes to ensure complete nuclear lysis.
- Pellet the nuclei and resuspend in ChIP Sonication Nuclear Lysis Buffer [29]. The chromatin is now ready for sonication.
Empirical Determination of Sonication Conditions Sonication must be optimized for each tissue type, sonicator model, and sample volume. The following table summarizes recommended starting parameters for different contexts.
Table 1: Empirical Guidelines for Sonication Conditions in Tissue ChIP-seq
| Tissue Type / Context | Recommended Sonicator | Starting Point Parameters | Target Fragment Size | Critical Quality Control |
|---|---|---|---|---|
| General Solid Tissues (e.g., Colorectal Cancer) | Bioruptor Plus or equivalent [14] | Cycle Series 1: 5 cycles (30 sec ON/30 sec OFF) Cycle Series 2: 10 cycles (30 sec ON/30 sec OFF) Power setting: High [1] | 200–500 bp [14] | Agarose gel electrophoresis & Agilent Bioanalyzer [14] |
| Lipid-Rich Tissues (e.g., Frozen Adipose) | Bioruptor Plus [14] | Requires more intensive shearing. Start with 15-20 cycles (30 sec ON/30 sec OFF) and adjust empirically [14]. | 200–500 bp | High-Sensitivity DNA Kit (e.g., Agilent 5067-4626) [14] |
| High-Resolution Methods (Micro-C-ChIP) | Focused-ultrasonicator (e.g., Covaris S2) [30] | Post-MNase digestion, sonicate to solubilize cross-linked chromatin after proximity ligation [30]. | Dinucleosomal-sized fragments | Analysis of soluble fraction yield [30] |
Quality Control and Data Analysis
Post-Sonication QC Checkpoints
After sonication, it is essential to verify the efficiency of fragmentation.
- Reverse Cross-Links: Take a small aliquot (e.g., 50 µL) of sheared chromatin. Reverse cross-links by incubating with Proteinase K at 65°C for at least 2 hours or overnight [29] [14].
- Purify DNA: Purify the DNA using a PCR purification kit or phenol-chloroform extraction.
- Analyze Fragment Size: Analyze the DNA using agarose gel electrophoresis or, for higher precision, an Agilent Bioanalyzer with a High-Sensitivity DNA chip [14]. A successful sonication will show a smear centered in the 200–500 bp range.
Troubleshooting Sonication
- Large Fragment Size: Increase the number of sonication cycles incrementally. Ensure the sample is kept cold during the process to prevent overheating and ensure the sonicator's water bath is properly cooled.
- Over-fragmentation / Low Yield: Reduce the number of cycles or the power setting. Verify that the protease inhibitor cocktail is fresh and used at the correct concentration to prevent protease degradation.
The Scientist's Toolkit
Table 2: Essential Reagents and Equipment for Sonication Optimization
| Item | Specific Example / Catalog Number | Function in Protocol |
|---|---|---|
| Protease Inhibitor Cocktail (PIC) | cOmplete, EDTA-free (Merck-Roche #11873580001) [14] | Prevents proteolytic degradation of proteins and histones during sample preparation. |
| Sonicator | Bioruptor Plus (Diagenode) [14] | Instrument for consistent and efficient chromatin shearing via high-frequency sound waves. |
| Magnetic Beads | ChIP-Grade Protein G Magnetic Beads (#9006) [29] | Used for immunoprecipitation to capture antibody-bound chromatin complexes. |
| DNA Quality Analysis | High-sensitivity DNA Kit (Agilent #5067-4626) [14] | Provides precise assessment of chromatin fragment size distribution post-sonication. |
| Dounce Homogenizer | 7 mL, Pestle A (MilliporeSigma #D9063) [1] | For mechanical disruption of solid tissues to release cells and nuclei. |
| Formaldehyde | Methanol-free, 37% (Thermo Fisher #28906) [14] | Reversible cross-linking agent that fixes protein-DNA interactions in place. |
Experimental Workflow and Logical Relationships
The following diagram summarizes the key decision points and steps in the optimized sonication protocol for tissues.
Diagram 1: Tissue ChIP-seq Sonication Workflow
The empirical determination of optimal sonication settings is a non-negotiable prerequisite for generating high-quality ChIP-seq data from solid tissues. The protocols and guidelines presented here, centered on systematic testing and rigorous quality control, provide a framework for researchers to overcome the significant challenges posed by tissue heterogeneity and density. By optimizing this critical step, scientists can achieve the reproducible and high-resolution data necessary for accurate mapping of histone modifications and a deeper understanding of epigenetic regulation in health and disease.
Scalable Chromatin Preparation from 25 mg Tissue or 4x10^6 Cells per IP
The reliability of any Chromatin Immunoprecipitation followed by sequencing (ChIP-seq) experiment is fundamentally dependent on the initial quality and suitability of the prepared chromatin. For research focused on optimizing sonication conditions for histone ChIP-seq, establishing a robust and scalable chromatin preparation protocol represents the foundational step that determines all subsequent outcomes. Challenges in chromatin preparation are particularly pronounced when working with limited biological samples or difficult-to-lyse tissues, where standard protocols often fail to yield sufficient quantities of quality chromatin. The chromatin fragmentation process through sonication directly impacts antibody accessibility, resolution of binding sites, and ultimately, the signal-to-noise ratio in final sequencing data [22] [31]. This application note details a optimized framework for preparing high-quality chromatin from limited starting materials—25 mg of tissue or 4×10^6 cells per immunoprecipitation (IP)—specifically tailored for histone modification studies, thereby enabling more precise investigations into sonication parameters for histone ChIP-seq optimization.
Quantitative Benchmarks for Chromatin Preparation
Successful chromatin preparation for ChIP-seq requires meeting specific quantitative benchmarks that indicate suitable material for downstream immunoprecipitation and sequencing. The table below summarizes the key quality control metrics that should be achieved following chromatin preparation and fragmentation:
Table 1: Quality Control Metrics for Optimized Chromatin Preparation
| Parameter | Target Specification | Assessment Method | Impact on ChIP-seq |
|---|---|---|---|
| DNA Fragment Size | 200–500 bp (average ~250 bp) [22] | Bioanalyzer/TapeStation [10] | Determines genomic resolution; affects antibody efficiency [22] |
| Chromatin Concentration | ≥ 5 ng/µL (post-fragmentation) | Fluorometric quantification (Qubit) | Ensures sufficient material for multiple IPs and controls |
| Cross-linking Efficiency | Formaldehyde concentration: 1% (v/v) [13] | Reverse cross-linking & gel electrophoresis | Preserves protein-DNA interactions without epitope masking [32] [13] |
| Sample Purity | A260/A280 ≈ 1.8; A260/A230 > 2.0 | Spectrophotometry | Induces minimal antibody interference during IP |
The optimal DNA fragment size of approximately 250 bp represents DNA wrapped around a single nucleosome, providing the ideal balance between immunoprecipitation efficiency and genomic resolution for histone mark studies [22]. Using a Bioanalyzer or similar automated electrophoresis system provides superior resolution for assessing fragmentation patterns compared to traditional agarose gels, enabling researchers to distinguish subtle differences in shearing efficiency (e.g., 200-300 bp versus 300-400 bp fragments) [10]. The specified chromatin concentration ensures sufficient material for performing multiple IP replicates with various antibody conditions, including necessary controls such as IgG and input samples.
Detailed Methodologies for Scalable Chromatin Preparation
Cell and Tissue Lysis Conditions
Efficient nuclear extraction and lysis represent the most variable aspects of chromatin preparation across different sample types. The protocols below are optimized for the specified starting quantities:
Table 2: Lysis Conditions for Different Sample Types
| Sample Type | Cell Lysis Buffer | Incubation Conditions | Tissue-Specific Modifications |
|---|---|---|---|
| Cell Culture (4×10^6 cells) | 1% SDS, 10 mM EDTA, 50 mM Tris-Cl, pH 8.0 [22] | Ice, 10 min | Add protease inhibitors immediately before use |
| Plant Tissue (25 mg) | 1% SDS, 10 mM EDTA, 50 mM Tris-Cl, pH 8.0, plus 0.5% β-mercaptoethanol [13] | Ice, 15 min | For bud tissues, remove protective scales before processing [13] |
| Fruit Mesocarp (25 mg) | 1% SDS, 10 mM EDTA, 50 mM Tris-Cl, pH 8.0 [13] | Ice, 20 min | Pool multiple biological replicates for low-yield stages [13] |
For all sample types, proper handling during the lysis phase is essential. After adding lysis buffer, incubate samples on ice for the specified duration with gentle vortexing every 5 minutes to ensure complete lysis. The inclusion of protease inhibitors is critical to prevent histone degradation during the extraction process [10]. For challenging plant tissues with high polysaccharide content, such as fruit mesocarp in later developmental stages, additional purification steps may be necessary to obtain chromatin of sufficient quality [13].
Chromatin Fragmentation via Sonication
DNA shearing through sonication represents the most technically demanding aspect of chromatin preparation. The following protocol establishes the foundation for systematic sonication optimization studies:
Table 3: Optimized Sonication Parameters for Chromatin Fragmentation
| Parameter | Recommended Setting | Alternative Approaches | Quality Control |
|---|---|---|---|
| Equipment | Sonic Dismembrator with 1/2-inch probe [22] | Bioruptor Pico (tube-based) [10] | Regular calibration of output intensity |
| Cycle Settings | 1 second ON/1 second OFF [22] | 30 seconds ON/30 seconds OFF (Bioruptor) | Monitor temperature throughout process |
| Amplitude | 50% [22] | 70–80% for tough tissues | Adjust based on sample viscosity |
| Total Duration | 6–10 seconds (multiple rounds) [22] | 5–15 cycles (Bioruptor) | Check fragment size after each round |
The sonication process should be performed with samples maintained in an ice-water bath throughout to prevent heat-induced chromatin degradation. For the initial optimization, remove a 100 µL aliquot after different sonication durations (e.g., 2, 6, and 10 seconds) to establish a fragmentation curve for your specific sample type and equipment [22]. After sonication, centrifuge samples at 16,200 × g for 10 minutes at 4°C to remove insoluble debris, and transfer the supernatant containing the fragmented chromatin to a new tube [22].
The following workflow diagram illustrates the complete chromatin preparation process:
Quality Assessment and Quantification
Rigorous quality assessment following chromatin fragmentation ensures that only optimal material proceeds to immunoprecipitation:
Fragment Size Analysis: Assess 1 µL of fragmented chromatin using a High Sensitivity DNA Kit on a Bioanalyzer or similar automated electrophoresis system [10]. The ideal profile should show a dominant peak between 200-500 bp, with minimal material below 100 bp or above 1000 bp.
Chromatin Quantification: Determine concentration using a fluorometric method (e.g., Qubit dsDNA HS Assay) as spectrophotometric approaches may overestimate concentration due to residual RNA or free nucleotides.
Cross-link Reversal Test: Reverse cross-links for a small aliquot (10 µL) by adding 1 µL of 5M NaCl and incubating at 65°C for 4 hours, followed by proteinase K treatment. This confirms efficient cross-linking and helps troubleshoot if fragmentation issues arise.
The Scientist's Toolkit: Essential Research Reagents
The following table details critical reagents required for implementing this scalable chromatin preparation protocol:
Table 4: Essential Research Reagents for Chromatin Preparation
| Reagent Category | Specific Products | Application Notes |
|---|---|---|
| Cross-linking Reagents | 37% formaldehyde (fresh, <3 months old) [10] | Use 1% final concentration for 10 min at room temperature [13] |
| Lysis Buffers | ChIP Lysis Buffer: 1% SDS, 10 mM EDTA, 50 mM Tris-Cl, pH 8.0 [22] | Supplement with protease inhibitors immediately before use |
| Protease Inhibitors | PMSF, Aprotinin, Leupeptin, Pepstatin A [10] | Add to all buffers during chromatin preparation steps |
| Sonication Equipment | Sonic Dismembrator with 1/2-inch probe [22] or Bioruptor Pico [10] | Regular calibration ensures reproducible fragmentation |
| Quality Control Tools | Agilent Bioanalyzer with High Sensitivity DNA Kit [10] | Enables precise fragment size distribution analysis |
| DNA Clean-up Kits | QIAquick PCR Purification Kit [10] | For purifying DNA after reverse cross-linking |
Technical Considerations and Troubleshooting
When implementing this scalable chromatin preparation protocol, several technical considerations warrant attention:
Sample-specific Optimization: While this protocol provides a robust framework, specific tissue types may require optimization of lysis conditions. Tissues with high nuclease activity may benefit from shorter lysis times, while those with extensive connective tissue may require longer lysis incubation [13].
Cross-linking Variability: The optimal formaldehyde concentration and cross-linking duration may vary by sample type. While 1% formaldehyde for 10 minutes works well for most applications, some tissues may require adjustment. Under-crosslinking fails to preserve protein-DNA interactions, while over-crosslinking can mask epitopes and reduce antibody binding efficiency [32] [13].
Sonication Calibration: Sonication efficiency depends on multiple factors including sample viscosity, volume, and tube geometry. Establish a fragmentation curve for each new sample type or when changing equipment. If fragment sizes remain too large, increase sonication time in small increments while monitoring closely to prevent over-shearing.
Scale Considerations: The specified starting amounts (25 mg tissue or 4×10^6 cells) represent the minimum recommended quantities for histone ChIP-seq. While recent methods like CUT&Tag claim compatibility with much lower inputs [32], standard ChIP-seq still requires these quantities for robust genome-wide coverage.
The chromatin preparation protocol detailed in this application note provides a standardized, scalable approach for generating high-quality fragmented chromatin from limited biological samples. By establishing rigorous quality control metrics and optimized conditions for cell lysis and sonication, researchers can create a solid foundation for subsequent histone ChIP-seq experiments. The reproducibility of this protocol enables systematic investigation of sonication parameters as an independent variable in histone ChIP-seq optimization research, potentially leading to further refinements in chromatin preparation methodologies. Through implementation of these standardized protocols, epigenetics researchers can enhance cross-study comparability and accelerate discoveries in chromatin biology and gene regulation mechanisms.
Solving Common Sonication Problems and Enhancing ChIP Efficiency
Diagnosing and Correcting Under-Fragmentation (Large Fragments, High Background)
In histone ChIP-seq optimization research, chromatin fragmentation via sonication stands as a critical determinant of experimental success. Under-fragmentation results in large DNA fragments that substantially increase background noise and reduce resolution, compromising data quality and interpretability [7] [33]. The extent of chromatin sonication represents a key controllable variable that directly impacts the sensitivity and specificity of mapping histone modifications genome-wide [33]. Systematic investigation has revealed that suboptimal sonication conditions consistently diminish ChIP-seq quality, leading to both increased experimental costs and potential misinterpretation of epigenetic landscapes [33]. This application note provides detailed methodologies for diagnosing, troubleshooting, and correcting under-fragmentation to ensure generation of high-quality histone ChIP-seq data.
Diagnosing Under-Fragmentation: Assessment Methods and Parameters
Analytical Techniques for Fragment Size Distribution
Bioanalyzer/TapeStation Analysis: The primary diagnostic approach involves analyzing DNA fragment size distribution before and after immunoprecipitation. Prior to ChIP, sheared chromatin should display a smooth size distribution curve centered between 150-300 bp for histone targets [9]. Post-ChIP samples exhibiting a systematic size shift toward 1000-2000 bp fragments indicate significant under-fragmentation [34]. This aberration is readily detectable via Bioanalyzer electrophherograms or agarose gel electrophoresis, with the size shift being particularly pronounced for less abundant histone modifications such as H3K4me3 compared to more abundant targets like total H3 [34].
Quality Control Metrics: Input chromatin should demonstrate that ≥99% of DNA fragments fall below 600 bp, with optimal distributions centered between 150-300 bp [34]. Post-IP samples maintaining this distribution indicate adequate fragmentation, while those showing predominant fragments >1000 bp confirm under-fragmentation issues.
Table 1: Diagnostic Parameters for Fragment Size Assessment
| Assessment Metric | Optimal Range | Under-Fragmented Indicator | Detection Method |
|---|---|---|---|
| Average Fragment Size | 150-300 bp | >500 bp | Bioanalyzer, Agarose Gel |
| Size Distribution Post-IP | Matches input pattern | Systematic shift to 1000-2000 bp | Bioanalyzer Electropherogram |
| Fragment Size Profile | Smooth curve centered at 200-300 bp | Bimodal distribution with high molecular weight peak | Bioanalyzer, TapeStation |
| Abundance-Based Size Bias | Minimal difference between input and IP | Pronounced shift for low abundance targets | Comparative analysis |
Impact on Data Quality and Interpretation
Under-fragmentation introduces substantial technical artifacts in ChIP-seq data. The preferential immunoprecipitation of longer chromatin fragments occurs because they carry more epitopes, creating a selection bias during antibody binding [34]. This effect is more pronounced for rare histone modifications, where antibodies preferentially pull down longer fragments containing multiple modification sites [34]. While this size bias doesn't necessarily preclude successful sequencing, it substantially reduces resolution and can mask true binding patterns, particularly for sharp histone marks. Research demonstrates that under-sonication frequently leads to the loss of legitimate binding sites and reduces overall dataset quality [33].
Optimal Sonication Parameters for Histone Modifications
Target Fragment Size Ranges
For histone ChIP-seq, the optimal chromatin fragment size ranges between 150-300 bp, equivalent to mono- and dinucleosome fragments [7] [9]. This size range provides high resolution of binding sites while maintaining compatibility with next-generation sequencing platforms. Histone targets generally tolerate more extensive sonication than non-histone targets due to the protective nucleosomal structure that preserves epitope integrity [9]. However, excessive sonication (over-sonication) can also reduce ChIP-seq quality, indicating the need for precise optimization [33].
Factor-Specific Sonication Requirements
Systematic studies varying sonication levels have demonstrated that the impact of under-sonication differs among chromatin features. While some factors like CTCF show resilience to minimal sonication, proper fragmentation is crucial for obtaining comprehensive maps of histone modifications [33]. The optimal extent of sonication must be empirically determined for each cell type and biological context, as fixation conditions, cell density, and sonicator efficiency all influence fragmentation efficiency.
Table 2: Optimal Sonication Parameters for Chromatin Targets
| Chromatin Target | Recommended Fragment Size | Sonication Buffer | Sonication Intensity | Special Considerations |
|---|---|---|---|---|
| Histone Modifications | 150-300 bp | 50 mM Tris-HCl pH=8.0, 10 mM EDTA, 1% SDS, protease inhibitors [9] | Moderate to High | Tolerates more sonication than transcription factors [9] |
| Histone H3 | 150-300 bp | SDS-containing buffer | Moderate | Abundant target, minimal size shift [34] |
| H3K4me3 | 150-300 bp | SDS-containing buffer | Moderate | Rare modification, pronounced size shift if under-sonicated [34] |
| H3K27ac | 150-300 bp | SDS-containing buffer | Moderate | Moderate abundance, intermediate size shift [34] |
| Transcription Factors | 200-700 bp | 10 mM Tris-HCl pH=8.0, 100 mM NaCl, 1 mM EDTA, 0.5 mM EGTA, 0.1% sodium deoxycholate, 0.5% sodium lauroylsarcosine [9] | Low to Moderate | Oversonication reduces quality [33] |
Experimental Protocol: Correction of Under-Fragmentation
Cross-linking and Nuclear Preparation
Cell Culture and Cross-linking:
- Grow adherent cells to 90% confluence in appropriate medium. For optimal results, use approximately 4×10⁶ cells for each immunoprecipitation [35].
- Cross-link proteins to DNA using 1% formaldehyde (37% stock diluted in culture medium) for exactly 10 minutes at room temperature with gentle swirling. For histone modifications, 10-minute fixation is sufficient [35].
- Quench cross-linking by adding glycine to a final concentration of 125 mM and incubate for 5 minutes at room temperature [35] [9].
- Wash cells twice with ice-cold PBS containing protease inhibitors. Scrape adherent cells and transfer to conical tubes.
- Centrifuge at 1,000 × g for 5 minutes at 4°C. Cell pellets can be frozen on dry ice and stored at -80°C for later use.
Nuclear Extraction:
- Resuspend cell pellet in 1 mL of 1X ChIP Sonication Cell Lysis Buffer (0.5 mL 2X ChIP Sonication Cell Lysis Buffer + 0.5 mL water) + 5 µl 200X Protease Inhibitor Cocktail per chromatin preparation [35].
- For nuclear extraction, incubate cells in Nuclear Extraction Buffer 1 (50 mM HEPES-NaOH pH=7.5, 140 mM NaCl, 1 mM EDTA, 10% Glycerol, 0.5% NP-40, 0.25% Triton X-100, 1× protease inhibitors) for 15 minutes at 4°C with rocking [9].
- Pellet nuclei by centrifugation at 1,500 × g for 5 minutes at 4°C.
- Resuspend in Nuclear Extraction Buffer 2 (10 mM Tris-HCl pH=8.0, 200 mM NaCl, 1 mM EDTA, 0.5 mM EGTA, 1× protease inhibitors) and incubate for 15 minutes at 4°C with rocking [9].
- Pellet nuclei by centrifugation at 1,500 × g for 5 minutes at 4°C.
Optimized Sonication Protocol
Sonication Setup:
- Resuspend nuclear pellet in 350 µL of Histone Sonication Buffer (50 mM Tris-HCl pH=8.0, 10 mM EDTA, 1% SDS, protease inhibitors) for 1×10⁷ cells [9].
- Transfer suspension to a pre-chilled 1.5 mL Bioruptor tube or equivalent sonication microtube.
- Keep samples on ice or in a cooled sonication chamber throughout the process to prevent overheating.
Sonication Optimization:
- Perform sonication using a focused ultrasonicator or Bioruptor system with the following initial parameters: 30-second pulses followed by 30-second rest periods on ice [35].
- After 3 cycles, remove 25 µL of sample and analyze fragment size distribution using Bioanalyzer.
- Continue sonication with periodic size checking until fragments reach the optimal 150-300 bp range.
- Avoid oversonication, which can reduce ChIP-seq quality, particularly for transcription factors [33].
- Centrifuge sonicated lysate at 17,000 × g for 15 minutes at 4°C to pellet cell debris [9].
- Transfer supernatant (sheared chromatin) to a new tube and proceed immediately to immunoprecipitation or store at -80°C.
Alternative Fragmentation Methods and Emerging Technologies
Enzymatic Fragmentation Approaches
For histone modifications, micrococcal nuclease (MNase) digestion of native chromatin represents an alternative fragmentation method that generates high-resolution data for nucleosome modifications [7]. MNase digestion produces mononucleosome-sized particles, effectively eliminating artifactual signals caused by cross-linking while providing superior resolution for nucleosome positioning [7]. However, this approach may suffer from signal loss due to unstable nucleosomes and is less suitable for transcription factors that tend to bind linker regions [7].
Advanced Chromatin Profiling Techniques
Recent methodological advances include CUT&RUN and CUT&Tag, which utilize enzymatic reactions rather than sonication to isolate chromatin fragments [36]. These approaches offer advantages including reduced cell input requirements (as low as 10⁴-10⁵ cells), higher signal-to-noise ratios, and elimination of cross-linking and sonication artifacts [36]. For histone modification mapping, CUT&Tag particularly stands out for its ability to generate high-resolution signals in accessible chromatin regions with minimal background [36].
The Scientist's Toolkit: Essential Reagents and Materials
Table 3: Research Reagent Solutions for Chromatin Fragmentation
| Reagent/Material | Function | Example Products/Specifications |
|---|---|---|
| Protease Inhibitor Cocktail | Preserves protein integrity during chromatin preparation | 200X Protease Inhibitor Cocktail #7012 (Cell Signaling) [35] |
| ChIP Sonication Buffers | Optimal chromatin environment for fragmentation | ChIP Sonication Cell Lysis Buffer #96529, ChIP Sonication Nuclear Lysis Buffer #28778 (Cell Signaling) [35] |
| Histone Sonication Buffer | SDS-containing buffer for efficient histone chromatin shearing | 50 mM Tris-HCl pH=8.0, 10 mM EDTA, 1% SDS, protease inhibitors [9] |
| Magnetic Beads | Immunoprecipitation of chromatin complexes | ChIP-Grade Protein G Magnetic Beads #9006 (Cell Signaling) [35] |
| Size Analysis System | Quality control of fragment size distribution | Agilent Bioanalyzer High Sensitivity DNA Kit or TapeStation |
| Focused Ultrasonicator | Chromatin shearing equipment | Bioruptor, Covaris, or equivalent sonication system |
| ChIP-Grade Antibodies | Target-specific immunoprecipitation | Validated antibodies for histone modifications (e.g., H3K4me3, H3K27ac) [7] |
| DNA Purification System | Cleanup of sheared chromatin and final DNA | DNA Binding Buffer #10007, DNA Wash Buffer #10008, DNA Elution Buffer #10009, DNA Purification Columns #10010 (Cell Signaling) [35] |
Successful histone ChIP-seq requires meticulous attention to chromatin fragmentation quality. Under-fragmentation systematically biases results toward longer DNA fragments, increasing background and reducing resolution. Through systematic optimization of sonication conditions, regular monitoring of fragment size distribution, and appropriate troubleshooting using the protocols outlined herein, researchers can consistently generate high-quality histone modification maps. Implementation of these standardized approaches will enhance reproducibility and reliability in epigenetic studies, ultimately advancing our understanding of chromatin biology in development and disease.
Preventing Over-Sonication to Avoid Histone Denaturation and Signal Loss
In the context of chromatin immunoprecipitation followed by sequencing (ChIP-seq) for histone modifications, sonication serves as a critical step for fragmenting chromatin into appropriate sizes for protein-DNA interaction analysis. However, excessive sonication presents a significant methodological challenge, potentially leading to histone denaturation, epitope destruction, and ultimately, loss of immunoprecipitation signal [37]. This application note details the mechanisms of sonication-induced damage and provides optimized protocols to preserve histone integrity while achieving efficient chromatin fragmentation, framed within a broader thesis on ChIP-seq optimization.
The fundamental challenge lies in balancing sufficient DNA fragmentation against preserving protein structure. While sonication can generate 200-500 bp fragments suitable for sequencing, over-sonication creates two primary problems: direct denaturation of histone proteins that destroys antibody recognition epitopes, and dissociation of histones from DNA, compromising the accuracy of protein-DNA interaction mapping [37] [17]. These effects are particularly detrimental for studying labile histone modifications and low-abundance transcription factors, where signal preservation is paramount.
The Impact of Sonication on Chromatin and Histone Integrity
Mechanisms of Sonication-Induced Damage
Sonication utilizes high-frequency sound waves to create cavitation bubbles in liquid solutions, generating shear forces that fragment chromatin. However, the harsh, denaturing conditions produced during this process—including local heating and detergent exposure—can irreversibly damage histone proteins and their modification states [17]. The epitopes recognized by histone-modification-specific antibodies are often conformational, meaning their three-dimensional structure is essential for antibody binding. Over-sonication disrupts this tertiary structure, rendering the epitopes unrecognizable even though the covalent histone modification may remain intact.
Additionally, the mechanical shear forces generated during sonication can cause histones to dissociate from DNA, particularly for transcription factors and cofactors with weaker DNA binding affinity [37]. This results in an inaccurate representation of in vivo protein-DNA interactions and reduced signal in downstream immunoprecipitation and sequencing steps.
Comparative Analysis of Chromatin Fragmentation Methods
Table 1: Comparison of Chromatin Fragmentation Methods for Histone ChIP-seq
| Parameter | Sonication-Based Fragmentation | Enzymatic Fragmentation (MNase) |
|---|---|---|
| Principle | Physical shearing via sound waves | Enzymatic cleavage at linker DNA |
| Fragment Size | 200-500 bp (variable) | Primarily mononucleosomes (~147 bp) |
| Effect on Histones | Risk of denaturation and epitope damage | Preserves histone integrity and epitopes |
| Resolution | Lower resolution relative to fragment size | Higher, single-nucleosome resolution |
| Uniformity | Inconsistent fragment sizes | Highly uniform fragments |
| Equipment Dependency | High (varies by sonicator type/probe) | Low (consistent enzyme activity) |
| Best Applications | Transcription factor ChIP-seq, cross-linked complexes | Native ChIP, histone modification mapping |
Enzymatic fragmentation using micrococcal nuclease (MNase) offers a compelling alternative to sonication, particularly for histone-focused studies. MNase gently cuts linker DNA between nucleosomes without exposing chromatin to high heat or detergents, thereby preserving antibody epitopes and histone-DNA interactions [38] [17]. Experimental comparisons demonstrate that enzyme-digested chromatin consistently yields more robust enrichment of target DNA loci than sonicated chromatin, especially for studying polycomb group proteins and other chromatin-associated factors with less stable DNA interactions [17].
Quantitative Optimization of Sonication Parameters
Key Variables and Their Optimal Ranges
Table 2: Optimization Parameters for Sonication-Based Chromatin Fragmentation
| Parameter | Suboptimal Conditions | Optimal Range | Effect of Deviation |
|---|---|---|---|
| Cell Concentration | >2×10^7 cells/ml | 1-2×10^7 cells/ml | Reduced fragmentation efficiency |
| Sonication Amplitude | >70% | 40-60% | Increased heating and denaturation |
| Pulse Duration | >30 seconds continuous | 10-30 seconds | Local overheating and protein damage |
| Rest Period | <30 seconds between pulses | 30-60 seconds | Cumulative heating effect |
| Total Sonication Time | Instrument-dependent | Target 60-90% fragments <1kb | Epitope destruction with over-sonication |
| Temperature Control | Without ice bath | Strict maintenance at 4°C | Irreversible protein denaturation |
| Cross-linking Duration | >30 minutes for histones | 10 minutes for histones | Reduced chromatin shearing efficiency |
Optimal sonication generates chromatin in which 60-90% of fragments are smaller than 1kb [39]. The minimal number of sonication cycles required to achieve this fragment size distribution should be used, as over-sonication directly correlates with reduced or complete loss of ChIP signal due to harsh treatment of chromatin [39]. For example, using a Branson Digital Sonifier with a 1/8-inch Micro Tip, approximately 4 minutes of total sonication time (using cycles of 1 second on/1 second off) at 50% amplitude typically provides good fragmentation while preserving chromatin integrity [39].
Quality Assessment of Sonicated Chromatin
Following sonication, chromatin fragmentation efficiency must be verified through systematic quality control:
- Fragment Size Analysis: Resolve sheared chromatin on a 1.5-2% agarose gel to confirm the majority of fragments fall within the 200-500 bp range [39].
- Qubit Quantification: Measure DNA concentration using fluorescence-based methods (e.g., Qubit dsDNA HS Assay) to ensure sufficient material for immunoprecipitation [40].
- Cross-linking Reversal Test: Reverse cross-links in a small aliquot of sonicated chromatin and assess DNA integrity to confirm shearing efficiency without excessive degradation.
Experimental Protocols for Optimal Sonication
Optimized Sonication Protocol for Cell Cultures
Materials:
- Phosphate Buffered Saline (PBS) with protease inhibitors
- 1% formaldehyde for cross-linking
- 2X ChIP Sonication Cell Lysis Buffer
- ChIP Sonication Nuclear Lysis Buffer
- Branson Digital Sonifier or equivalent probe sonicator
Procedure:
- Cell Harvesting: Grow HCT 116 or similar cells to 90% confluence in 15 cm culture dishes. Use approximately 4×10^6 cells per immunoprecipitation [39].
- Cross-linking: Add 540 µl of 37% formaldehyde to 20 ml culture medium (final concentration 1%). Incubate 10 minutes at room temperature. For histone modifications, 10 minutes fixation is sufficient [39].
- Quenching: Add 2 ml of 10X glycine to each dish, swirl to mix, and incubate 5 minutes at room temperature.
- Cell Collection: Remove media, wash cells twice with 20 ml ice-cold PBS, and scrape into cold PBS. Pellet cells at 1,000 × g for 5 minutes at 4°C.
- Lysis: Resuspend cell pellet (up to 2×10^7 cells) in 1 ml ice-cold 1X ChIP Sonication Cell Lysis Buffer with protease inhibitors. Incubate on ice for 10 minutes.
- Nuclear Preparation: Pellet cells at 5,000 × g for 5 minutes at 4°C. Resuspend in 1 ml ice-cold ChIP Sonication Nuclear Lysis Buffer with protease inhibitors. Incubate on ice for 10 minutes.
- Sonication: Transfer 1 ml of cell suspension to an appropriate tube. Sonicate using a probe sonicator with the following parameters:
- Amplitude: 50%
- Cycle: 1 second on, 1 second off
- Total duration: 8 minutes (4 minutes actual sonication time)
- Maintain sample in ice-water bath throughout sonication
- Clarification: Centrifuge sonicated lysate at 21,000 × g for 10 minutes at 4°C. Transfer supernatant to a new tube – this is the cross-linked chromatin preparation.
Alternative Enzymatic Fragmentation Protocol
For histone ChIP-seq applications where sonication-induced damage remains problematic despite optimization, enzymatic fragmentation provides a reliable alternative:
Materials:
- Micrococcal nuclease (MNase)
- SimpleChIP Plus Enzymatic Chromatin IP Kit or equivalent
- 1X PBS with protease inhibitors
Procedure:
- Cell Preparation: Harvest and cross-link cells as described in steps 1-4 of the sonication protocol.
- Nuclear Isolation: Pellet cells and resuspend in 1 ml PBS with protease inhibitors. Transfer to a Dounce homogenizer and lyse with 20 strokes using a tight-fitting pestle.
- MNase Digestion: Add MNase (enzyme concentration requires empirical optimization) and incubate at 37°C for 15-20 minutes with occasional mixing.
- Digestion Termination: Stop reaction by adding EGTA to a final concentration of 10 mM.
- Chromatin Preparation: Centrifuge at 21,000 × g for 10 minutes at 4°C. Collect supernatant containing fragmented chromatin.
This enzymatic approach typically yields more robust enrichment of target DNA loci compared to sonicated chromatin, particularly for studying histone modifications and chromatin-associated proteins [17].
Workflow and Decision Pathway
The following diagram illustrates the critical decision points and optimization pathway for successful chromatin fragmentation in histone ChIP-seq applications:
The Scientist's Toolkit: Essential Research Reagents
Table 3: Essential Reagents for Optimized Chromatin Fragmentation
| Reagent/Category | Specific Examples | Function & Importance |
|---|---|---|
| Protease Inhibitors | 200X Protease Inhibitor Cocktail (PIC) | Preserves histone integrity during processing by inhibiting cellular proteases |
| Cross-linking Reagents | 37% formaldehyde, 16% methanol-free formaldehyde | Fixes protein-DNA interactions without introducing contaminants that affect sonication |
| Lysis Buffers | ChIP Sonication Cell Lysis Buffer, ChIP Sonication Nuclear Lysis Buffer | Facilitate nuclear isolation while maintaining chromatin structure |
| Sonication Equipment | Branson Digital Sonifier with 1/8-inch Micro Tip | Provides consistent, controllable fragmentation with minimal sample-to-sample variation |
| Enzymatic Alternative | Micrococcal nuclease (MNase), SimpleChIP Enzymatic IP Kit | Gentle chromatin fragmentation preserving histone epitopes and protein-DNA interactions |
| Quality Control Tools | Qubit dsDNA HS Assay, agarose gel electrophoresis | Verify fragment size distribution and DNA concentration before proceeding to IP |
| Chromatin Shearing Aids | Triton X-100 | Added after sonication to decrease foaming and improve chromatin recovery [40] |
Preventing over-sonication in histone ChIP-seq requires meticulous attention to empirical parameter optimization and rigorous quality control. The protocols and guidelines presented here provide a framework for achieving sufficient chromatin fragmentation while preserving histone integrity and modification signals. Implementation of these optimized sonication parameters or alternative enzymatic approaches will significantly enhance data quality and reliability in epigenetic studies, particularly within the broader context of chromatin preparation methodology optimization.
Addressing Low Chromatin Yield from Tissue Samples
Obtaining high-quality chromatin from solid tissues is a critical yet challenging step in generating robust and reproducible ChIP-seq data for histone modifications. The dense and heterogeneous nature of tissues, combined with the complex extracellular matrix, often leads to low chromatin yield and quality, which can compromise subsequent immunoprecipitation and sequencing results [1]. These challenges are particularly pronounced in epigenetics research focusing on disease mechanisms in native tissue contexts, where preserving in vivo chromatin architecture is essential for biological relevance [1]. This application note addresses these limitations by presenting optimized protocols for tissue processing, chromatin extraction, and fragmentation, incorporating quantitative guidance on sonication parameters to maximize yield while maintaining chromatin integrity for histone ChIP-seq applications.
Optimized Tissue Preparation and Homogenization
Proper tissue preparation is foundational for maximizing chromatin yield. The initial steps of tissue collection and processing directly impact the efficiency of chromatin extraction and subsequent fragmentation.
Standardized Tissue Collection and Mincing: Immediately after dissection, tissues should be rinsed in cold phosphate-buffered saline (PBS) to remove residual blood, and unwanted material such as fat and necrotic tissue should be carefully removed [41]. The tissue should then be minced on a cold surface into 1-2 mm cubes using a sterile scalpel blade. Maintaining cold conditions throughout this process is crucial to prevent protein degradation and preserve native chromatin structure [1] [41].
Systematic Homogenization Methods: Two effective homogenization approaches have been validated for chromatin preparation:
- Dounce Homogenization: Transfer minced tissue to a 7 mL Dounce grinder on ice. Add 1 mL of cold PBS supplemented with protease inhibitors and shear the tissue with 8-10 even strokes using the tight-fitting pestle (Pestle A). The presence of some connective tissue debris is expected, but the majority of cells should be liberated [1].
- GentleMACS Dissociator: For a more standardized, semi-automated approach, transfer minced tissue to a gentleMACS C-tube containing cold PBS with protease inhibitors. Run the pre-configured "htumor03.01" program, which provides optimized mechanical disruption parameters for tissue homogenization [1].
Table 1: Homogenization Methods Comparison
| Method | Throughput | Consistency | Recommended Tissue Types |
|---|---|---|---|
| Dounce Homogenization | Low to medium | User-dependent | Soft tissues (e.g., liver, spleen) |
| GentleMACS Dissociator | Medium to high | High standardized | Dense/fibrous tissues (e.g., tumor, muscle) |
The following workflow diagram illustrates the optimized steps from tissue preparation to chromatin fragmentation:
Chromatin Cross-Linking and Extraction Optimization
Cross-linking stabilizes protein-DNA interactions, while efficient nuclei isolation is essential for obtaining high-quality chromatin.
Tissue-Specific Cross-Linking: For histone ChIP-seq, a final concentration of 1% formaldehyde with a 10-minute fixation at room temperature is generally sufficient [41]. However, fixation time may require optimization based on tissue permeability and density. Stop the cross-linking reaction by adding glycine to a final concentration of 125-150 mM and incubating on ice for 5 minutes [41].
Nuclei Isolation from Complex Tissues: After homogenization and cross-linking, pellet cells and resuspend in ice-cold ChIP Sonication Cell Lysis Buffer supplemented with protease inhibitors. Incubate on ice for 10 minutes to facilitate lysis [41]. Pellet the nuclei and wash once more with the same buffer. Finally, resuspend the nuclei pellet in ChIP Sonication Nuclear Lysis Buffer + PIC and incubate on ice for 10 minutes prior to sonication [41]. The optimal number of cells or tissue mass per sonication volume is critical; 1×10^7 to 2×10^7 cells or 100-150 mg of tissue per 1 mL of sonication buffer is recommended for efficient fragmentation [41].
Critical Sonication Parameters for Chromatin Fragmentation
Sonication efficiency directly impacts chromatin yield, immunoprecipitation efficiency, and ultimately, ChIP-seq data quality. Several critical parameters must be systematically controlled.
Sonication Buffer Composition and Sample Volume: The SDS concentration in the lysis buffer significantly affects shearing efficiency. A two-step extraction process using a buffer with 0.5% SDS followed by dilution to a final concentration of 0.1% SDS before sonication dramatically improves consistency [28]. Sample volume in the sonication tube is equally crucial; 500 µL per tube provides optimal energy transfer in water bath sonicators, while significantly smaller or larger volumes result in inefficient lysis and fragmentation [28].
Sonication Equipment and Positioning: In water bath sonicators (e.g., Bioruptor), tube position affects energy delivery. Positions directly facing the transducers (e.g., R1) provide the most efficient sonication [28]. Using a rotating carousel or regularly repositioning tubes can improve consistency across multiple samples. For probe sonicators, ensuring the probe does not touch the tube walls or bottom and maintaining consistent immersion depth is vital.
Sonication Cycle and Cooling: To prevent sample overheating and protein degradation, use controlled cycles (e.g., 30 seconds ON/30-60 seconds OFF) while keeping samples in an ice-water bath [41] [28]. Monitoring temperature during sonication is recommended. The minimal number of sonication cycles required to achieve the desired fragment size should be used, as over-sonication can degrade proteins and reduce epitope accessibility [41] [28].
Table 2: Optimized Sonication Conditions for Tissue Chromatin
| Parameter | Recommended Condition | Impact on Chromatin Yield & Quality |
|---|---|---|
| SDS Concentration | 0.1% final during sonication | Optimized for shearing efficiency & protein integrity [28] |
| Sample Volume | 500 µL per tube (Bioruptor) | Maximizes ultrasonic energy transfer [28] |
| Cell Density | 15-20 million cells/mL | Prevents attenuation of ultrasonic waves [28] |
| Sonication Cycles | 5 sec ON/5 sec OFF (Low power) | Balance of efficient shearing & sample cooling [28] |
| Target Fragment Size | 200-600 bp | Ideal for histone ChIP-seq resolution & IP efficiency [28] |
Quality Control and Troubleshooting
Rigorous quality control after sonication is essential before proceeding to immunoprecipitation.
Fragment Size Distribution Analysis: Reverse cross-link a small aliquot (10-20 µL) of sheared chromatin by incubating with 5 M NaCl at 65°C for 4 hours or overnight. Purify the DNA using RNase A treatment followed by proteinase K digestion and clean-up. Analyze the DNA using a Bioanalyzer, TapeStation, or agarose gel electrophoresis [10]. The optimal size distribution for histone ChIP-seq should show a majority of fragments between 200-600 bp, with a peak around 300 bp [28].
Troubleshooting Low Yield Scenarios: For persistently low chromatin yield or poor fragmentation:
- Excessive Fragmentation: If the chromatin is over-sonicated (<150 bp), reduce sonication time or power by 20-30% and re-optimize.
- Insufficient Fragmentation: If fragments are predominantly >1000 bp, ensure SDS concentration is optimal (0.1%), verify sample volume and cell density, and increase sonication time incrementally [42] [28].
- Low DNA Recovery: Increase starting tissue mass (up to 150-200 mg), verify homogenization efficiency microscopically, and ensure complete nuclei lysis prior to sonication [1] [41].
The Scientist's Toolkit
Table 3: Essential Research Reagent Solutions for Tissue Chromatin Preparation
| Reagent/Equipment | Function | Application Notes |
|---|---|---|
| Protease Inhibitor Cocktail (PIC) | Preserves protein integrity & histone modifications | Add fresh to all buffers before use [41] |
| Formaldehyde (1%) | Cross-links proteins to DNA | Use fresh (<3 months old); 10 min for histones [10] [41] |
| Dounce Homogenizer | Mechanical tissue disruption | Pestle A (tight) for cell liberation; keep ice-cold [1] |
| ChIP Sonication Buffers | Nuclei lysis & chromatin preparation | Optimized SDS concentration is critical [41] [28] |
| Bioruptor Sonicator | Consistent chromatin shearing | Low power, 5-30 sec ON/OFF cycles with ice [28] |
| Bioanalyzer/TapeStation | Fragment size QC | Superior to agarose gels for resolution & sensitivity [10] |
Successful histone ChIP-seq from tissue samples requires a meticulously optimized workflow from tissue collection through chromatin fragmentation. By implementing the standardized homogenization techniques, controlling cross-linking conditions, and rigorously optimizing sonication parameters outlined in this application note, researchers can significantly improve chromatin yield and quality from challenging solid tissues. Attention to critical factors such as buffer composition, sample volume, and equipment settings transforms ChIP-seq from a challenging protocol to a robust and reproducible method for studying histone modifications in physiologically relevant tissue contexts, thereby enhancing the quality and biological significance of epigenomics research.
Chromatin Immunoprecipitation followed by sequencing (ChIP-seq) has revolutionized our understanding of epigenetic regulation, yet its application to complex tissues presents unique methodological hurdles. Tissues such as brain, heart, and adipose contain heterogeneous cellular compositions, high lipid content, and variable protein levels that complicate chromatin isolation and immunoprecipitation. Adipose tissue, for instance, poses significant difficulties due to its high lipid content and heterogeneous cellular composition, requiring specialized optimization for successful ChIP experiments [14]. Similarly, brain and heart tissues present challenges related to cellular complexity and structural density. This application note provides a comprehensive framework of optimization strategies and detailed protocols for generating high-quality ChIP-seq data from these challenging tissues, with particular emphasis on sonication conditions critical for histone modification studies.
Tissue-Specific Challenges and Optimization Parameters
Different tissues present distinct obstacles for ChIP-seq that demand tailored approaches. The table below summarizes the primary challenges and corresponding optimization strategies for brain, heart, and adipose tissues.
Table 1: Tissue-Specific Challenges and Optimization Strategies for ChIP-seq
| Tissue Type | Primary Challenges | Recommended Optimization Strategies |
|---|---|---|
| Adipose | High lipid content, heterogeneous cellular composition (adipocytes, pre-adipocytes, immune cells) [14] | Small chromatin input protocols, efficient washing steps, lipid removal during preparation [14] |
| Brain | Cellular heterogeneity (neurons, glia), complex connectivity, variable cell density | Extended cross-linking (15-30 min), mechanical dissociation (Dounce homogenizer), optimized sonication cycles [43] [44] |
| Heart | High myocyte density, fibrous structure, contractile proteins | Extended cross-linking (15-30 min), rigorous mechanical dissociation, increased sonication time/cycles [43] [44] |
| General Tissue | Variable protein levels, endogenous nuclease activity, background proteins [43] | Standardized tissue mass (25-150 mg), protease inhibitors throughout, rapid processing [43] [44] |
The optimization of sonication conditions represents a particularly critical parameter that must be empirically determined for each tissue type and experimental setup. Research indicates that optimal sonication conditions should generate chromatin in which 60-90% of the fragments are smaller than 1kb for most applications, with over-sonication potentially resulting in signal reduction or loss due to harsh treatment of chromatin complexes [44]. For histone-specific ChIP-seq, ideal fragment sizes typically range from 150-300 bp, while transcription factor studies may benefit from larger fragments of 200-700 bp [9].
Quantitative Optimization Parameters
Successful ChIP-seq requires careful optimization of multiple quantitative parameters across different tissue types. The following table summarizes key experimental conditions that require tissue-specific adjustment.
Table 2: Quantitative Optimization Parameters for Difficult Tissues
| Parameter | Adipose Tissue | Brain/Heart Tissue | Standard Tissue Culture Cells |
|---|---|---|---|
| Tissue Input | Small input protocols developed [14] | 100-150 mg recommended [44] [45] | 1×10⁷ to 2×10⁷ cells [44] [45] |
| Cross-linking | 1% formaldehyde, 10 min for histones [44] [45] | 1% formaldehyde, 10-30 min [44] [45] | 1% formaldehyde, 10 min for histones [44] [9] [45] |
| Sonication Fragment Size | 150-300 bp for histones [9] | 150-300 bp for histones [9] | 150-300 bp for histones [9] |
| Chromatin Preparation | Specialized lipid-handling protocols [14] | Mechanical dissociation (Dounce homogenizer) [44] [45] | Direct lysis and sonication [9] |
| Cross-linking Quenching | 125 mM glycine, 5 min [44] [45] | 125 mM glycine, 5 min [44] [45] | 125 mM glycine, 5 min [44] [9] [45] |
Detailed Experimental Workflow
The following diagram illustrates the optimized complete workflow for tissue ChIP-seq, highlighting critical optimization points for difficult tissues.
Stage 1: Tissue Preparation and Cross-linking
Begin by weighing 100-150 mg of fresh or frozen tissue per chromatin preparation, which accounts for potential low yield with some tissue types [44] [45]. Place the tissue sample in a petri dish resting on ice or dry ice and mince into 1-2 mm cubes using a clean scalpel or razor blade [44] [45]. Transfer the minced tissue to a 15 mL conical tube and add 1 mL of ice-cold PBS containing Protease Inhibitor Cocktail (PIC) per chromatin preparation [44] [45].
For cross-linking, add 28 μL of 37% formaldehyde (or 62.5 μL of 16% methanol-free formaldehyde) per 1 mL of PBS+PIC to achieve a final formaldehyde concentration of 1% [44] [9] [45]. Incubate at room temperature for 10 minutes for histone modifications; for transcription factors, extend fixation to 10-30 minutes [44] [45]. Stop the cross-linking reaction by adding 100 μL of 10X glycine per 1 mL of PBS+PIC, mix, and incubate on ice for 5 minutes [44] [9] [45]. Centrifuge tissue at 1,200 × g for 5 minutes at 4°C, remove supernatant, and wash with 1 mL ice-cold PBS+PIC, repeating the centrifugation and wash steps once more [44] [45].
Stage 2: Tissue Dissociation and Nuclei Preparation
Resuspend the tissue pellet in 1 mL of 1X ChIP Sonication Cell Lysis Buffer containing PIC per chromatin preparation [44] [45]. For effective tissue dissociation, transfer the tissue suspension to a Dounce homogenizer using a cut pipet tip and use a tight-fitting pestle (Type A) to disaggregate tissue pieces with 20 strokes or until no chunks of tissue are observed [44] [45]. Transfer the cell suspension to a 1.5 mL tube and incubate on ice for 10 minutes [44] [45].
Pellet cells at 5,000 × g for 5 minutes at 4°C, remove supernatant, and resuspend the pellet in 1 mL ice-cold ChIP Sonication Nuclear Lysis Buffer containing PIC per chromatin preparation [44] [45]. Incubate on ice for 10 minutes before proceeding to chromatin fragmentation [44] [45]. For adipose tissue specifically, additional optimization is required due to high lipid content, including specialized pre-clearing steps and efficient washing protocols to reduce background [14].
Stage 3: Chromatin Shearing by Sonication
Transfer 1 mL of cell suspension to an appropriately sized tube for sonication. The volume and concentration of cells are critical for efficient chromatin fragmentation [44]. Fragment chromatin by sonication using conditions that must be empirically determined for each tissue type and sonicator system [44] [9]. When using a Branson Digital Sonifier D250 probe sonicator with a 1/8-inch Micro Tip, 8 minutes of 1 second on/1 second off sonication cycles (4 minutes of total sonication time) at 50% amplitude typically provides good fragmentation and ChIP efficiency [44].
During sonication, keep the chromatin sample cool by maintaining the tube in an ice-water bath during and between sonication steps [44]. Ensure the probe does not touch the bottom or wall of the tube, and stop sonication to adjust the position if the chromatin sample foams [44]. Optimal sonication generates chromatin fragments where 60-90% are smaller than 1kb [44]. For histone targets, aim for an average fragment size of 150-300 bp, while non-histone targets may benefit from larger fragment sizes of 200-700 bp [9].
After sonication, clarify lysates by centrifugation at 21,000 × g in a microcentrifuge for 10 minutes at 4°C [44]. Transfer the supernatant to a new tube—this cross-linked chromatin preparation can be used immediately for immunoprecipitation or stored at -80°C [44].
Stage 4: Immunoprecipitation and DNA Recovery
For immunoprecipitation, prepare a 50:50 slurry of Protein A and Protein G magnetic beads, washing them twice with excess ice-cold PBS [9]. Block the beads with blocking buffer (0.5% w/v BSA in RIPA-150) for 30 minutes at 4°C with gentle rotation [9]. Wash the beads twice with 1 mL of RIPA-150 before binding to ChIP-grade antibodies [9]. Use 4 μg antibody for histone targets and 8 μg for non-histone targets in 500 μL RIPA-150 buffer with 25 μL bead slurry, incubating for 6 hours or overnight at 4°C with gentle rotation [9].
Incubate the chromatin preparation with antibody-bound beads for several hours or overnight at 4°C with rotation [9]. Wash beads sequentially with low salt, high salt, and LiCl buffers, followed by TE buffer [9]. Elute chromatin complexes from beads using freshly prepared ChIP Elution Buffer (1% SDS, 0.1 M NaHCO₃) [9]. Reverse cross-links by adding NaCl to a final concentration of 200 mM and incubating at 65°C for 4 hours or overnight [9]. Treat samples with RNase A and Proteinase K before purifying DNA using a PCR purification kit [9].
The Scientist's Toolkit: Essential Research Reagents
Successful ChIP-seq for difficult tissues requires specific reagent solutions tailored to address the unique challenges of each tissue type.
Table 3: Essential Research Reagents for Tissue ChIP-seq
| Reagent/Category | Specific Examples | Function and Importance |
|---|---|---|
| Protease Inhibitors | PIC #7012 [44] [45], PMSF, Aprotinin, Leupeptin [10] | Prevent protein degradation during tissue processing and chromatin preparation |
| Cross-linking Reagents | Methanol-free formaldehyde (16-37%) [44] [9] [45] | Preserve protein-DNA interactions; methanol-free preferred for epitope preservation |
| Magnetic Beads | Protein G Magnetic Beads [44] [45], Protein A/G mix [9] | Antibody binding and antigen capture during immunoprecipitation |
| Sonication Buffers | ChIP Sonication Nuclear Lysis Buffer [44] [45], Histone/Non-histone Sonication Buffers [9] | Optimize chromatin shearing efficiency and fragment size distribution |
| Quality Control Kits | High-sensitivity DNA kits [14] [10], Agilent Bioanalyzer [10] | Assess chromatin fragment size distribution and library quality |
| Chromatin Shearing | Branson Sonifier [44], Bioruptor Pico [10] | Mechanical fragmentation of chromatin to optimal size ranges |
Advanced Methodological Considerations
Quality Control and Normalization Strategies
Rigorous quality control is essential throughout the ChIP-seq workflow. Assess chromatin fragmentation using a Bioanalyzer, TapeStation, or LabChip system, which provides superior resolution compared to agarose gels for distinguishing subtle size differences (e.g., 200-300 bp vs. 300-400 bp fragments) [10]. Include input DNA controls and quantify input DNA in ChIP-seq workflows to ensure accurate normalization and peak validation [43].
For quantitative comparisons across experimental conditions, consider implementing spike-in normalization strategies using well-defined cellular spike-in ratios of orthologous species' chromatin [46]. This approach enables highly quantitative comparisons of 2D chromatin sequencing across experimental conditions and cellular contexts, addressing a fundamental challenge in epigenetic research [46].
Tissue Selection and Storage Considerations
Tissue integrity profoundly impacts ChIP-seq outcomes. Fresh tissue is optimal for ChIP workflows as it allows immediate fixation, preserving native protein-DNA complexes and minimizing degradation [43]. When fresh tissue is unavailable, snap-freezing in liquid nitrogen immediately after collection effectively locks in chromatin structure and maintains protein-DNA binding [43]. While formalin-fixed paraffin-embedded (FFPE) samples offer long-term stability, the fixation process complicates chromatin extraction, often resulting in lower yields, and standard ChIP protocols are generally not recommended for FFPE tissue without specialized modifications [43].
Optimizing ChIP-seq for difficult tissues like brain, heart, and adipose requires a systematic approach addressing tissue-specific challenges through customized protocols. The strategies outlined here—including optimized cross-linking conditions, mechanical dissociation techniques, empirically determined sonication parameters, and rigorous quality control measures—provide a foundation for generating robust and reproducible histone ChIP-seq data from complex tissues. As epigenetic research increasingly focuses on tissue-specific regulation in health and disease, these optimized protocols will enable researchers to overcome technical barriers and obtain meaningful insights into gene regulatory mechanisms operating in biologically relevant contexts.
Adapting Sonication for Extended Cross-linking Times (Transcription Factor Co-studies)
The optimization of sonication conditions is a critical determinant for success in chromatin immunoprecipitation followed by sequencing (ChIP-seq), particularly when investigating transcription factors. This process becomes significantly more complex when extended cross-linking times are employed to capture transient or indirect DNA-protein interactions. Extended cross-linking, often necessary for stabilizing complexes involving transcription factors and co-factors, alters chromatin rigidity and accessibility, directly impacting the efficiency and consistency of acoustic shearing. Within the broader context of histone ChIP-seq optimization research, understanding this interplay is not merely a technical refinement but a foundational requirement for generating quantitative, reproducible, and biologically meaningful data. The challenge lies in achieving a fragment size distribution that provides high-resolution binding site mapping without compromising antigen integrity or introducing experimental artifacts. This protocol details a systematic approach to adapting sonication for such demanding conditions, integrating spike-in controls for robust normalization and providing a framework to ensure data quality and reliability across diverse cellular contexts and experimental perturbations.
Key Principles and Rationale for Protocol Adaptation
The Impact of Extended Cross-linking on Chromatin
Formaldehyde cross-linking creates covalent bonds between proteins and DNA, as well as between closely associated proteins. While standard cross-linking times (e.g., 10 minutes) are often sufficient for stable interactions like histone modifications, transcription factors and their co-regulators frequently require extended cross-linking (e.g., 20-30 minutes) for efficient capture [47] [48]. This is because these proteins may interact with DNA indirectly or transiently, and longer fixation times help stabilize these complexes. However, this increased stabilization comes at a cost: extended cross-linking leads to higher chromatin rigidity, which can result in larger average fragment sizes after sonication and potentially reduced shearing efficiency [47]. Furthermore, over-crosslinking can mask epitopes, reducing antibody binding efficiency during immunoprecipitation. Therefore, the sonication process must be recalibrated to overcome the increased mechanical resistance of the chromatin without generating excessive heat or damaging the protein-DNA interactions of interest.
Quantitative Normalization Strategies
When sonication conditions are altered, or when comparing samples with globally different levels of a chromatin mark (e.g., after HDAC inhibitor treatment), standard ChIP-seq normalization methods can fail. In such cases, spike-in controls are essential for accurate quantitative comparisons [46] [40]. This method involves adding a known quantity of chromatin from a distantly related species (e.g., Drosophila S2 chromatin for human cell studies) to the experimental samples before immunoprecipitation. The spike-in chromatin serves as an internal reference, allowing for normalization based on the ratio of mapped experimental-to-spike-in reads. This controls for technical variability in IP efficiency, DNA recovery, and library preparation, enabling precise differential analysis between conditions [46] [40]. An alternative bioinformatic method, siQ-ChIP, has also been developed as a mathematically rigorous alternative that calculates absolute IP efficiency without exogenous spike-in chromatin [49]. The choice between these methods depends on the experimental question and system.
Materials and Reagent Solutions
Table 1: Essential Research Reagents and Solutions for Sonication and Cross-linking
| Reagent/Solution | Function/Application | Key Considerations |
|---|---|---|
| Formaldehyde | Crosslinking agent for fixing protein-DNA interactions. | Use a fresh 1-1.5% final concentration for extended cross-linking; always quench with glycine [9] [48]. |
| EGS (Ethylene glycol bis(succinimidyl succinate)) | Homobifunctional crosslinker for dual-crosslinking. | Stabilizes protein-protein interactions prior to formaldehyde crosslinking; use at ~1.5 mM [48]. |
| Sonicator | Instrument for acoustic shearing of chromatin. | Use a probe-type sonicator (e.g., Misonix 3000) for efficiency; critical to optimize cycles/power [40]. |
| Non-Histone Sonication Buffer | Lysis and sonication buffer for transcription factor targets. | Contains 0.1% sodium deoxycholate, 0.5% lauroylsarcosine; milder detergents preserve complexes [9]. |
| Protein G Magnetic Beads | Solid support for antibody-based immunoprecipitation. | Preferred for ChIP-seq as they are not blocked with DNA, preventing contamination [47] [9]. |
| Drosophila S2 Chromatin | Spike-in control for normalization. | Added in a defined ratio (e.g., 1:10) to experimental chromatin before IP for quantitative comparisons [40]. |
| ChIP-grade Antibody | Target-specific immunoprecipitation. | Must be validated for ChIP; typically 4-8 µg per IP reaction [47] [9]. |
| Nuclear Extraction Buffers | For isolating nuclei and reducing cytoplasmic content. | Buffers with Triton X-100/NP-40 help clean nuclei before sonication [9]. |
Optimized Sonication Protocol for Extended Cross-linking
Pre-sonication: Cross-linking and Nuclear Preparation
- Cell Culture and Cross-linking: Grow and treat cells according to your experimental design. For transcription factor studies, prepare for dual-crosslinking if the target does not bind DNA directly.
- Dual-Crosslinking: Harvest and wash cells with PBS to remove media amines. Resuspend cell pellet in PBS and add EGS to a final concentration of 1.5 mM. Incubate for 30 minutes at room temperature with gentle rotation. Then, add formaldehyde to a final concentration of 1% and incubate for an additional 30 minutes [48].
- Standard Extended Cross-linking: For a single crosslink, resuspend cells directly in a 1% formaldehyde solution and incubate for 20-30 minutes at room temperature with gentle agitation [47].
- Quench all cross-linking reactions by adding glycine to a final concentration of 125-150 mM and incubating for 5 minutes.
- Nuclear Extraction: Pellet the cross-linked cells and wash twice with cold PBS. Resuspend the pellet in 2 mL of Nuclear Extraction Buffer 1 (e.g., containing 0.5% NP-40, 0.25% Triton X-100) and incubate for 15 minutes at 4°C with rocking. Pellet the nuclei and resuspend in 2 mL of Nuclear Extraction Buffer 2 (e.g., 200 mM NaCl, 0.5 mM EGTA) for another 15-minute incubation at 4°C [9]. This step removes cytoplasmic components that can interfere with sonication.
Sonication Optimization and Execution
- Lysate Preparation: Pellet the nuclei and carefully resuspend them in an appropriate, ice-cold sonication buffer. For transcription factors, use a Non-Histone Sonication Buffer, which is milder than SDS-heavy histone buffers [9]. A starting volume of 350 µL for 1 x 10⁷ cells is typical.
- Sonication Setup: Transfer the lysate to a pre-chilled microcentrifuge tube. Place the tube in a metal cup filled with ice and water to ensure consistent cooling during sonication. Use a microtip probe sonicator.
- Optimization Cycle (Pilot): The optimal sonication conditions are highly dependent on the cell type, cross-linking duration, and equipment. It is mandatory to perform a pilot optimization.
- Set the power output to a medium level (e.g., 30-40% of maximum).
- Sonicate the lysate for a defined number of cycles (e.g., 5, 8, 10, 12), with each cycle consisting of a short pulse (e.g., 15-30 seconds ON) followed by a long rest period (e.g., 45-60 seconds OFF) to prevent overheating.
- After each test condition, reverse the cross-links, purify the DNA, and analyze 10 µL on a 1.2-1.5% agarose gel or a Bioanalyzer to determine the fragment size distribution [40] [22].
- Execution of Optimized Program: Once the optimal number of cycles is determined, perform the full-scale sonication on all experimental samples. The goal is a smear of fragments centered between 200-700 bp for transcription factors [9]. For studies involving massive histone acetylation changes, remember to incorporate spike-in chromatin before the IP step [40].
- Post-Sonication Clean-up: Pellet the insoluble debris by centrifuging the sonicated lysate at 17,000 x g for 15 minutes at 4°C. Transfer the supernatant (containing the sheared chromatin) to a new tube. Save a small aliquot (e.g., 50 µL) as the "Input" control.
Diagram 1: Sonication optimization workflow for cross-linked chromatin. The critical feedback loop for determining optimal power and cycles is shown.
Data Analysis and Quality Control
Fragment Size and Library Quality Assessment
After sonication and library preparation, rigorous QC is essential. The size distribution of the purified DNA fragments should be verified using a High Sensitivity DNA Kit on a Bioanalyzer or similar system. A successful preparation for transcription factor studies should show a peak in the 200-700 bp range. Libraries with a significant proportion of fragments outside this range may require re-optimization. Furthermore, metrics from sequencing, such as the NFI (Normalized Strand Cross-Correlation coefficient) and FRiP (Fraction of Reads in Peaks), should be calculated. A high FRiP score (>1-5% for transcription factors) indicates good signal-to-noise ratio.
Quantitative Normalization Methods
Table 2: Comparison of Quantitative ChIP-seq Normalization Approaches
| Method | Principle | Application Context | Advantages | Limitations |
|---|---|---|---|---|
| Spike-in Normalization [46] [40] | Addition of exogenous chromatin (e.g., Drosophila) as an internal control. | Essential for capturing global histone changes (e.g., HDACi) or comparing different cell states. | Controls for technical variability in IP efficiency and library prep. | Requires careful titration; spike-in and experimental chromatin must IP with similar efficiency. |
| siQ-ChIP [49] | Computational calculation of absolute IP efficiency using input DNA mass and IP'd DNA mass. | Rigorous absolute quantification without need for exogenous spike-ins. | Mathematically robust; no additional wet-lab steps. | Relies on accurate quantification of input and IP DNA masses. |
| Normalized Coverage [49] | Scaling signal to reads per genomic content (RPGC). | Relative comparisons within a sample or between samples with no global changes. | Simple and widely used for standard comparisons. | Fails when global levels of the target mark change significantly. |
Troubleshooting Guide
Table 3: Common Sonication Problems and Solutions with Extended Cross-linking
| Problem | Potential Cause | Recommended Solution |
|---|---|---|
| Fragment size too large | Insufficient sonication power/cycles; over-crosslinking. | Increase number of sonication cycles incrementally; ensure proper cooling. |
| Low DNA yield after sonication | Over-sonication (DNA degradation); inefficient chromatin extraction. | Reduce sonication time/amplitude; ensure complete nuclear lysis in sonication buffer. |
| High background/ low signal (FRiP) | Over-crosslinking masking epitopes; antibody issues. | Reduce cross-linking time; titrate antibody; include spike-in controls to verify [40]. |
| Fragment size inconsistency | Inconsistent cell numbers per sample; variable sonication. | Use precise cell counts for all samples; ensure consistent lysate volume and tube position during sonication. |
| Failure to IP transcription factor | Insufficient cross-linking for indirect binders. | Implement a dual-crosslinking protocol using EGS [48]. |
The adaptation of sonication parameters for extended cross-linking times is a critical, non-trivial step in the reliable genomic profiling of transcription factors and their associated complexes. This protocol underscores that a one-size-fits-all approach to chromatin shearing is insufficient for advanced epigenetic studies. Success hinges on a systematic process of empirical optimization, where pilot experiments to define the relationship between cross-linking duration and acoustic energy are mandatory. Furthermore, the integration of spike-in controls or quantitative methods like siQ-ChIP provides the necessary framework for ensuring that observed biological differences are not artifacts of technical variation introduced by the adapted protocol. By adhering to these detailed application notes, researchers can confidently modify their ChIP-seq workflows to address challenging biological questions involving dynamic protein-DNA interactions, thereby generating data that is both high in quality and quantitative in nature.
Quality Control, Assay Validation, and Advanced Integrated Methods
Agarose Gel Electrophoresis for Visualizing Chromatin Fragment Distribution
Within chromatin immunoprecipitation followed by sequencing (ChIP-seq) workflows, controlled fragmentation of chromatin is a critical step that directly influences the resolution and quality of resulting data. This is particularly true for optimizing sonication conditions for histone ChIP-seq, where the goal is to generate fragments primarily consisting of mononucleosomes. Agarose gel electrophoresis serves as an essential, rapid quality control check, enabling researchers to visually assess the size distribution of sheared chromatin before proceeding to immunoprecipitation. This application note details the methodology for using agarose gel electrophoresis to visualize chromatin fragments, ensuring they fall within the optimal range for high-resolution histone mapping.
The Critical Role of Fragment Size in Histone ChIP-seq
The fidelity of histone ChIP-seq data is heavily dependent on chromatin fragmentation. Optimal sonication produces fragments ranging from 150 to 300 base pairs (bp), which correspond to mono- and dinucleosome-sized fragments [7]. Fragments within this size range provide high-resolution binding sites and are compatible with next-generation sequencing platforms.
- Oversonication can destroy histone-mark epitopes or generate fragments too short for meaningful mapping.
- Undersonication results in large fragments that reduce mapping resolution and can increase background noise.
For histone modifications, fragmentation via micrococcal nuclease (MNase) is often preferred as it digests linker DNA and generates mononucleosome-sized particles, providing high-resolution data for nucleosome modifications [7]. However, cross-linked chromatin sheared by sonication remains a common and effective approach. Analysis of sheared chromatin on an agarose gel provides immediate feedback on sonication efficiency and consistency between samples, which is crucial for reproducible quantitative comparisons, such as in time-series experiments [10].
Materials and Equipment
Research Reagent Solutions
Table 1: Essential materials for chromatin fragmentation analysis via agarose gel electrophoresis.
| Item | Function/Benefit |
|---|---|
| Agarose | Matrix for gel electrophoresis; separates DNA fragments by size. |
| DNA Ladder | Molecular weight standard for estimating chromatin fragment sizes. |
| Electrophoresis Buffer (TAE or TBE) | Conducts current and maintains stable pH during electrophoresis. |
| Nucleic Acid Stain | Intercalates with DNA for visualization under UV light (e.g., ethidium bromide, SYBR Safe). |
| Bioanalyzer or TapeStation | Preferred instrument for high-sensitivity, quantitative analysis of DNA fragmentation patterns. Provides superior resolution over agarose gels [10]. |
Step-by-Step Protocol for Gel Analysis of Chromatin Fragments
Sample Preparation Post-Sonication
- Reverse Cross-linking: Take a small aliquot (e.g., 50 µL) of sheared chromatin. Add 5 µL of 5 M NaCl and 2 µL of 10 mg/mL Proteinase K. Incubate at 65°C for 2 hours (or overnight) to reverse formaldehyde cross-links [10] [50].
- DNA Purification: Purify the DNA using a commercial PCR purification kit or by phenol-chloroform extraction and ethanol precipitation [10].
- Resuspension: Resuspend the purified DNA in 15-20 µL of nuclease-free water or TE buffer.
Gel Electrophoresis Execution
- Gel Casting: Prepare a 1.5-2% agarose gel in 1x TAE or TBE buffer, adding the nucleic acid stain to the molten agarose before pouring.
- Loading and Run: Combine 5-10 µL of purified DNA with an appropriate DNA loading dye. Load the sample alongside a suitable DNA ladder (e.g., 100 bp ladder) onto the gel. Run the gel at 5-8 V/cm until the dye front has migrated sufficiently.
- Visualization: Image the gel using a UV transilluminator or gel documentation system.
Data Interpretation and Quality Assessment
A successfully sonicated chromatin sample will appear on the gel as a smear centered between 150-300 bp [7]. A tight, bright band near 150 bp indicates predominant mononucleosomes, which is ideal for MNase-digested or optimally sonicated histone samples. A smear skewed towards larger sizes (>500 bp) suggests undersonication, while a very low molecular weight smear may indicate oversonication or DNA degradation.
Advanced Quantitative Analysis
While agarose gels offer a good initial assessment, instruments like the Agilent Bioanalyzer or TapeStation offer superior resolution and quantification [10]. These systems provide digital electrophherograms, allowing for precise determination of the average fragment size and distribution, which is critical for accurate quantification in subsequent steps like qPCR and library preparation for sequencing.
Software tools such as Invitrogen iBright Analysis Software or E-Editor 2.0 can assist with lane alignment, band detection, and intensity analysis of gel images, facilitating more rigorous data documentation [51].
Integrated Workflow for Sonication Optimization
The process of sonication optimization and quality control is a critical pathway within the broader histone ChIP-seq protocol. The following diagram illustrates the key decision points and optimal outcomes.
Sonication Optimization Decision Pathway
Troubleshooting Common Issues
Table 2: Common issues in chromatin fragmentation and recommended solutions.
| Problem | Potential Cause | Solution |
|---|---|---|
| High Molecular Weight Smear | Insufficient sonication energy or time. | Increase sonication time or power; optimize conditions for cell type. |
| Low Molecular Weight Smear | Excessive sonication; degraded DNA. | Reduce sonication time or power; check nuclease contamination. |
| No DNA Visible | Failed reversal of cross-links; inefficient DNA recovery. | Ensure complete Proteinase K digestion and purification. |
| Discrete Bands | Incomplete fragmentation; protected genomic regions. | Verify sonicator function; ensure chromatin is not precipitating. |
Integrating agarose gel electrophoresis as a routine quality control check is indispensable for optimizing sonication conditions in histone ChIP-seq. By ensuring chromatin is fragmented to the ideal size range of 150-300 bp, researchers can significantly enhance the resolution, specificity, and overall quality of their genome-wide histone modification data, laying a solid foundation for robust and reproducible scientific discovery.
Bioanalyzer and TapeStation for Precise Fragment Size Analysis
In chromatin immunoprecipitation followed by sequencing (ChIP-seq), precise fragment size analysis is not merely a quality control step but a fundamental determinant of data quality and resolution. Proper chromatin fragmentation directly influences peak sharpness, background noise, and the ability to accurately map transcription factor binding sites and histone modifications across the genome [52] [11]. For histone ChIP-seq optimization research, where targets include nucleosome-bound modifications, achieving mononucleosome-sized fragments (150-300 bp) is particularly crucial for obtaining high-resolution data [11].
The Agilent Bioanalyzer 2100 and TapeStation 4200 systems have emerged as essential tools for quantifying chromatin fragmentation quality prior to sequencing. These automated microfluidics-based platforms replace traditional agarose gel electrophoresis with more sensitive, quantitative assessment of DNA fragment size distribution [10] [53]. This application note provides detailed protocols and comparative analysis for researchers utilizing these systems within sonication optimization workflows for histone ChIP-seq.
Instrumentation Comparison: Bioanalyzer versus TapeStation
Technical Specifications and Performance Metrics
The choice between Bioanalyzer and TapeStation systems involves careful consideration of throughput requirements, sensitivity needs, and data compatibility with existing laboratory workflows.
Table 1: Comparative Analysis of Bioanalyzer and TapeStation Systems
| Parameter | Agilent 2100 Bioanalyzer | Agilent 4200 TapeStation |
|---|---|---|
| Throughput | 12 samples per chip [53] | 96 samples per screen tape [53] |
| Sample Volume | 1 μL [53] | 1 μL [53] |
| Quantitative Range | 25–500 ng/μL [53] | 25–500 ng/μL [53] |
| Fragment Size Detection | DNA High Sensitivity Kit: ~50-7,000 bp [54] | Genomic DNA ScreenTape: ~100-60,000 bp |
| Primary Application | Gold standard for RNA integrity (RIN) [53] | RNA integrity equivalent (RINe) [53] |
| Detection Method | Fluorescent intercalating dye with laser detection [53] | Fluorescent intercalating dye with laser detection [53] |
Practical Considerations for ChIP-seq Quality Control
While both systems utilize microfluidics and fluorescent detection, they employ different algorithms for quality assessment. The Bioanalyzer assesses the entire electrophoretic trace, including ribosomal peak ratios, their separation, and degradation products [53]. In contrast, the TapeStation measures the relative ratio of degraded products in the "fast zone" (region between small RNAs and the 18S peak) to the 18S peak signal [53]. Research indicates that these algorithmic differences can yield significantly different quality scores, with one study reporting an average difference of 3.2 units between Bioanalyzer RIN and TapeStation RINe values [53]. Consequently, quality thresholds should be established independently for each system rather than used interchangeably.
Figure 1: Fragment Analysis Workflow in Histone ChIP-seq Optimization. This diagram illustrates the iterative process of sonication optimization guided by fragment size analysis, with the goal of achieving the ideal 150-300 bp fragment distribution for high-resolution histone mapping.
Experimental Protocols
Sample Preparation Guidelines for Fragment Analysis
Proper sample preparation is fundamental to obtaining accurate fragment size distribution data. The following protocols have been optimized for chromatin fragments typically generated in histone ChIP-seq experiments.
DNA Sample Preparation for Bioanalyzer
For optimal results with the Bioanalyzer DNA High Sensitivity kit, precisely 1 μL of each sample should be provided in low-retention tubes [54]. Sample concentration should ideally fall between 0.5-5 ng/μL, though concentrations as low as 100 pM may yield detectable signals for well-defined DNA smears [54]. When analyzing chromatin sheared for histone ChIP-seq, the expected fragment size distribution should peak between 150-300 bp, representing mononucleosomal DNA [52] [11]. For broad DNA smears, lower concentrations (1-3 ng/μL) generally produce more reliable electrophoretograms than concentrated samples (>5 ng/μL) [54].
Quality Assessment Criteria
Following fragment analysis, several quality metrics should be evaluated prior to proceeding with ChIP-seq library preparation:
- Primary Peak Location: The dominant peak should fall within 150-300 bp [52] [11]
- Size Distribution: The majority of fragments should be under 500 bp, with minimal high molecular weight contamination [52]
- Profile Shape: A tight, well-defined distribution indicates consistent sonication, while multiple peaks or broad smears suggest incomplete or uneven fragmentation [11]
Samples failing these criteria should trigger re-optimization of sonication parameters, including duration, intensity, and cell density during shearing.
Chromatin Shearing Optimization Protocol for Histone ChIP-seq
This protocol details the optimization of sonication conditions to achieve ideal fragment sizes for histone ChIP-seq applications, with embedded quality checkpoints using fragment analysis instrumentation.
Equipment and Reagents
Table 2: Essential Research Reagent Solutions for Chromatin Shearing Optimization
| Reagent/Equipment | Function | Specifications |
|---|---|---|
| Covaris Sonicator | Chromatin shearing | Closed-tube system for consistent fragmentation [52] |
| DNA LoBind Tubes | Sample storage | Prevent DNA adsorption to tube walls [52] |
| Bioanalyzer DNA HS Kit | Fragment analysis | High sensitivity DNA quantification (50-7,000 bp) [54] |
| Qubit dsDNA HS Assay | DNA quantification | Fluorometric quantitation for dilute samples [52] |
| FA Lysis Buffer | Chromatin preparation | Stabilizes chromatin during shearing [10] |
| Proteinase K | DNA purification | Digests proteins after immunoprecipitation [11] |
Step-by-Step Sonication Optimization
Cross-linking and Cell Lysis
Sonication Time Course
- Divide chromatin preparation into 6-8 aliquots of 100 μL each
- Subject aliquots to varying sonication durations (e.g., 2, 4, 6, 8, 10, 12 minutes) using a Covaris sonicator with fixed settings (peak incident power: 175, duty factor: 10%, cycles per burst: 200) [52]
- Reverse cross-links by incubating with Proteinase K at 65°C for 2 hours [11]
- Purify DNA using silica column purification and elute in 25 μL EB buffer [52]
Fragment Analysis
- Analyze 1 μL of each time point using the Bioanalyzer DNA High Sensitivity kit [54]
- Determine which sonication duration yields the highest proportion of fragments between 150-300 bp
- Select optimal conditions for full-scale ChIP-seq experiments
Figure 2: Instrument Comparison: Bioanalyzer versus TapeStation. This diagram highlights the key differences between the two primary fragment analysis systems, including throughput, analytical algorithms, and preferred applications in chromatin research.
Quality Assessment and Data Interpretation
Quantitative Metrics for ChIP-seq Fragment Quality
Following fragment analysis, researchers should employ standardized metrics to evaluate chromatin preparation quality before proceeding to library preparation and sequencing.
Table 3: Fragment Quality Metrics for Histone ChIP-seq Optimization
| Quality Parameter | Optimal Range | Acceptable Range | Impact on Data Quality |
|---|---|---|---|
| Primary Peak Size | 150-250 bp [11] | 100-300 bp [52] | Determines peak resolution and sharpness |
| Size Distribution | >80% between 100-300 bp [52] | >70% between 100-400 bp [52] | Affects background noise and mapping specificity |
| High Molecular Weight | <5% >500 bp [52] | <10% >500 bp [52] | Reduces non-specific immunoprecipitation |
| Concentration | 0.5-2 ng/μL [54] | 0.1-5 ng/μL [54] | Ensures sufficient material for library prep |
Integration with Downstream ChIP-seq Applications
Proper fragment size optimization directly influences sequencing requirements and data quality. For histone ChIP-seq applications, the ideal fragment distribution enables reduced sequencing depth compared to transcription factor studies, with approximately 20 million read pairs sufficient for robust peak calling [52]. Recent methodological advances such as CUT&RUN sequencing may further reduce sequencing requirements to 4-8 million read pairs per sample while maintaining sensitivity [52]. The inclusion of unique molecular identifiers (UMIs) in adapter sequences provides additional advantage for low-input samples by enabling accurate detection and removal of PCR duplicates [52].
Precise fragment size analysis using Bioanalyzer or TapeStation systems provides an essential quality control checkpoint in histone ChIP-seq optimization research. Through systematic sonication optimization and rigorous fragment analysis, researchers can achieve the mononucleosomal fragment distribution necessary for high-resolution mapping of histone modifications across the genome. The protocols and quality metrics outlined in this application note provide a framework for standardizing chromatin preparation across experiments and laboratories, ultimately enhancing the reproducibility and reliability of epigenomic studies.
Incorporating Spike-in Controls for Quantitative Cross-Experiment Comparisons
Spike-in controls are exogenous synthetic materials added to experimental samples in known, fixed quantities prior to library preparation. They serve as internal standards to normalize data across different experiments, accounting for technical variability arising from differences in cell counting, sample handling, library preparation efficiency, and sequencing depth [55]. For histone ChIP-seq optimization studies, particularly those investigating sonication conditions, incorporating spike-in controls provides an essential quantitative framework for comparing chromatin enrichment efficiency and immunoprecipitation success across different experimental parameters.
The External RNA Control Consortium (ERCC) has developed standardized spike-in controls that demonstrate minimal sequence homology with eukaryotic genomes, ensuring they can be uniquely mapped without interfering with endogenous data analysis [55]. These controls enable researchers to generate standard calibration curves that relate read counts to known input amounts, transforming ChIP-seq from a qualitative to a quantitative assay.
Spike-in Control Applications in Histone ChIP-seq
Normalization for Technical Variability
In histone ChIP-seq optimization research, spike-in controls address critical normalization challenges. When evaluating different sonication conditions (e.g., duration, intensity, or method), technical variability can obscure true biological effects or experimental optimizations. Spike-in controls enable:
- Cross-experiment comparability: Normalize data across different sonication protocols, personnel, or batches [55]
- Quantitative enrichment assessment: Precisely measure fold-enrichment of histone modifications across shearing conditions
- Data quality verification: Identify failed experiments or suboptimal conditions before extensive sequencing
For histone modifications, specialized spike-in controls like SNAP-ChIP utilize DNA-barcoded nucleosomes to assess antibody performance directly within the ChIP experiment, providing crucial validation of immunoprecipitation specificity under different sonication parameters [11].
Establishing Standard Curves and Detection Limits
Research demonstrates that spike-in controls show a linear relationship between input abundance and read density over six orders of magnitude, enabling precise quantification of histone enrichment across different experimental conditions [55]. This linearity (Pearson's r > 0.96 on log-transformed counts) allows researchers to:
- Derive standard curves for absolute quantification
- Determine sensitivity limits for detecting low-abundance histone modifications
- Establish thresholds for distinguishing true binding from background noise
Experimental Design and Protocols
Incorporating Spike-ins into Histone ChIP-seq Workflow
Table: Quantitative Standards for Histone ChIP-seq Experiments Based on ENCODE Guidelines
| Parameter | Broad Histone Marks | Narrow Histone Marks | Exceptions |
|---|---|---|---|
| Required Reads per Replicate | 45 million usable fragments | 20 million usable fragments | H3K9me3: 45 million total mapped reads |
| Biological Replicates | Minimum of 2 | Minimum of 2 | EN-TEx samples may be exempt |
| Control Experiments | Input DNA with matching characteristics | Input DNA with matching characteristics | Must match read length and replicate structure |
| Library Complexity | NRF > 0.9, PBC1 > 0.9, PBC2 > 10 | NRF > 0.9, PBC1 > 0.9, PBC2 > 10 | Consistent across all marks |
The following workflow diagram illustrates the integration of spike-in controls into a standard histone ChIP-seq protocol for sonication optimization studies:
Detailed Protocol for Spike-in Controlled ChIP-seq
Materials Required:
- ERCC spike-in control RNAs OR SNAP-ChIP nucleosome spike-ins
- Cell culture for histone ChIP-seq
- Target-specific validated antibodies
- ChIP-seq library preparation kit
- Magnetic beads (Protein A/G)
- DNA purification reagents
Step-by-Step Procedure:
Spike-in Addition and Cross-linking
- Harvest approximately 1 million cells per ChIP reaction (optimization may require adjustment)
- Add spike-in controls at predetermined concentrations (typically 1-2% of total material) [55]
- Cross-link cells with 1% formaldehyde for 10 minutes at room temperature
- Quench cross-linking with 125mM glycine
Chromatin Preparation and Sonication Optimization
- Lyse cells and isolate chromatin
- Shear chromatin to 150-300 bp fragments using optimized sonication conditions
- Test multiple sonication parameters (duration, intensity, cycle number) across experimental conditions
- Verify fragment size distribution by agarose gel or Bioanalyzer
Immunoprecipitation
- Incubate sheared chromatin with target-specific antibody overnight at 4°C
- Include negative control (IgG) and positive control (e.g., H3K4me3) antibodies
- Recover antibody-chromatin complexes with magnetic beads
- Wash with low-salt, high-salt, and LiCl buffers
DNA Recovery and Library Preparation
- Reverse cross-links and purify DNA
- Quantify DNA concentration by fluorometric analysis
- Prepare sequencing libraries with dual indexing to allow multiplexing
- Validate library quality and fragment size
Sequencing and Data Analysis
- Sequence on appropriate platform (minimum 50 bp read length recommended) [56]
- Pool multiple libraries using unique barcodes
- Sequence to appropriate depth based on histone mark type (see Table 1)
Data Analysis and Normalization
Bioinformatics Workflow for Spike-in Normalization
The following computational pipeline processes spike-in controlled ChIP-seq data to enable quantitative comparisons across sonication conditions:
Normalization Methods and Metrics
Table: Key Quality Control Metrics for Spike-in Controlled ChIP-seq
| Quality Metric | Target Value | Calculation Method | Interpretation |
|---|---|---|---|
| Spike-in Recovery Rate | Consistent across samples | (Observed spike-in reads / Expected spike-in reads) × 100 | Measures technical variation in library prep and sequencing |
| FRiP Score | >1% for broad marks, >2% for narrow marks | Fraction of Reads in Peaks | Indicates enrichment efficiency |
| Library Complexity (NRF) | >0.9 | Non-Redundant Fraction | Measures sequencing saturation and PCR duplicates |
| Cross-sample Correlation | R² > 0.8 between replicates | Pearson correlation of normalized read counts | Assesses reproducibility after spike-in normalization |
Normalization Algorithm:
- Map reads to combined reference genome (endogenous + spike-in sequences)
- Count reads aligning uniquely to spike-in controls
- Calculate scaling factors based on spike-in read counts
- Apply scaling factors to endogenous read counts
- Perform differential enrichment analysis across sonication conditions
The normalization factor (NF) for each sample can be calculated as:
Where the reference sample is typically the one with median spike-in read counts across the dataset.
Research Reagent Solutions
Table: Essential Reagents for Spike-in Controlled Histone ChIP-seq
| Reagent Category | Specific Examples | Function | Validation Requirements |
|---|---|---|---|
| Spike-in Controls | ERCC RNA controls, SNAP-ChIP barcoded nucleosomes | Normalization standards | Demonstrate linear quantification and lack of cross-hybridization |
| Antibodies | H3K27me3, H3K4me3, H3K9me3 specific antibodies | Target immunoprecipitation | Primary characterization by immunoblot (>50% signal in main band) and secondary validation [57] |
| Chromatin Shearing Reagents | Sonication buffers, MNase enzymes | DNA fragmentation | Achieve 150-300 bp fragment size optimized for each cell type |
| Library Preparation | DNA end repair, A-tailing, ligation modules | Sequencing library construction | Include unique dual indexes for multiplexing |
| Quality Assessment Tools | Bioanalyzer, TapeStation, Qubit | QC of samples and libraries | Verify fragment size distribution and concentration accuracy |
Application to Sonication Optimization Research
In the context of sonication optimization for histone ChIP-seq, spike-in controls enable precise comparison of shearing efficiency and immunoprecipitation success across different mechanical or enzymatic fragmentation conditions. Key applications include:
Quantifying Shearing Efficiency: By normalizing across conditions, researchers can objectively determine which sonication parameters yield optimal chromatin fragmentation without excessive damage to epitopes.
Antibody Performance Validation: Spike-in controls, particularly barcoded nucleosome standards, help distinguish between true signal loss due to poor shearing versus antibody failure [11].
Normalizing Across Varying Input Materials: Different sonication conditions may yield different amounts of usable chromatin. Spike-ins control for this variability, enabling fair comparison.
Establishing Quality Thresholds: Using spike-in normalized metrics, researchers can set objective pass/fail criteria for sonication protocols based on quantitative data rather than qualitative assessments.
The implementation of spike-in controls transforms histone ChIP-seq from a qualitative descriptive technique to a quantitative comparative method, essential for systematic optimization of sonication conditions and other critical protocol parameters.
Micro-C-ChIP represents a significant advancement in the field of three-dimensional (3D) genomics by combining the nucleosome-resolution capability of Micro-C with the target specificity of chromatin immunoprecipitation. This hybrid methodology enables researchers to map histone mark-specific chromatin organization at fine-scale resolution while substantially reducing sequencing costs compared to genome-wide approaches. Developed to overcome the limitations of traditional Hi-C and Micro-C methods, Micro-C-ChIP provides unprecedented insights into promoter-promoter contact networks and enhancer-promoter interactions that drive cell-type-specific transcriptional regulation. This application note details the experimental protocols, optimization parameters, and analytical frameworks for implementing Micro-C-ChIP in research settings, with particular emphasis on sonication conditions critical for successful histone modification studies.
Historical Context and Technological Development
The regulation of cell-type-specific transcription relies on complex 3D interactions between promoters and distal regulatory elements. While Hi-C has advanced our understanding of genome architecture, its high sequencing demand limits use in large-scale or time course experiments. Traditional Hi-C resolution is constrained by restriction enzyme digestion sites and requires over a billion sequencing reads to achieve nucleosome-scale resolution, making it costly and inefficient for comprehensive studies [30].
Micro-C-ChIP addresses these limitations by integrating Micro-C with chromatin immunoprecipitation to map 3D genome organization at nucleosome resolution for defined histone modifications. This approach leverages the principle that histone post-translational modifications (PTMs) allow targeting sequencing efforts to functionally relevant genomic regions. For example, H3K4me3 marks active promoters, H3K4me1 is enriched at enhancers, and H3K27me3 is associated with Polycomb-bound domains [30]. By enriching these specific histone modifications, researchers can focus sequencing power on key regulatory interactions while minimizing resources spent on unrelated genomic regions.
Comparative Advantages Over Existing Methods
Micro-C-ChIP demonstrates significant improvements over previous ChIP-based 3C methods such as HiChIP, PLAC-seq, and MChIP-C. When benchmarked against these technologies, Micro-C-ChIP maintains a substantially higher fraction of "informative reads" (42% compared to 37% in genome-wide Micro-C and only 4% in MChIP-C) [30]. This efficiency stems from critical protocol differences: Micro-C-ChIP performs in situ proximity ligation before immunoprecipitation, thus preserving true 3D interactions throughout the protocol, whereas methods like HiChIP perform proximity ligation after ChIP enrichment, potentially introducing non-specific ligation artifacts.
The technology has been successfully validated in multiple cell systems, including mouse embryonic stem cells (mESC), hTERT-immortalized human retinal pigment epithelial (hTERT-RPE1) cells, and HCT-116 RAD21-mAID-mClover cells [30]. In these applications, Micro-C-ChIP has revealed genuine 3D genome features not driven by ChIP-enrichment bias, including extensive promoter-promoter contact networks and the distinct 3D architecture of bivalent promoters in mESCs.
Principles and Applications
Fundamental Workflow and Mechanism
The Micro-C-ChIP protocol involves a carefully orchestrated sequence of steps designed to preserve native chromatin interactions while enabling targeted enrichment. The complete workflow begins with dual crosslinking of cells using disuccinimidyl glutarate (DSG) and formaldehyde (FA) to fix protein-DNA and protein-protein interactions [58]. Fixed chromatin is then digested with micrococcal nuclease (MNase), which cleaves DNA between nucleosomes to achieve nucleosome-resolution fragmentation.
Following digestion, DNA ends are repaired with biotin-labeled nucleotides and proximity ligation is performed in situ to connect spatially adjacent DNA fragments. The ligated chromatin is then solubilized through optimized sonication conditions before immunoprecipitation with antibodies specific to histone modifications of interest. Finally, the enriched DNA fragments are prepared for sequencing, with the biotin label enabling selective purification of ligation junctions [30].
A key innovation in Micro-C-ChIP is the implementation of input-based normalization rather than conventional ICE normalization used in bulk Hi-C/Micro-C analyses. This approach accounts for biases inherent to chromatin accessibility, sequencing, and experimental artifacts by leveraging corresponding bulk Micro-C data as an input reference, ensuring that observed interactions reflect true protein-mediated enrichment rather than general chromatin features [30].
Research Applications and Biological Insights
Micro-C-ChIP enables researchers to address previously challenging questions in chromatin biology. The technology has been particularly valuable for:
Mapping promoter-centered interactomes: Studies using H3K4me3-based Micro-C-ChIP have identified extensive promoter-promoter contact networks in both pluripotent and differentiated cells, revealing how genes coordinate their expression patterns through spatial organization [30] [59].
Resolving bivalent chromatin domains: In mouse embryonic stem cells, Micro-C-ChIP has elucidated the distinct 3D architecture of bivalent promoters marked by both active (H3K4me3) and repressive (H3K27me3) histone modifications, providing insights into developmental gene regulation [30].
Characterizing enhancer-promoter interactions: While traditional Hi-C struggles to resolve fine-scale enhancer-promoter interactions, Micro-C-ChIP captures these critical regulatory connections with high resolution, enabling more accurate assignment of enhancers to their target genes [30] [58].
Developmental and disease contexts: Applications in mouse fetal tissues have revealed dynamic chromatin interaction changes during development and provided insights into how noncoding risk variants for diseases like schizophrenia may disrupt fetal enhancer function, supporting the fetal origins of adult disease hypothesis [59].
Experimental Protocol
Step-by-Step Methodology
Cell Preparation and Crosslinking
- Grow approximately 10 million cells per immunoprecipitation condition to 70-80% confluence.
- Perform dual crosslinking first with disuccinimidyl glutarate (DSG) at a final concentration of 2 mM for 45 minutes at room temperature, followed by formaldehyde crosslinking at a final concentration of 1% for 10 minutes at room temperature [58].
- Quench the crosslinking reaction by adding 2.5 M glycine to a final concentration of 0.125 M and incubate for 5 minutes at room temperature with gentle rotation.
Nuclei Isolation and Chromatin Fragmentation
- Wash cells twice with cold PBS and resuspend in nuclear isolation buffer (10 mM Tris-HCl pH 7.5, 3 mM CaCl₂, 2 mM MgCl₂, 0.5% NP-40, protease inhibitors).
- Pellet nuclei and resuspend in MNase digestion buffer. Add 2-5 units of MNase per million cells and incubate for 10-20 minutes at 37°C with occasional mixing [30].
- Stop digestion by adding EGTA to a final concentration of 4 mM and place on ice.
End Repair and Proximity Ligation
- Repair DNA ends using a combination of T4 DNA polymerase, Klenow fragment, and T4 polynucleotide kinase in the presence of biotin-dATP.
- Perform proximity ligation in a large volume (1-2 mL) using high-concentration T4 DNA ligase (4000 U) for 4-6 hours at room temperature [30].
Chromatin Solubilization and Sonication
- Pellet ligated chromatin and resuspend in sonication buffer (10 mM Tris-HCl pH 7.5, 1 mM EDTA, 0.5% SDS).
- Sonicate using a focused-ultrasonicator with the following optimized conditions:
- Duration: 5-10 cycles of 30 seconds on/30 seconds off
- Power: Medium setting (approximately 15-20% maximum power)
- Sample volume: 100-200 µL per tube
- Temperature: Maintain at 4°C throughout process [30]
- Centrifuge at 15,000 × g for 10 minutes to remove insoluble material.
Immunoprecipitation and DNA Recovery
- Dilute sonicated chromatin 10-fold in ChIP dilution buffer (16.7 mM Tris-HCl pH 8.0, 167 mM NaCl, 1.2 mM EDTA, 1.1% Triton X-100, 0.01% SDS).
- Add 2-5 µg of histone modification-specific antibody (e.g., anti-H3K4me3, anti-H3K27me3) and incubate overnight at 4°C with rotation.
- Add protein A/G magnetic beads and incubate for 2-4 hours at 4°C.
- Wash beads sequentially with low salt, high salt, and LiCl wash buffers, followed by a final TE wash.
- Elute DNA in elution buffer (1% SDS, 0.1 M NaHCO₃) and reverse crosslinks by incubating with 200 mM NaCl and 1 µg/µL Proteinase K overnight at 65°C.
- Recover DNA using phenol-chloroform extraction and ethanol precipitation.
Library Preparation and Sequencing
- Repair DNA ends using a combination of T4 DNA polymerase and Klenow fragment.
- Ligate sequencing adapters and perform limited-cycle PCR amplification (6-12 cycles).
- Enrich for biotinylated fragments using streptavidin beads [30].
- Sequence on an appropriate platform (Illumina NovaSeq or similar) to a depth of 200-400 million read pairs per sample.
Critical Optimization Parameters
Sonication Conditions Optimal chromatin fragmentation requires careful optimization of sonication parameters. Under-sonication results in incomplete chromatin solubilization and reduced immunoprecipitation efficiency, while over-sonication can damage antibody epitopes and produce fragments too small for meaningful interaction analysis. The ideal size range for sonicated chromatin fragments is 150-1000 base pairs, with the majority between 200-500 bp [60].
Crosslinking Optimization Dual crosslinking with DSG and formaldehyde improves capture of transient protein-DNA interactions but requires optimization for different cell types. Over-fixation can reduce fragmentation efficiency and mask antibody epitopes, while under-fixation may not adequately preserve chromatin interactions. As demonstrated in tissue studies, fixation time should be empirically determined – typically 10-30 minutes for formaldehyde following DSG pre-fixation [60].
MNase Digestion Balance MNase digestion must be carefully titrated to achieve predominantly mononucleosomal fragments while preserving a portion of dinucleosomal fragments that contain valuable intermediate-range interactions. Complete digestion to solely mononucleosomes limits the detection of longer-range interactions critical for understanding chromatin architecture.
Technical Comparisons and Data Analysis
Quantitative Comparison of Chromatin Fragmentation Methods
Table 1: Comparison of Chromatin Fragmentation Techniques for 3D Genomics
| Parameter | Sonication | MNase Digestion | MNase + Sonication (Micro-C-ChIP) |
|---|---|---|---|
| Fragment Size Range | 150-1000 bp | 150-750 bp (mono-, di-, tri-nucleosomes) | 150-500 bp (optimized for ChIP) |
| Resolution | 200-1000 bp | Nucleosome-level (150 bp) | Nucleosome-level with protein specificity |
| Protein Epitope Preservation | Moderate (heat and detergent damage) | High (mild conditions) | Moderate (requires optimization) |
| Applicability | X-ChIP only | N-ChIP and X-ChIP | X-ChIP with dual crosslinking |
| Reproducibility | Variable (requires extensive optimization) | High (consistent enzymatic digestion) | High after initial optimization |
| Efficiency for Transcription Factor ChIP | Suitable with optimization | Limited for non-histone proteins | Excellent for histone modifications |
| Typical Informative Read Percentage | 30-40% | 35-45% | 42% (demonstrated) |
Performance Metrics Compared to Alternative Technologies
Table 2: Performance Benchmarking of Micro-C-ChIP Against Related Methods
| Method | Sequencing Depth Required | Informative Read Percentage | Resolution | Cost per Sample | Key Applications |
|---|---|---|---|---|---|
| Hi-C | 1-3 billion reads | 35-40% | 1-10 kb | High | Genome-wide architecture, TAD identification |
| Micro-C | 1-3 billion reads | 37% | Nucleosome-level | High | Enhancer-promoter interactions, fine-scale structure |
| HiChIP | 200-500 million reads | 15-25% | 1-5 kb | Medium | Protein-centric interactions |
| PLAC-seq | 200-500 million reads | 20-30% | 1-5 kb | Medium | Promoter-centered interactions |
| MChIP-C | 100-300 million reads | 4% | 500 bp-2 kb | Medium | Histone mark interactions |
| Micro-C-ChIP | 200-400 million reads | 42% | Nucleosome-level | Medium | Histone mark-specific architecture |
| Region Capture Micro-C | 50-100 million reads | 60-70% | Nucleosome-level | Low (targeted) | Ultra-deep targeted regions |
Data Analysis Workflow
The analytical pipeline for Micro-C-ChIP data involves both standard ChIP-seq and Hi-C processing elements:
Raw Data Processing: Quality control using FastQC, adapter trimming, and alignment to reference genome using specialized tools like HiC-Pro or similar pipelines designed for proximity ligation data.
Interaction Calling: Identify statistically significant chromatin interactions using methods like MAPS (Model-based Analysis of PLAC-seq and HiChIP) which accounts for technical biases and normalization challenges specific to enrichment-based 3C methods [59].
Normalization: Implement input-based normalization using matched bulk Micro-C data to account for coverage variations across genomic regions, as conventional ICE normalization assumes equal coverage unsuitable for enrichment-based methods [30].
Integration with Epigenomic Data: Correlate interaction data with complementary datasets including:
- Chromatin states from ChromHMM or Segway [61]
- Histone modification ChIP-seq peaks
- Chromatin accessibility (ATAC-seq/DNase-seq)
- Gene expression data (RNA-seq)
Biological Interpretation: Identify promoter-centered interactomes, annotate enhancer-promoter connections, and perform functional enrichment analysis of interacting regions.
Visualization and Data Interpretation
Experimental Workflow Visualization
Micro-C-ChIP Experimental Workflow with Sonication Optimization
Key Research Reagent Solutions
Table 3: Essential Reagents for Micro-C-ChIP Protocol
| Reagent Category | Specific Products/Components | Function in Protocol | Optimization Notes |
|---|---|---|---|
| Crosslinkers | Disuccinimidyl glutarate (DSG), Formaldehyde | Fix protein-DNA and protein-protein interactions | Dual crosslinking improves capture of transient interactions; concentration and time require optimization |
| Nuclease | Micrococcal nuclease (MNase) | Chromatin digestion to nucleosome resolution | Titration critical; under-digestion reduces resolution, over-digestion loses interactions |
| Antibodies | Anti-H3K4me3, Anti-H3K27me3, other histone marks | Target-specific immunoprecipitation | Antibody quality crucial; validate with known positive controls |
| Sonication System | Focused-ultrasonicator with cooling | Chromatin solubilization after ligation | Maintain 4°C temperature; optimize cycles for 150-500 bp fragments |
| DNA Modification Enzymes | T4 DNA polymerase, Klenow fragment, T4 PNK, T4 DNA ligase | End repair, biotin labeling, proximity ligation | High-concentration ligase (4000U) improves ligation efficiency |
| Beads | Protein A/G magnetic beads, Streptavidin beads | Immunoprecipitation, biotinylated fragment selection | Magnetic beads improve washing efficiency and reproducibility |
| Library Prep | Illumina-compatible adapters, PCR reagents | Sequencing library construction | Limited-cycle PCR (6-12 cycles) prevents amplification bias |
Troubleshooting and Quality Control
Common Technical Challenges and Solutions
Low Informative Read Percentage
- Problem: Percentage of informative reads (long-range and trans interactions) falls below 35%.
- Solution: Optimize proximity ligation conditions by increasing reaction volume and enzyme concentration. Verify MNase digestion produces appropriate mono-/di-nucleosome ratio. Ensure proper biotin labeling efficiency.
High Background Noise
- Problem: Excessive non-specific interactions in sequencing data.
- Solution: Optimize sonication conditions to achieve ideal fragment size (150-500 bp). Increase stringency of wash steps during immunoprecipitation. Titrate antibody amount to find optimal signal-to-noise ratio.
Incomplete Chromatin Solubilization
- Problem: Poor recovery after sonication step.
- Solution: Increase sonication cycles incrementally while maintaining cooling. Verify crosslinking time hasn't been excessive. Add brief MNase treatment after sonication to assist solubilization.
Low Library Complexity
- Problem: High PCR duplication rates in final sequencing data.
- Solution: Increase starting cell number. Reduce PCR cycle number during library amplification. Ensure proper fragment size selection to remove very small fragments.
Quality Control Metrics
Successful Micro-C-ChIP experiments should meet the following quality control standards:
- Sequencing Metrics: 200-400 million read pairs per sample, with non-duplicate read percentage >85% [30]
- Library Complexity: PCR duplication rate <15%
- Fragment Size Distribution: Majority of fragments between 150-500 bp after sonication
- Reproducibility: High correlation between biological replicates (Pearson correlation >0.75) [59]
- Enrichment Validation: Strong correlation between interaction hotspots and corresponding ChIP-seq peaks for the targeted histone mark
- Specificity Ratio: >5-fold enrichment of interactions at positive control loci compared to negative controls
Micro-C-ChIP represents a significant methodological advancement that bridges the gap between genome-wide chromatin architecture mapping and targeted epigenetic analysis. By integrating the nucleosome resolution of Micro-C with the specificity of ChIP, this technology enables researchers to explore histone mark-specific 3D genome organization with unprecedented detail while remaining cost-effective for large-scale studies.
The optimized sonication protocol detailed in this application note serves as a critical component for successful Micro-C-ChIP experiments, ensuring proper chromatin solubilization while preserving protein epitopes and interaction information. As the field moves toward increasingly sophisticated multi-omics integration, Micro-C-ChIP provides a robust framework for understanding how epigenetic modifications translate into functional chromatin architecture across development, disease, and therapeutic interventions.
Future developments will likely focus on further reducing input requirements, enabling single-cell applications, and enhancing computational methods for integrating Micro-C-ChIP data with complementary epigenomic datasets. These advances will continue to illuminate the fundamental relationship between chromatin structure and gene regulation in health and disease.
Benchmarking Performance Against Reference Datasets and Positive Controls
In the context of optimizing sonication conditions for histone ChIP-seq, benchmarking against reference datasets and implementing robust positive controls are not merely best practices—they are fundamental requirements for generating biologically meaningful data. The quality of a ChIP-seq experiment is governed by multiple interacting factors, with sonication conditions directly influencing the resolution and specificity of the resulting genomic maps [7]. For histone modifications, the fragmentation method must preserve nucleosome integrity while providing sufficient resolution to map specific epigenetic marks [62]. Without proper benchmarking against established standards and controls, researchers cannot distinguish true biological signals from technical artifacts, potentially leading to erroneous conclusions about epigenetic regulation.
The interplay between sonication efficiency and antibody specificity creates a complex optimization landscape where benchmarking provides essential navigational guidance. As highlighted by the ENCODE and modENCODE consortia, which have performed thousands of ChIP-seq experiments, consistent practices and quality metrics are crucial for comparing data across studies and drawing valid biological inferences [57]. This application note provides detailed protocols and frameworks for benchmarking sonication conditions in histone ChIP-seq, enabling researchers to establish performance standards tailored to their specific experimental systems.
Experimental Design for Effective Benchmarking
Control Selection and Implementation
Appropriate controls are the foundation of reliable benchmarking in ChIP-seq experiments. The choice of controls depends on the specific benchmarking goals, whether addressing antibody specificity, chromatin fragmentation efficiency, or background signal identification.
Table 1: Control Strategies for Histone ChIP-seq Benchmarking
| Control Type | Purpose | Implementation | Interpretation |
|---|---|---|---|
| Input DNA | Controls for chromatin fragmentation bias and sequencing efficiency [7] [63] | Process chromatin without immunoprecipitation; sequence alongside IP samples | Provides background model for peak calling; normalizes for open chromatin shearing bias |
| IgG Control | Assess non-specific antibody binding [63] | Immunoprecipitation with non-specific IgG from same species | High signal may indicate non-specific antibody interactions |
| Knockout/Knockdown | Verify antibody specificity [7] [57] | Use cells lacking target histone modification or protein | Residual signal indicates antibody cross-reactivity |
| Biological Replicates | Evaluate experimental reproducibility [7] | Perform independent experiments with different cell preparations | Irreproducible Discovery Rate (IDR) < 0.05 indicates high-quality replicates |
| Positive Control Loci | Monitor technical success across experiments [63] | Include known enriched genomic regions in assay | Provides reference point for comparing sonication efficiency |
Chromatin inputs generally serve as superior controls compared to non-specific IgGs for addressing biases in chromatin fragmentation and variations in sequencing efficiency [7]. Input DNA provides greater and more evenly distributed coverage of the genome, creating a more accurate background model for peak identification algorithms. However, for assessing antibody cross-reactivity, knockout controls or true pre-immune serum offer the most stringent validation [7].
Reference Datasets and Standards
Leveraging existing reference datasets provides an essential benchmark for comparing internally generated data. The ENCODE and modENCODE consortia have established comprehensive guidelines and quality metrics that researchers can utilize for benchmarking purposes [57]. When comparing data to reference datasets, several key factors must be considered:
- Sequence depth alignment: Ensure comparable sequencing depth between your data and reference datasets
- Cell type comparability: Account for biological context differences that may legitimate variation
- Platform consistency: Recognize technical differences between sequencing platforms
- Analysis pipeline harmonization: Use consistent bioinformatic approaches where possible
For histone modifications, consortia like ENCODE provide validated datasets for common marks such as H3K4me3, H3K27ac, and H3K27me3 in various cell types, which can serve as excellent references for benchmarking internally generated data [57].
Protocols for Benchmarking Sonication Conditions
Establishing Sonication Efficiency Metrics
The following protocol provides a systematic approach for benchmarking sonication efficiency specifically for histone ChIP-seq applications.
Materials:
- Covaris E220 or Bioruptor Pico sonication system
- Qubit dsDNA HS Assay Kit or similar quantification method
- Agilent 2100 Bioanalyzer with High Sensitivity DNA kit or TapeStation
- Cells of interest (1-10 million per condition)
- ChIP Sonication Cell Lysis Buffer and Nuclear Lysis Buffer [64]
Procedure:
- Cell Cross-linking and Lysis
Systematic Sonication Testing
- Aliquot identical chromatin samples into multiple tubes
- Subject to varying sonication conditions (time, intensity, cycles)
- For probe sonicators: Test 1-8 minutes of total sonication time with 1-second on/off cycles [64]
- For bath sonicators: Test 5-30 minute cycles with varying power settings
- Maintain samples on ice water throughout sonication to prevent heating
Chromatin Fragment Analysis
- Reverse cross-links by incubating with 5M NaCl at 65°C for 4 hours
- Purify DNA using SPRI beads or phenol-chloroform extraction
- Quantify DNA concentration
- Analyze fragment size distribution using Bioanalyzer
Optimal Sonication Criteria
Antibody Validation for Histone Modifications
The quality of antibodies used for ChIP-seq experiments represents one of the most critical factors influencing data quality [7]. The following protocol outlines a comprehensive approach for antibody validation specifically for histone modifications.
Materials:
- Antibodies against target histone modification
- Isotype control IgG
- Western blot apparatus
- Immunofluorescence microscopy supplies
- Positive and negative control cell lines (if available)
Procedure:
- Primary Characterization - Immunoblot Analysis
- Prepare protein extracts from whole cells or chromatin preparations
- Perform Western blotting with the ChIP antibody
- Criteria for passing: Primary reactive band should contain at least 50% of the signal observed on the blot, ideally corresponding to the expected size [57]
Alternative Primary Characterization - Immunofluorescence
- If immunoblot analysis is not successful, use immunofluorescence as an alternative method
- Staining should show the expected pattern (e.g., nuclear) [57]
- Staining should only appear in cell types or under specific conditions that express the factor
Secondary Characterization - ChIP-qPCR Validation
- Perform ChIP with the antibody using standardized conditions
- Test enrichment at several known positive-control regions compared to negative control regions
- Acceptance criterion: ≥ 5-fold enrichment at positive-control regions compared to negative controls [7]
Specificity Controls
- Where possible, use peptide competition assays to demonstrate specificity
- Employ RNAi knockdown or knockout models to verify signal loss [7]
Quantitative Benchmarks and Quality Metrics
Performance Metrics Table
Establishing quantitative benchmarks is essential for objectively evaluating ChIP-seq data quality. The following table summarizes key quality metrics adapted from ENCODE guidelines and published literature.
Table 2: Quantitative Quality Metrics for Histone ChIP-seq Benchmarking
| Metric | Threshold | Measurement Method | Significance |
|---|---|---|---|
| Fraction of Reads in Peaks (FRiP) | > 1% for broad marks, > 5% for narrow marks [57] | Percentage of mapped reads falling in called peaks | Measures signal-to-noise ratio; primary quality metric |
| Cross-correlation (NSC) | > 1.05 [57] | Strand cross-correlation analysis | Indicates signal-to-noise ratio; higher values indicate stronger signal |
| Cross-correlation (RSC) | > 0.8 [57] | Strand cross-correlation analysis | Normalized strand coefficient; values > 1 indicate strong signal |
| Reproducibility (IDR) | < 0.05 [57] | Irreproducible Discovery Rate between replicates | Measures consistency between biological replicates |
| Sequencing Depth | 10-20 million non-redundant reads for histone marks [57] | Mapping statistics | Ensures sufficient coverage for confident peak calling |
| Fragment Size Distribution | Majority between 150-300 bp [7] | Bioanalyzer/TapeStation | Confirms appropriate sonication and library preparation |
| ChIP-qPCR Enrichment | ≥ 5-fold over control regions [7] | qPCR at positive control loci | Validates antibody performance and IP efficiency |
These metrics should be tracked across experiments and sonication conditions to establish laboratory-specific benchmarks. The ENCODE Consortium has established that these quality metrics directly affect downstream analyses, including peak calling, motif discovery, and integrative analyses with other genomic data types [57].
Cell Number Requirements
The required number of cells varies significantly depending on the abundance of the target histone modification. The table below provides evidence-based recommendations for different scenarios.
Table 3: Cell Number Requirements for Histone ChIP-seq
| Target Abundance | Recommended Cells | Expected DNA Yield | Notes |
|---|---|---|---|
| Abundant marks (H3K4me3, H3K27ac) | 1 million cells [7] | 10-20 ng ChIP DNA | Sufficient for strong signal-to-noise ratio |
| Less abundant marks | Up to 10 million cells [7] | 50-100 ng ChIP DNA | Required for sufficient coverage of diffuse marks |
| Low cell number protocols | 10,000-100,000 cells [7] | 1-5 ng ChIP DNA | Requires specialized library preparation methods |
Data Analysis and Interpretation
Workflow for Integrated Benchmarking
The following diagram illustrates the comprehensive workflow for benchmarking sonication conditions in histone ChIP-seq, integrating experimental and computational components:
Interpreting Benchmarking Results
Successful benchmarking requires careful interpretation of quality metrics in the context of biological expectations. Key considerations include:
FRiP score variations: Different histone modifications exhibit expected variations in FRiP scores. Broad marks like H3K27me3 typically have lower FRiP scores than narrow marks like H3K4me3 [57]. When benchmarking sonication conditions, compare FRiP scores across conditions for the same mark rather than absolute values between different marks.
Cross-correlation metrics: The NSC and RSC values provide complementary information about signal strength. NSC values increase with sequencing depth, while RSC values are more independent of depth [57]. Optimal sonication conditions should maximize both metrics.
Fragment size distribution: The size profile of sequenced fragments provides direct evidence of sonication efficiency. For histone modifications, a strong periodicity corresponding to nucleosome protection (e.g., peaks at ~200 bp, ~400 bp) indicates appropriate fragmentation [7] [62].
Spatial correlation with known domains: Compare the spatial distribution of histone marks with known chromosomal domains. For example, H3K4me3 should enrich at promoters, while H3K27me3 forms broader domains [65]. Deviation from these expected patterns may indicate technical artifacts.
Research Reagent Solutions
The following table outlines essential reagents and their specific functions in benchmarking ChIP-seq performance.
Table 4: Essential Research Reagents for ChIP-seq Benchmarking
| Reagent | Function | Benchmarking Application | Considerations |
|---|---|---|---|
| Validated ChIP Antibodies | Specific immunoprecipitation of target histone modification | Primary reagent for determining specificity | Must demonstrate ≥5-fold enrichment in ChIP-qPCR [7] |
| Protein A/G Magnetic Beads | Efficient capture of antibody-antigen complexes | Standardize IP efficiency across experiments | Minimize non-specific binding background |
| Micrococcal Nuclease (MNase) | Chromatin fragmentation for nucleosome positioning | Alternative to sonication for histone marks [7] | Generates high-resolution data for nucleosome modifications |
| Formaldehyde | Crosslinking protein-DNA interactions | Standardize crosslinking conditions | 1% concentration, 10 min for histones [64] |
| Protease Inhibitor Cocktail | Preserve protein integrity during processing | Maintain consistent sample quality | Essential for all buffer preparations [64] |
| SPRI Beads | Size selection and DNA purification | Standardize fragment selection | Ensures consistent library preparation |
| Sequencing Library Prep Kits | Preparation of sequencing libraries | Maintain reproducibility across batches | Include molecular barcodes for multiplexing [62] |
Advanced Benchmarking Applications
Innovative Methods: Micro-C-ChIP
Recent methodological advances have integrated ChIP with other genomic approaches to enhance resolution while reducing sequencing costs. Micro-C-ChIP combines Micro-C with chromatin immunoprecipitation to map 3D genome organization at nucleosome resolution for defined histone modifications [65]. This method is particularly valuable because:
- It provides histone mark-specific fine-scale chromatin architecture mapping
- It maintains a high fraction of "informative reads" (42% vs 4% in MChIP-C) [65]
- It enables focused sequencing on functionally relevant genomic regions
- It reveals extensive promoter-promoter contact networks marked by H3K4me3 [65]
For benchmarking sonication conditions, Micro-C-ChIP represents a stringent test of chromatin fragmentation efficiency, as it requires preservation of both protein-DNA interactions and 3D chromatin contacts.
Multiplexed Benchmarking Approaches
For laboratories conducting large-scale epigenetic profiling, implementing multiplexed benchmarking strategies can enhance efficiency:
- Barcoded sonication conditions: Using different barcodes for various sonication conditions enables direct comparison within a single sequencing run
- Pooled control samples: Including standardized control chromatin in each experiment facilitates cross-experiment comparison
- Automated quality metric calculation: Implementing automated pipelines for calculating FRiP, NSC, RSC, and other metrics ensures consistent quality assessment
Establishing robust benchmarking practices for sonication conditions in histone ChIP-seq requires a systematic approach integrating experimental controls, quantitative quality metrics, and comparison to reference standards. By implementing the protocols and frameworks outlined in this application note, researchers can objectively evaluate and optimize their ChIP-seq workflows, ensuring generation of high-quality data suitable for addressing biological questions about epigenetic regulation. The iterative process of benchmarking not only improves individual experiments but also enhances reproducibility and comparability across studies, ultimately advancing our understanding of chromatin biology.
Conclusion
Mastering sonication is fundamental to generating high-quality, reproducible histone ChIP-seq data. This synthesis underscores that success hinges on a holistic approach: understanding the foundational relationship between chromatin structure and acoustic shearing, meticulously applying tissue- and cell-type-specific protocols, proactively troubleshooting fragmentation issues, and rigorously validating results with modern QC standards. The integration of quantitative controls and emerging methods like Micro-C-ChIP paves the way for more precise epigenetic analyses. For the biomedical research community, these optimized sonication strategies are pivotal for unlocking deeper insights into gene regulatory mechanisms in development, disease, and in response to therapeutic interventions, ultimately strengthening the bridge between basic epigenetics and clinical application.
References
- 1. Refined ChIP‐Seq Protocol for High‐Quality Chromatin ... [https://pmc.ncbi.nlm.nih.gov/articles/PMC12628287/]
- 2. Guidelines to Analyze ChIP-Seq Data: Journey Through ... [https://pubmed.ncbi.nlm.nih.gov/39745614/]
- 3. Transcription Factor ChIP-seq Data Standards and ... [https://www.encodeproject.org/chip-seq/transcription_factor/]
- 4. ChIP-seq data processing tutorial [https://nbis-workshop-epigenomics.readthedocs.io/en/latest/content/tutorials/chipseqProc/lab-chipseq-processing.html]
- 5. H3NGST: a fully automated, web-based platform for end-to ... [https://bmcbioinformatics.biomedcentral.com/articles/10.1186/s12859-025-06247-5]
- 6. Chromatin IP Frequently Asked Questions [https://www.cellsignal.com/learn-and-support/frequently-asked-questions/chip-faqs?srsltid=AfmBOooEQSw017WLyBDt3EU0s4vKah0ML-tiCu11eE50HXNOz4Ih8tzu]
- 7. ChIP-Seq: Technical Considerations for Obtaining High ... [https://pmc.ncbi.nlm.nih.gov/articles/PMC3541830/]
- 8. Sonication Chromatin Immunoprecipitation Protocol [https://www.cellsignal.com/protocols/1404?srsltid=AfmBOopB7Aq2xo1i-wQBPhIrs5fWOzf8r7US4EbN3O7hIIPgXCnICvT8]
- 9. Cross-linking ChIP-seq protocol [https://www.abcam.com/en-us/technical-resources/protocols/cross-linking-chip-seq]
- 10. An Optimized Chromatin Immunoprecipitation Protocol for ... [https://pmc.ncbi.nlm.nih.gov/articles/PMC7357673/]
- 11. Chromatin Mapping Basics: ChIP - seq - EpiCypher [https://www.epicypher.com/resources/blog/chromatin-mapping-basics-chip-seq/]
- 12. Overview of Chromatin Immunoprecipitation (ChIP) [https://www.cellsignal.com/applications/chip-and-chip-seq/regulation-expression-in-cell-and-tissue?srsltid=AfmBOoocRs5ZSmApO5YPf585OKrpXK4ABNLnP4Z96RA6a2ZtG11HoQoq]
- 13. An efficient chromatin immunoprecipitation (ChIP) protocol ... [https://pmc.ncbi.nlm.nih.gov/articles/PMC8973749/]
- 14. Protocol for chromatin immunoprecipitation of histone ... [https://pmc.ncbi.nlm.nih.gov/articles/PMC11261134/]
- 15. Studying epigenetics using ChIP [https://www.abcam.com/en-us/technical-resources/guides/epigenetics-guide/studying-epigenetics-using-chip]
- 16. Benchmark of chromatin–protein interaction methods in ... [https://pmc.ncbi.nlm.nih.gov/articles/PMC12106302/]
- 17. How to Choose Enzymatic Digestion or Sonication for ChIP [https://blog.cellsignal.com/how-to-choose-enzymatic-or-sonication-protocol-for-chip]
- 18. Iterative Fragmentation Improves the Detection of ChIP-seq ... [https://pmc.ncbi.nlm.nih.gov/articles/PMC5081244/]
- 19. Sonication Chromatin Immunoprecipitation Protocol [https://www.cellsignal.com/protocols/1404?srsltid=AfmBOopr7F_9B0zIKO9B7DvJbQ7emyPJctjno2S6VtpRgi-uut8cl0-3]
- 20. Cell Lysis and Sonication [https://www.protocols.io/view/cell-lysis-and-sonication-bn3pmgmn.html]
- 21. Dual cross-linking ChIP protocol (dual-X-ChIP) [https://www.abcam.com/en-us/technical-resources/protocols/dual-x-chip]
- 22. An optimized ChIP‐Seq framework for profiling histone ... [https://pmc.ncbi.nlm.nih.gov/articles/PMC8961045/]
- 23. Protocol for double-crosslinking ChIP-seq to improve data ... [https://pmc.ncbi.nlm.nih.gov/articles/PMC12603744/]
- 24. Lipidomics Reveals a Tissue-Specific Fingerprint [https://www.frontiersin.org/journals/physiology/articles/10.3389/fphys.2018.01165/full]
- 25. Sample preparation for lipid analysis of intra-articular ... [https://www.sciencedirect.com/science/article/pii/S000326972200478X]
- 26. Evaluation of tissue-specific extraction protocols for ... [https://www.sciencedirect.com/science/article/pii/S0003267025001850]
- 27. Sample Preparation Methods for Lipidomics Approaches ... [https://pmc.ncbi.nlm.nih.gov/articles/PMC7696154/]
- 28. Critical Parameters for Efficient Sonication and Improved ... [https://journals.plos.org/plosone/article?id=10.1371/journal.pone.0148023]
- 29. Sonication Chromatin Immunoprecipitation Protocol [https://www.cellsignal.com/protocols/1384?srsltid=AfmBOorYpLIUbOmqHyBMT2JZGZGqNT0l5gVxF5WIsbnfS9B3tROCJO3Z]
- 30. Deciphering histone mark-specific fine-scale chromatin ... [https://www.nature.com/articles/s41467-025-64350-w]
- 31. Systematic optimization of parameters involved in preparation ... [https://epigeneticsandchromatin.biomedcentral.com/articles/10.1186/1756-8935-6-S1-P122]
- 32. CUT&Tag recovers up to half of ENCODE ChIP-seq ... [https://www.nature.com/articles/s41467-025-58137-2]
- 33. Effects of sheared chromatin length on ChIP-seq quality ... [https://pmc.ncbi.nlm.nih.gov/articles/PMC8495733/]
- 34. Large DNA fragments after ChIP on histone modifications [https://www.seqanswers.com/forum/applications-forums/sample-prep-library-generation/16886-large-dna-fragments-after-chip-on-histone-modifications]
- 35. SimpleChIP® Plus Sonication Chromatin Immunoprecipitation Protocol (Magnetic Beads) | Cell Signaling Technology [https://www.cellsignal.com/learn-and-support/protocols/protocol-simplechip-plus-sonication]
- 36. Benchmark of chromatin–protein interaction methods in ... [https://www.frontiersin.org/journals/cell-and-developmental-biology/articles/10.3389/fcell.2025.1572405/full]
- 37. Chromatin Immunoprecipitation (ChIP) Principles and How ... [https://blog.benchsci.com/chromatin-immunoprecipitation-chip-principles-and-how-to-obtain-quality-results]
- 38. A simple method for generating high-resolution maps of ... [https://pmc.ncbi.nlm.nih.gov/articles/PMC4480131/]
- 39. Sonication Chromatin Immunoprecipitation Protocol [https://www.cellsignal.com/protocols/1404?srsltid=AfmBOorzycpJ-OSdWURH-haI_odC3bSSXxyyaXLRT3toI-qkH2Dh6U9t]
- 40. Protocol to apply spike-in ChIP-seq to capture massive ... [https://pmc.ncbi.nlm.nih.gov/articles/PMC8313745/]
- 41. Sonication Chromatin Immunoprecipitation Protocol [https://www.cellsignal.com/protocols/1404?srsltid=AfmBOoq8Zy29ziSRFY1BjGzViI83K4ufU8WS2VeeW-xUweKroPcQP2vX]
- 42. Effects of sheared chromatin length on ChIP-seq quality ... [https://pubmed.ncbi.nlm.nih.gov/33788948/]
- 43. Chromatin preparation from tissues for ChIP [https://www.abcam.com/en-us/technical-resources/protocols/chromatin-preparation-from-tissues]
- 44. Sonication Chromatin Immunoprecipitation Protocol [https://www.cellsignal.com/protocols/1404?srsltid=AfmBOorQdDoVyipvVReU9pshW9-u9f6og50jiMTXFV9nG_4Ut6_9mjc5]
- 45. SimpleChIP ® Plus Sonication Chromatin ... [https://www.cellsignal.com/learn-and-support/protocols/protocol-simplechip-plus-sonication?srsltid=AfmBOoqoy3lxDtfGp_C0w-6Jm4wMpcFSheu3aE_CVYg5gyZ6ElyqbVZh]
- 46. Highly quantitative measurement of differential protein ... [https://www.sciencedirect.com/science/article/pii/S2667237525000888]
- 47. Chromatin IP Frequently Asked Questions | Cell Signaling Technology [https://www.cellsignal.com/learn-and-support/frequently-asked-questions/chip-faqs]
- 48. Protocol for chromatin immunoprecipitation of ... [https://pmc.ncbi.nlm.nih.gov/articles/PMC11952799/]
- 49. ChIP-seq Data Processing and Relative and Quantitative ... [https://pmc.ncbi.nlm.nih.gov/articles/PMC12067309/]
- 50. Protocol for chromatin immunoprecipitation of ... [https://www.sciencedirect.com/science/article/pii/S2666166725001017]
- 51. Gel Electrophoresis Image Analysis [https://www.thermofisher.com/us/en/home/life-science/dna-rna-purification-analysis/nucleic-acid-gel-electrophoresis/e-gel-electrophoresis-system/e-editor-2-0-software.html]
- 52. How should I prepare and sequence samples for ChIP-seq? [https://dnatech.ucdavis.edu/faqs/how-should-i-prepare-samples-for-chip-seq]
- 53. A Comparison of TapeStation 4200 and Bioanalyzer 2100 ... [https://www.mdpi.com/1422-0067/24/18/13795]
- 54. Services for the Agilent Bioanalyzer [https://genomics.lsu.edu/genomics-services-agilent-bioanalyzer.php]
- 55. Synthetic spike-in standards for RNA-seq experiments - PMC [https://pmc.ncbi.nlm.nih.gov/articles/PMC3166838/]
- 56. Histone ChIP-seq Data Standards and Processing Pipeline [https://www.encodeproject.org/chip-seq/histone/]
- 57. ChIP-seq guidelines and practices of the ENCODE and ... [https://pmc.ncbi.nlm.nih.gov/articles/PMC3431496/]
- 58. Region Capture Micro-C reveals coalescence of enhancers ... [https://pmc.ncbi.nlm.nih.gov/articles/PMC10424778/]
- 59. Integrative analysis of the 3D genome and epigenome in ... [https://www.nature.com/articles/s41594-024-01431-2]
- 60. Overview of Chromatin Immunoprecipitation (ChIP) [https://www.cellsignal.com/applications/chip-and-chip-seq/regulation-expression-in-cell-and-tissue?srsltid=AfmBOoqI8dPQmhGDKYO2AfBxRKlndDUA5GYFdDnjIVKJHVhGH_S8xbvd]
- 61. Integrating ChIP-seq with other functional genomics data [https://pmc.ncbi.nlm.nih.gov/articles/PMC5888983/]
- 62. Overview of Chromatin Immunoprecipitation (ChIP) [https://www.cellsignal.com/applications/chip-and-chip-seq/regulation-expression-in-cell-and-tissue?srsltid=AfmBOopemNAOdg4PZazW_1Prk4Kze8E_m4vxAzjE_iVoRs9jCfjpzX0y]
- 63. Summarising ChIP-seq and controls needed [https://biology.stackexchange.com/questions/39698/summarising-chip-seq-and-controls-needed]
- 64. Sonication Chromatin Immunoprecipitation Protocol [https://www.cellsignal.com/protocols/1404?srsltid=AfmBOoowLn-aM2k8u3d108UoRsXoJLrdKk3wS88neHpdkQZkQYe9WF64]
- 65. Deciphering histone mark-specific fine-scale chromatin ... [https://pmc.ncbi.nlm.nih.gov/articles/PMC12546738/]